ServiceNow (Legacy Integration)
- 08 Aug 2024
- 5 Minutes to read
-
Print
-
DarkLight
-
PDF
ServiceNow (Legacy Integration)
- Updated on 08 Aug 2024
- 5 Minutes to read
-
Print
-
DarkLight
-
PDF
Article summary
Did you find this summary helpful?
Thank you for your feedback!
Create an alert in AlertOps when an Incident is created in ServiceNow, Close the alert when the Incident is closed in ServiceNow.
For New/Inbound Integration Specification related to the Marketplace Application refer to this LINK
ServiceNow Inbound Integration Guide (Legacy)
ServiceNow is a powerful platform-as-a-service, which offers advanced automation and process workflow for the enterprise environment. Integrate AlertOps’ alert management platform with ServiceNow to receive and respond to critical alerts through email, SMS, push notification, and phone alerts. AlertOps ensures that alerts received from ServiceNow always reach the correct, available team member by utilizing escalation policies and on-call schedules.
AlertOps Configuration
- From the main menu, click on Integrations and then select Inbound Integrations from the sub menu.
- Select API tab
- Select the 'ADD API INTEGRATION' button, you should now be on the API Integration Detail page. Select ServiceNow from the pre-built Integration Templates.
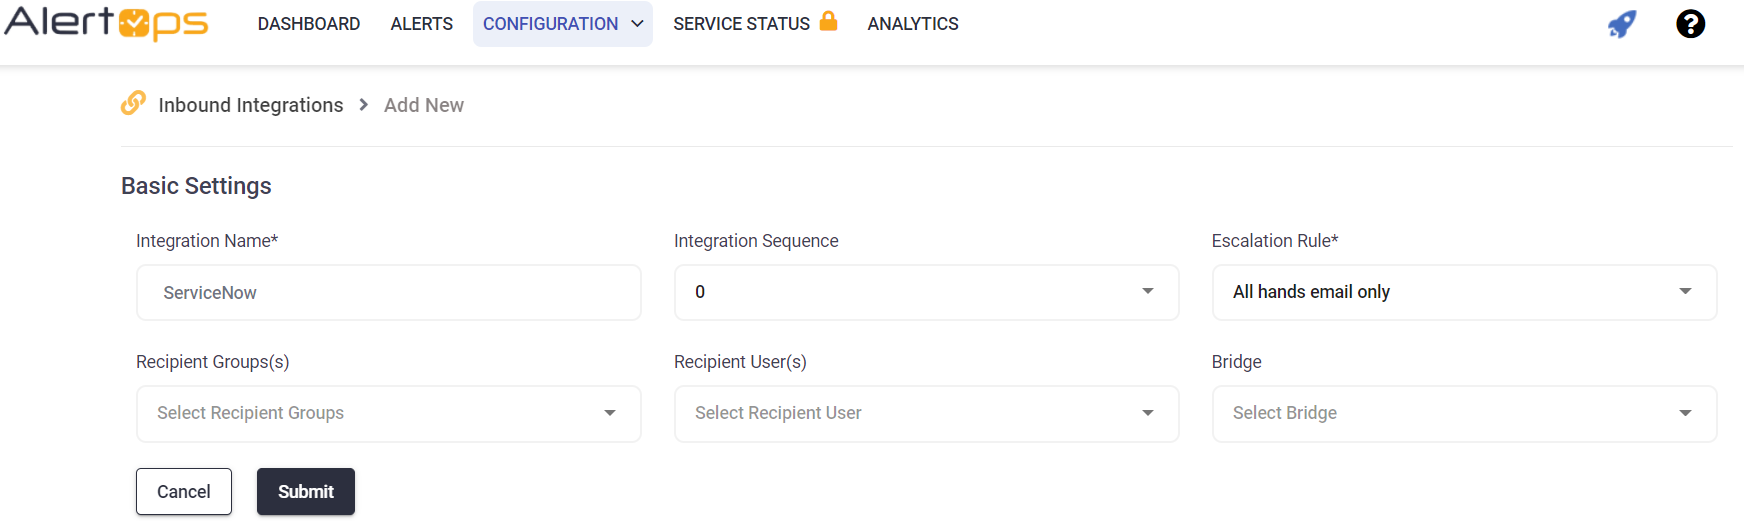
- Enter a name for the integration. Select an escalation rule to determine the integration's escalation policy.
- Enter the names of recipient group(s) and recipient user(s).
- Click 'SAVE.' then, click 'COPY URL' to copy the URL endpoint to be used in the Service Now configuration.
ServiceNow Configuration
The ServiceNow configuration requires a REST message and a Business Rule. The REST message defines the output to AlertOps, and the Business Rule sets the trigger to use the REST message to create/close an alert.
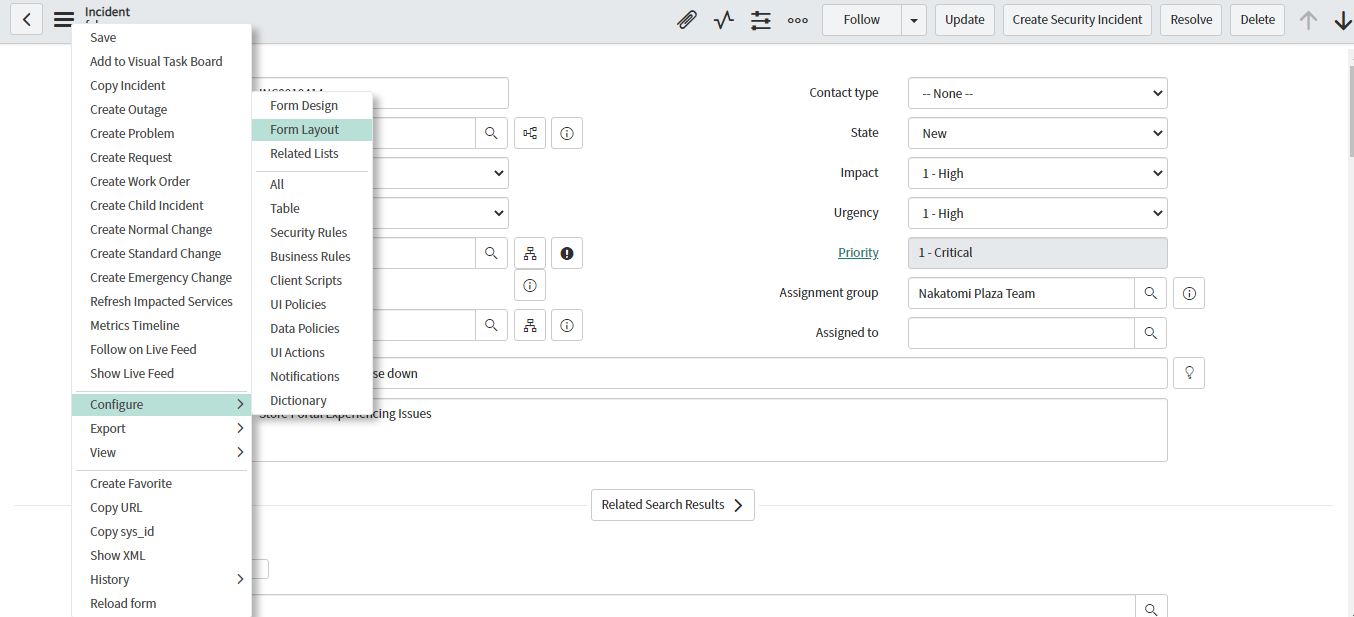
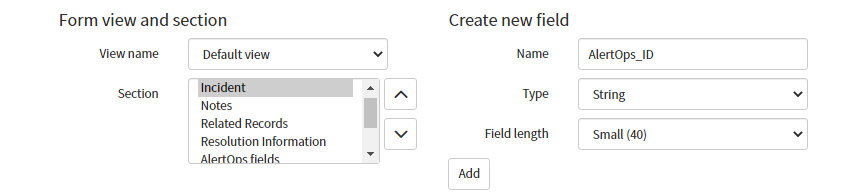
Step 1: Create a custom field for AlertOps ID
Navigate to Incidents within Servicenow and select an existing incident. Within the Incident, use the top-level menu to navigate to Form Layout to add a custom field.
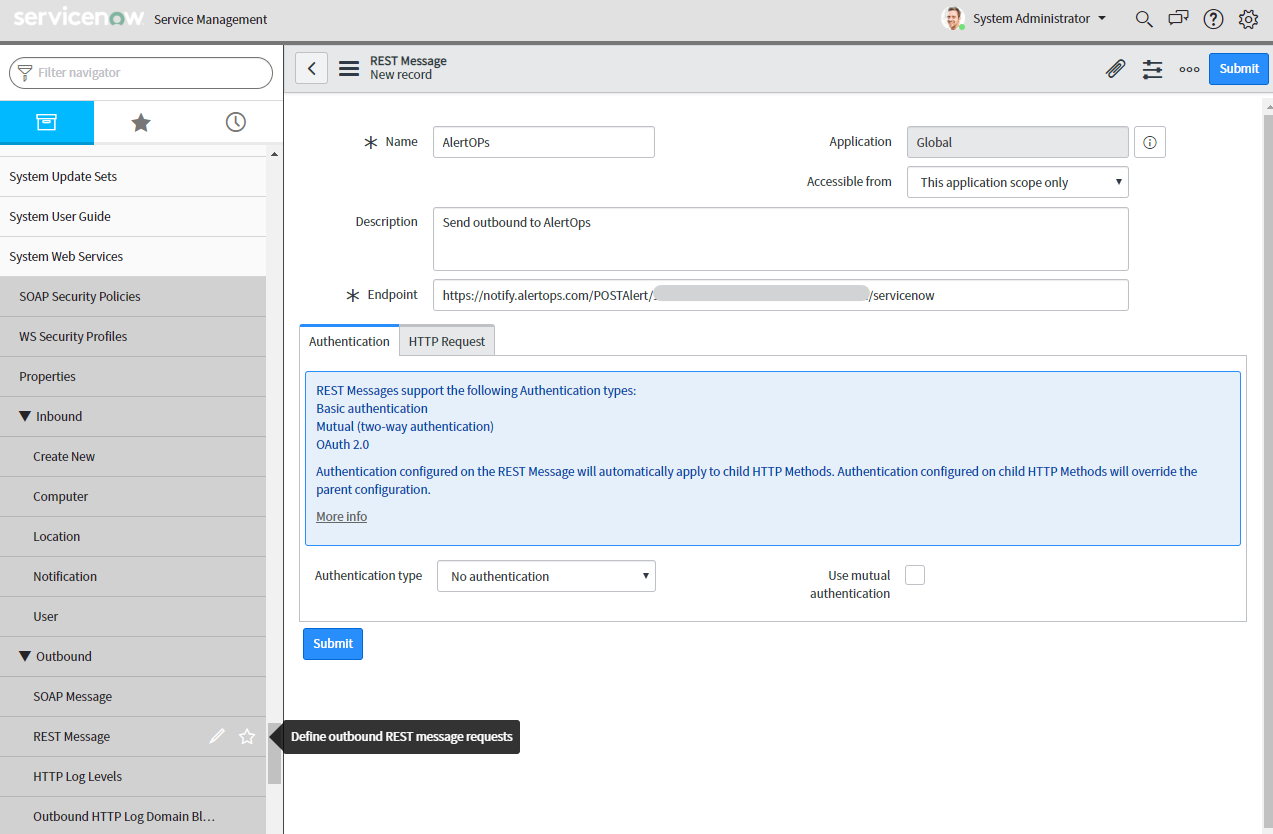
Step 2: Create a new REST message.
From the navigation menu, expand System Web Services, from the Outbound submenu, select REST Message. In the main pane choose New. Give the REST message a name and description (make a note of the name, you will use it for the Business Rule). Then paste the URL from the AlertOps Integration into the Endpoint field. Click Submit.
Step 3: Create POST method.
While still on the REST message page, scroll down to HTTP Methods and click New. Give the new Method a name (make a note of this name as well, you will need it for the Business Rule). Set the HTTP method to POST. Enter the Integration URL into the Endpoint field.
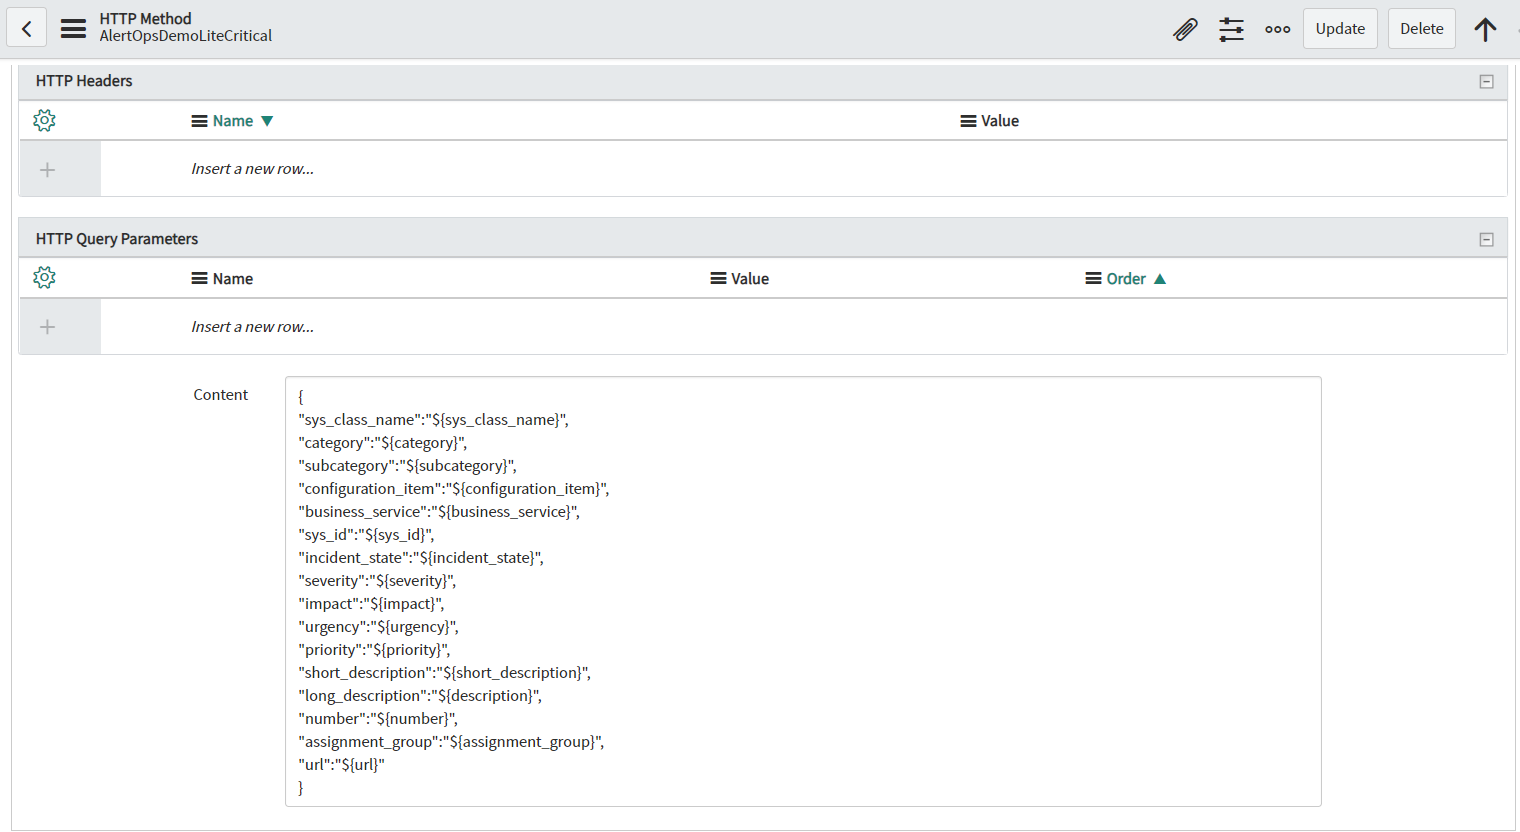
Step 4: Enter Content
Enter the following data into the Content field:
{
"sys_class_name":"${sys_class_name}",
"category":"${category}",
"subcategory":"${subcategory}",
"configuration_item":"${configuration_item}",
"business_service":"${business_service}",
"sys_id":"${sys_id}",
"incident_state":"${incident_state}",
"severity":"${severity}",
"impact":"${impact}",
"urgency":"${urgency}",
"priority":"${priority}",
"short_description":"${short_description}",
"long_description":"${description}",
"number":"${number}",
"assignment_group":"${assignment_group}",
"url":"${url}"
}
Step 5: Add variable substitutions and test.
By adding variable substitutions, you will define a test payload to ensure that the REST message can create an alert. Scroll to the bottom of the HTTP method and click New to enter a substitution.
Variable Substitutions:
NAME: category TESTVALUE: software
incident_state of 1 will open an alert, incident_state of 7 will close an alert
NAME: incident_state TESTVALUE: 1
NAME: number TESTVALUE: INC0010022
NAME: severity TESTVALUE: 3
NAME: short_description TESTVALUE: software update
NAME: sys_class_name TESTVALUE: incident
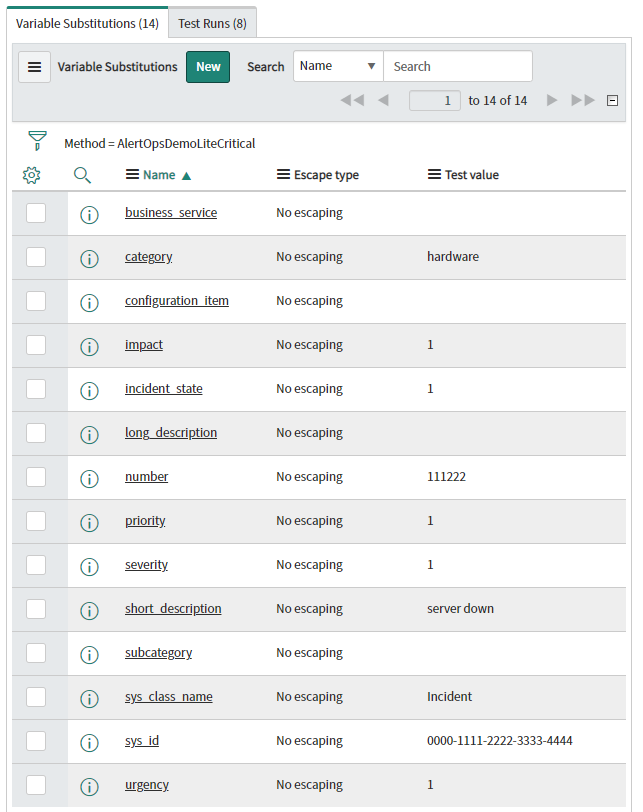
When all of the substitutions have been entered, click the Test link above the Variables to send a POST to AlertOps to create an alert. Verify the alert has been created, then change the incident_state variable to 7 and click Test again. The alert should now be closed.
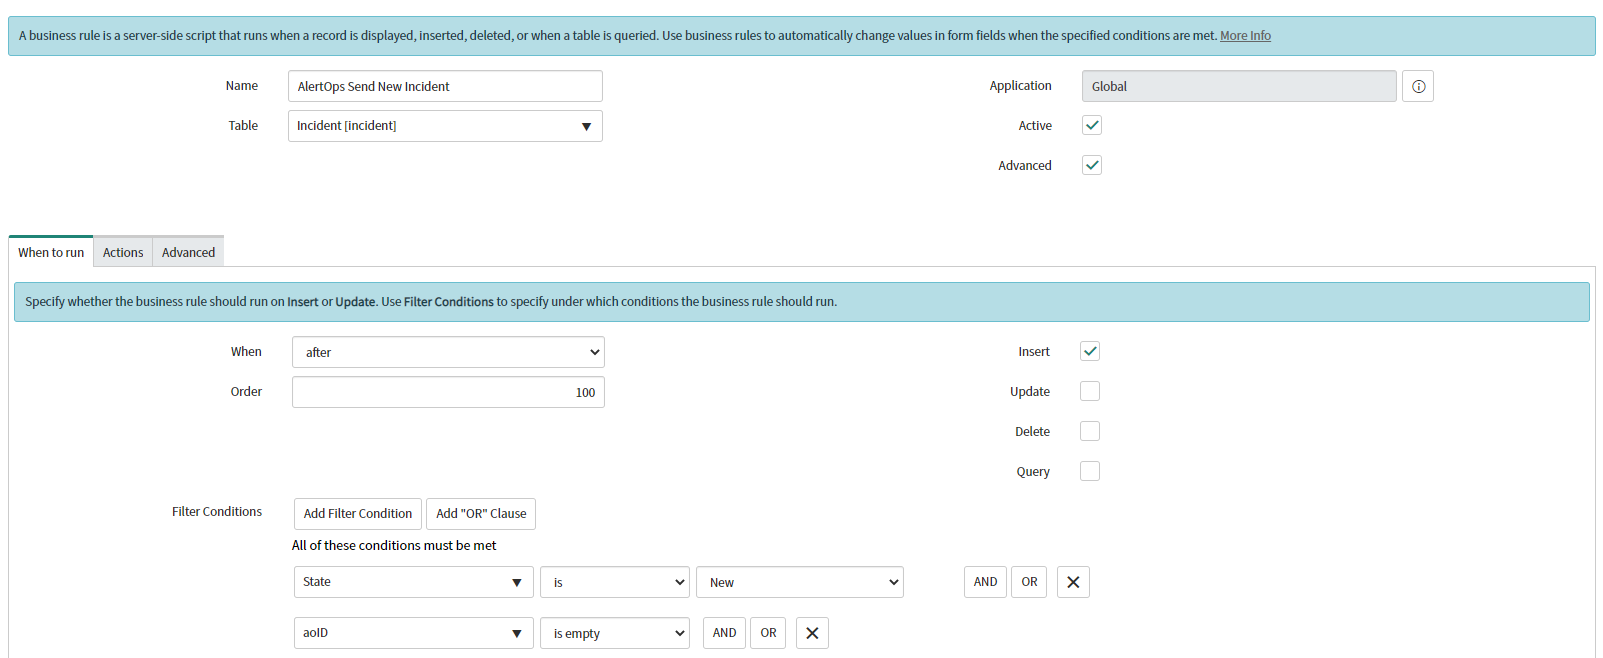
Step 6: Create a Business Rule to automatically trigger the REST Message when an Incident Status is New
Business Rule: Create AlertOps Alert on New Incident
- Navigate to System Definition > Business Rules and click New.
- Enter a name for the rule, choose Incident for the Table, select Active and Advanced.
- For When to Run, choose "after" in the When drop down, select Insert.
- Add Filter Conditions for Incident State is New. In addition, add a filter that only executes the business rule if the AlertOps ID field we created is empty. THIS IS CRUCIAL TO PREVENT REDUNDANT MESSAGES BETWEEN THE SYSTEMS.
- Click Update.
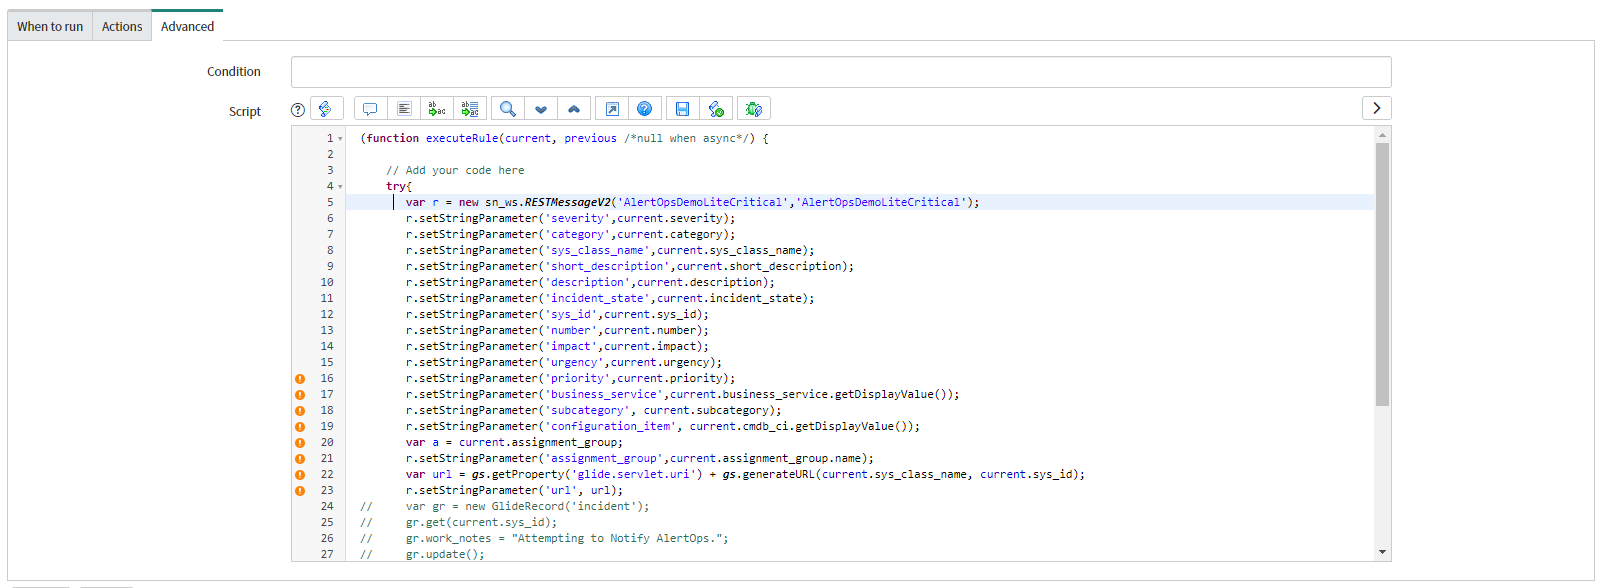
Next, Select the Advanced tab and enter the following data into the Script field:
(function executeRule(current, previous /*null when async*/ ) {
	// Add your code here
	escaped = function(str) {
		return str
			.replace(/[\\]/g, '\\\\')
			.replace(/[\/]/g, '\\/')
			.replace(/[\b]/g, '\\b')
			.replace(/[\f]/g, '\\f')
			.replace(/[\n]/g, '\\n')
			.replace(/[\r]/g, '\\r')
			.replace(/[\t]/g, '\\t')
			.replace(/[\"]/g, '\\"')
			.replace(/\\'/g, "\\'");
	};
	try {
		var r = new sn_ws.RESTMessageV2('AlertOpsDemoLiteCritical', 'AlertOpsDemoLiteCritical');
		r.setStringParameter('severity', current.severity);
		r.setStringParameter('category', current.category);
		r.setStringParameter('sys_class_name', current.sys_class_name);
		r.setStringParameter('short_description', escaped(current.short_description));
		r.setStringParameter('description', escaped(current.description));
		r.setStringParameter('incident_state', current.incident_state);
		r.setStringParameter('sys_id', current.sys_id);
		r.setStringParameter('number', current.number);
		r.setStringParameter('impact', current.impact);
		r.setStringParameter('urgency', current.urgency);
		r.setStringParameter('priority', current.priority);
		r.setStringParameter('business_service', current.business_service.getDisplayValue());
		r.setStringParameter('subcategory', current.subcategory);

		r.setStringParameter('configuration_item', current.cmdb_ci.getDisplayValue());

		r.setStringParameter('assignment_group', current.assignment_group.name);

		var url = gs.getProperty('glide.servlet.uri') + gs.generateURL(current.sys_class_name, current.sys_id);

		r.setStringParameter('url', url);

		var gr = new GlideRecord('incident');

		gr.get(current.sys_id);

		gr.work_notes = "Attempting to Notify AlertOps.";

		gr.update();

		var response = r.execute();

		var responseBody = response.getBody();

		var httpStatus = response.getStatusCode();

		gs.addInfoMessage(response.getBody());

		gs.addInfoMessage(r.getRequestBody());


	} catch (ex) {

		var message = ex.getMessage();

		var er = new GlideRecord('incident');

		er.get(current.sys_id);

		er.work_notes = message;

		gr.update();

	}

})(current, previous);NOTE: In the following line from the above data, the REST Message name and method in the parenthesis must match the previously configured elements:
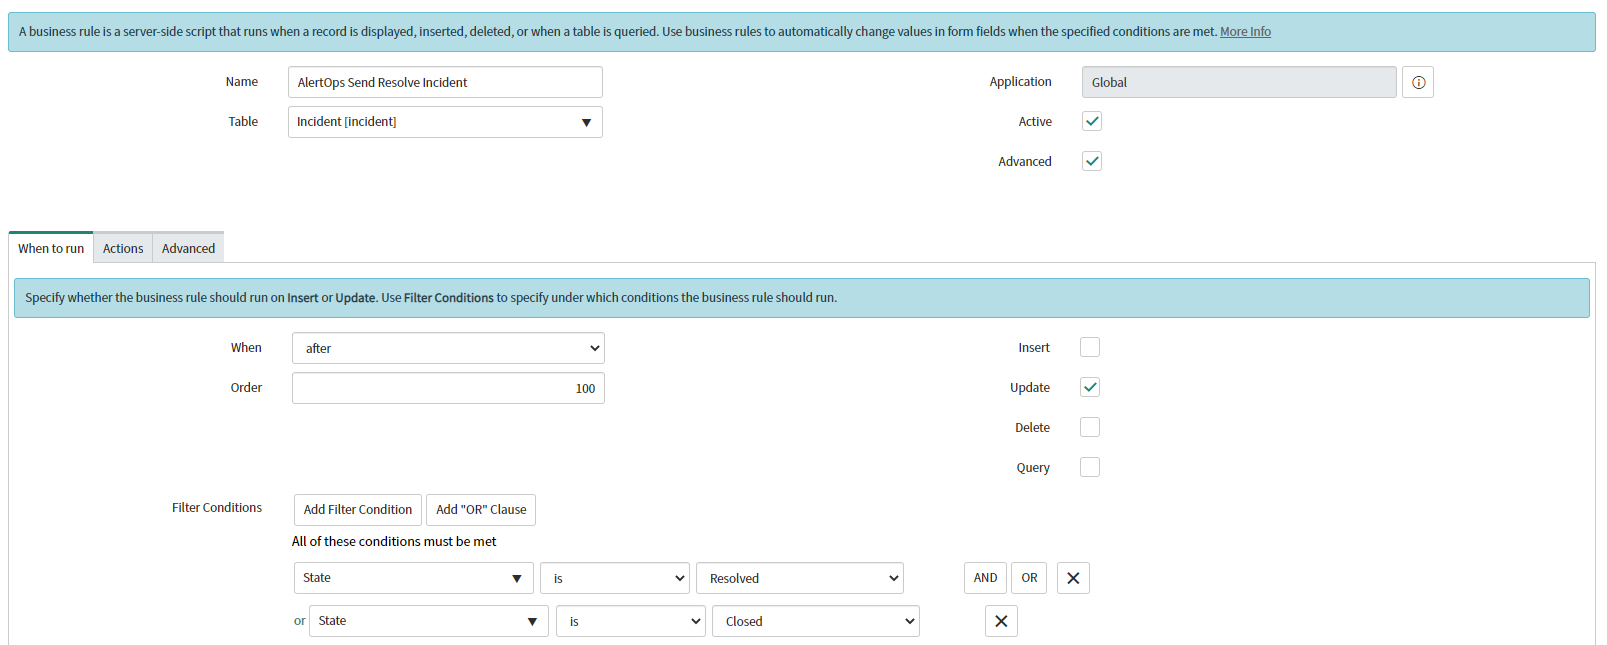
Step 7: Add another Business Rule to trigger when the Incident Status is Closed or Resolved.
Business Rule: Close AlertOps Alert on Closed/Resolved Incident
- Create your second business rule. Again, Navigate to System Definition > Business Rules, and click New.
- Enter a name for the rule, choose Incident for the Table, select Active and Advanced.
- For When to Run, choose "after" in the When drop down, select Update.
- Add Filter Conditions for Incident State is Resolved or Closed. Click Update.
Next, Select the Advanced tab and enter the following data into the Script field:
(function executeRule(current, previous /*null when async*/ ) {

	// Add your code here

	try {

		var r = new sn_ws.RESTMessageV2('AlertOpsDemoLiteCritical', 'AlertOpsDemoLiteCritical');

		r.setStringParameter('severity', current.severity);
		r.setStringParameter('category', current.category);
		r.setStringParameter('sys_class_name', current.sys_class_name);
		r.setStringParameter('short_description', current.short_description);
		r.setStringParameter('description', current.description);
		r.setStringParameter('incident_state', current.incident_state);
		r.setStringParameter('sys_id', current.sys_id);
		r.setStringParameter('number', current.number);
		r.setStringParameter('impact', current.impact);
		r.setStringParameter('urgency', current.urgency);
		r.setStringParameter('priority', current.priority);
		r.setStringParameter('business_service', current.business_service.getDisplayValue());
		r.setStringParameter('subcategory', current.subcategory);
		r.setStringParameter('configuration_item', current.cmdb_ci.getDisplayValue());

		var a = current.assignment_group;

		r.setStringParameter('assignment_group', current.assignment_group.name);

		var url = gs.getProperty('glide.servlet.uri') + gs.generateURL(current.sys_class_name, current.sys_id);

		r.setStringParameter('url', url);

		var gr = new GlideRecord('incident');

		gr.get(current.sys_id);

		gr.work_notes = "Attempting to Notify AlertOps.";

		gr.update();

		var response = r.execute();

		var responseBody = response.getBody();

		var httpStatus = response.getStatusCode();


	} catch (ex) {

		var message = ex.getMessage();

		var er = new GlideRecord('incident');

		er.get(current.sys_id);

		er.work_notes = message;

		gr.update();

	}


})(current, previous);
NOTE: In the following line from the above data, the REST Message name and method in the parenthesis must match the previously configured elements:

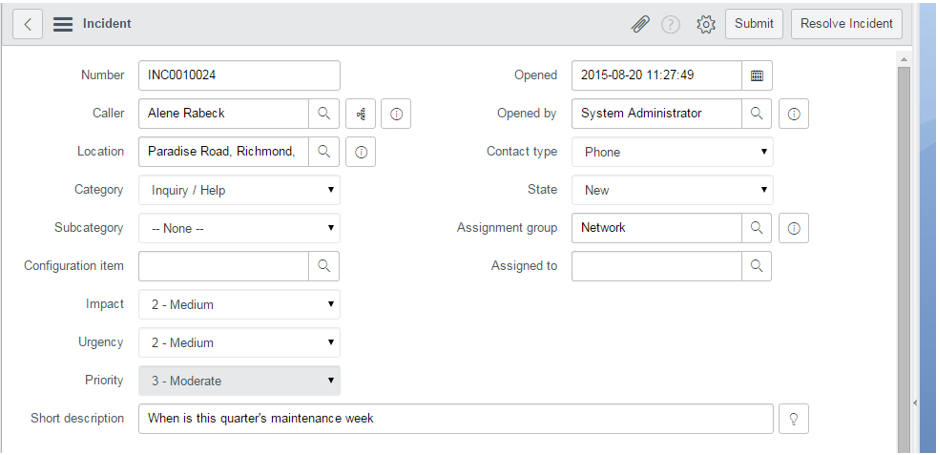
Step 8: Go to Incident > Create New.
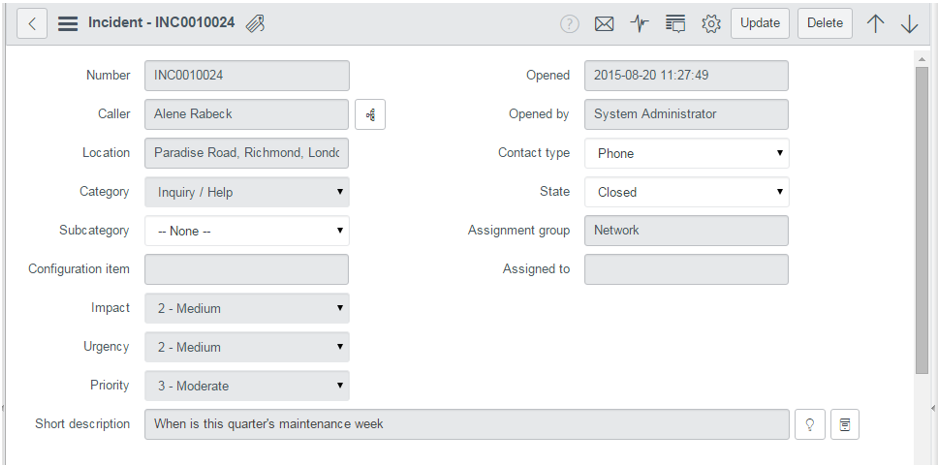
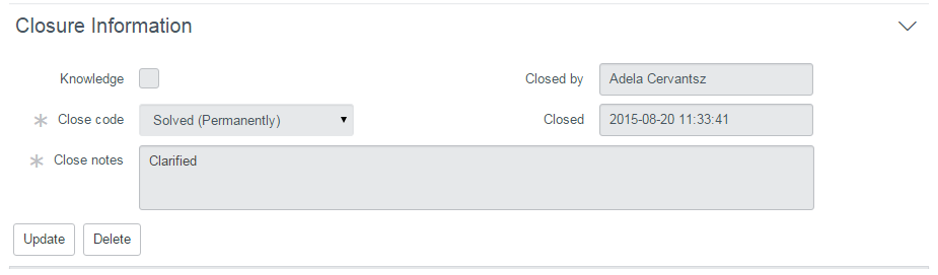
Step 9: Resolve and Close the incident.
Alert Triggering Information
AlertOps will automatically create an incident when a new alert is received from Service Now with an IncidentStatus status of “1.”
If an alert with status “1” matches an existing Open Alert, AlertOps will recognize the new alert as a duplicate and ignore the alert. The alert will be recorded in the Inbound Messages table as “Mapped Appended.”
AlertOps will automatically close the same incident when an alert with an IncidentStatus status “7” is received.
Testing and Troubleshooting
Click here to read about Web API Testing and Troubleshooting.
Was this article helpful?