JIRA
- 22 Apr 2024
- 6 Minutes to read
-
Print
-
DarkLight
-
PDF
JIRA
- Updated on 22 Apr 2024
- 6 Minutes to read
-
Print
-
DarkLight
-
PDF
Article summary
Did you find this summary helpful?
Thank you for your feedback!
JIRA Integration Guide
JIRA is a project management tool that enables collaboration between teams within an organization. Integrate AlertOps’ alert management platform with JIRA to receive and respond to critical alerts through email, SMS, push notification, and phone alerts. AlertOps ensures that alerts received from JIRA always reach the correct, available team member by utilizing escalation policies and on-call schedules.
Inbound Integration
AlertOps Configuration
- From the main menu, click on Configuration and select Integrations from the sub menu.
- In the Inbound Integration section, select API from the integration type dropdown menu.
- Click the 'ADD API' button.
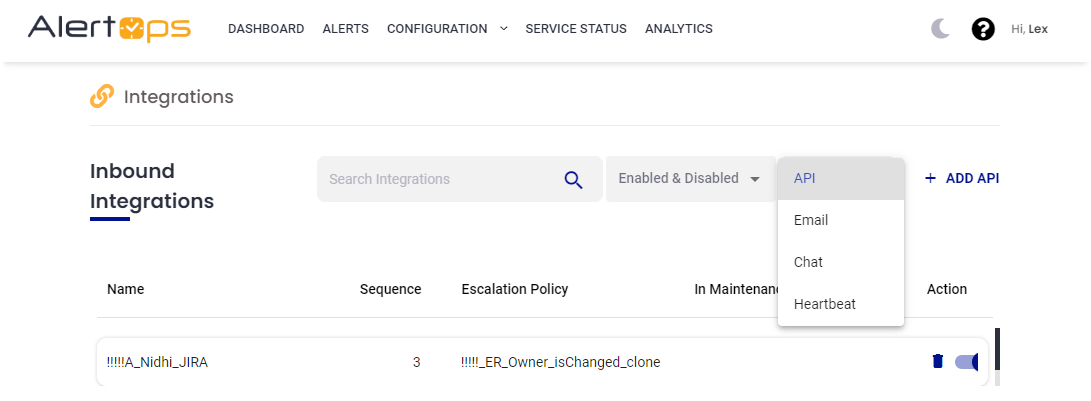
- You will be redirected to a list of API integration templates. Select JIRA from the list.
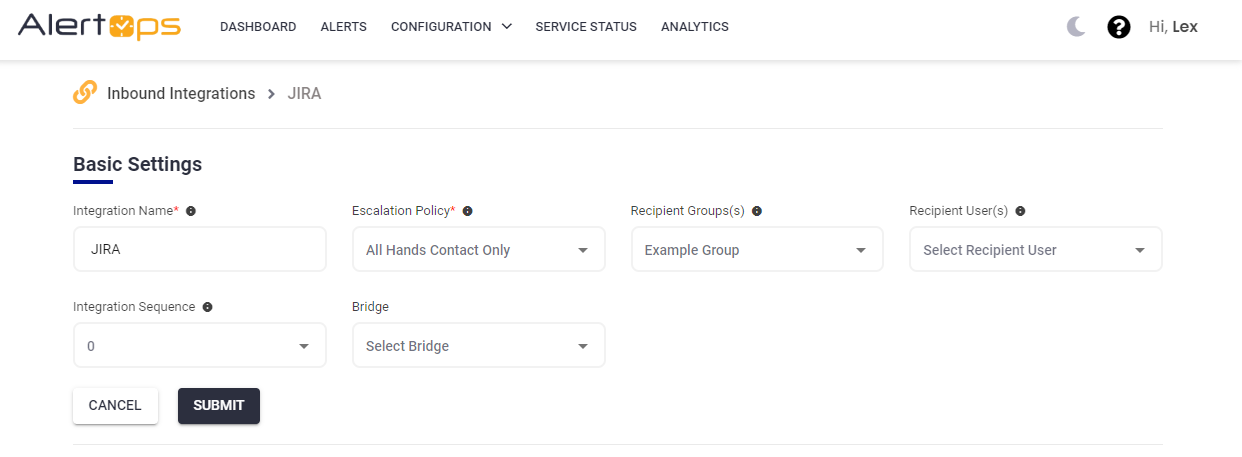
- To set up the integration, enter a name for the integration. Select an Escalation Policy to guide escalations coming from this Integration. And enter the names of recipient group(s) and recipient user(s).
- Click the Submit button to save this integration.
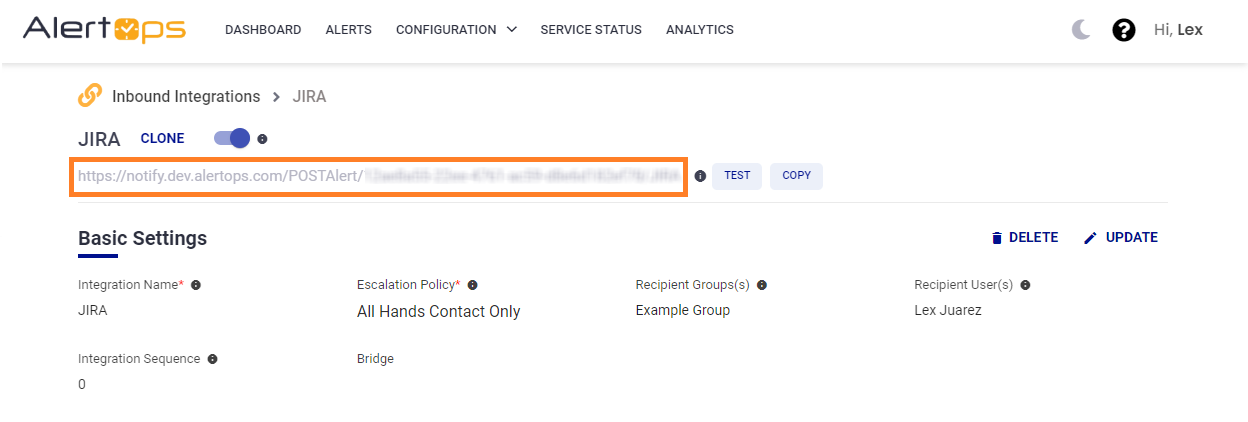
- Once saved, click 'COPY URL' to copy the URL endpoint to be used in the JIRA configuration.
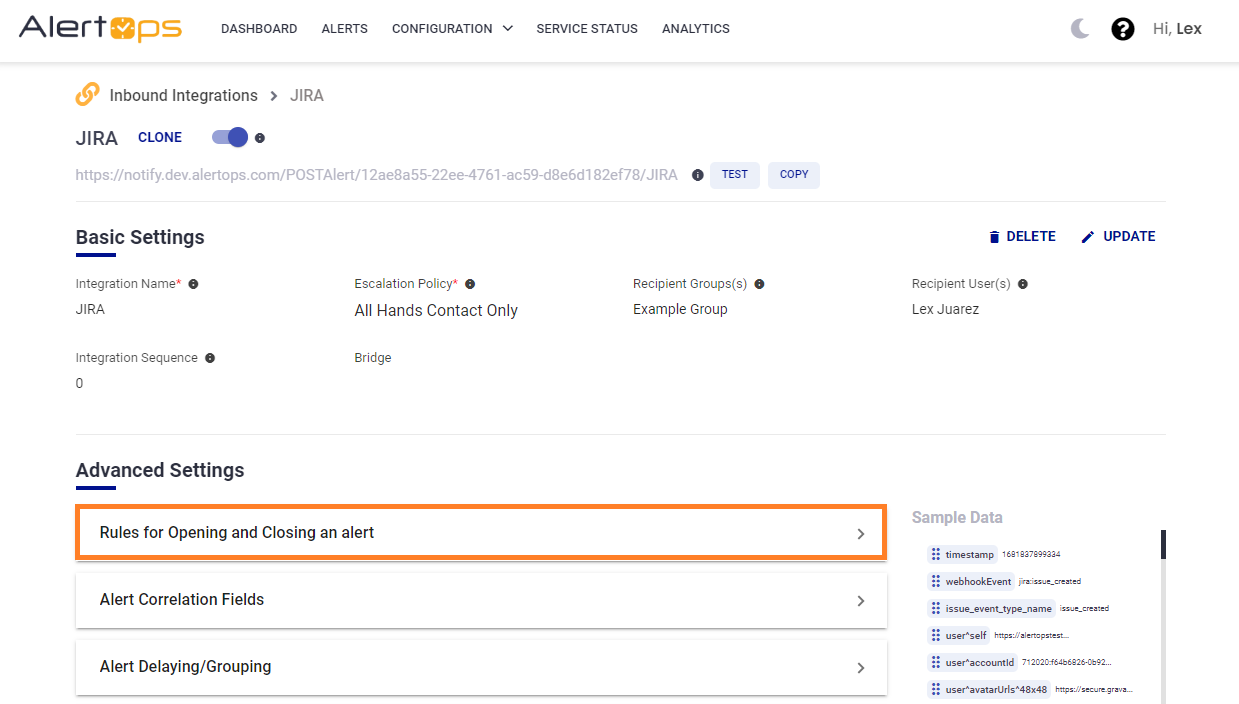
Advanced Settings
The final configuration we need to make to this integration is to add JIRA values to open, close, or update an alert.
- Expand Rules for Opening and Closing an alert in the advanced settings of this integration.
- Issues coming from JIRA have a SourceStatus that corresponds to transition titles. This means we need to add transition titles as additional values in the alert rules.These are client-environment specific, so you need to customize these accordingly. Note that these values are case sensitive and must match the JIRA transition names exactly. In our example we will add the generic To Do and Done JIRA labels:
.png)
- Click the green checkmark to save these changes.
JIRA Configuration
- Create a Webhook to send Issues to AlertOps
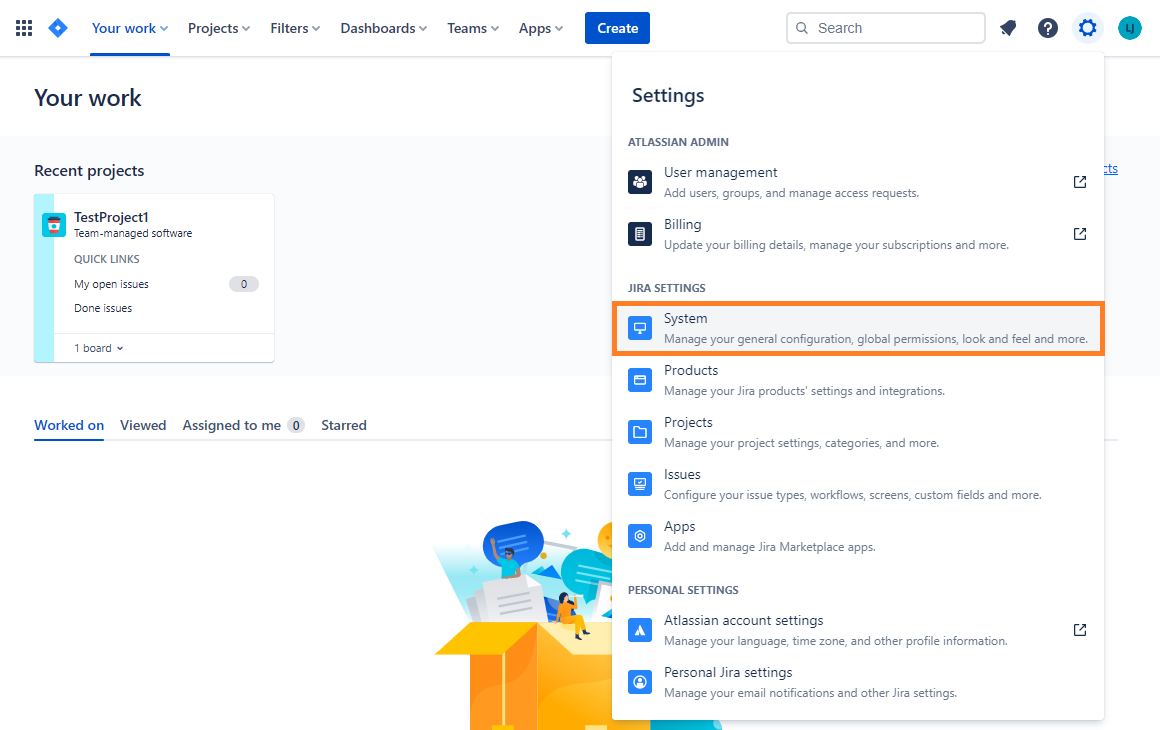
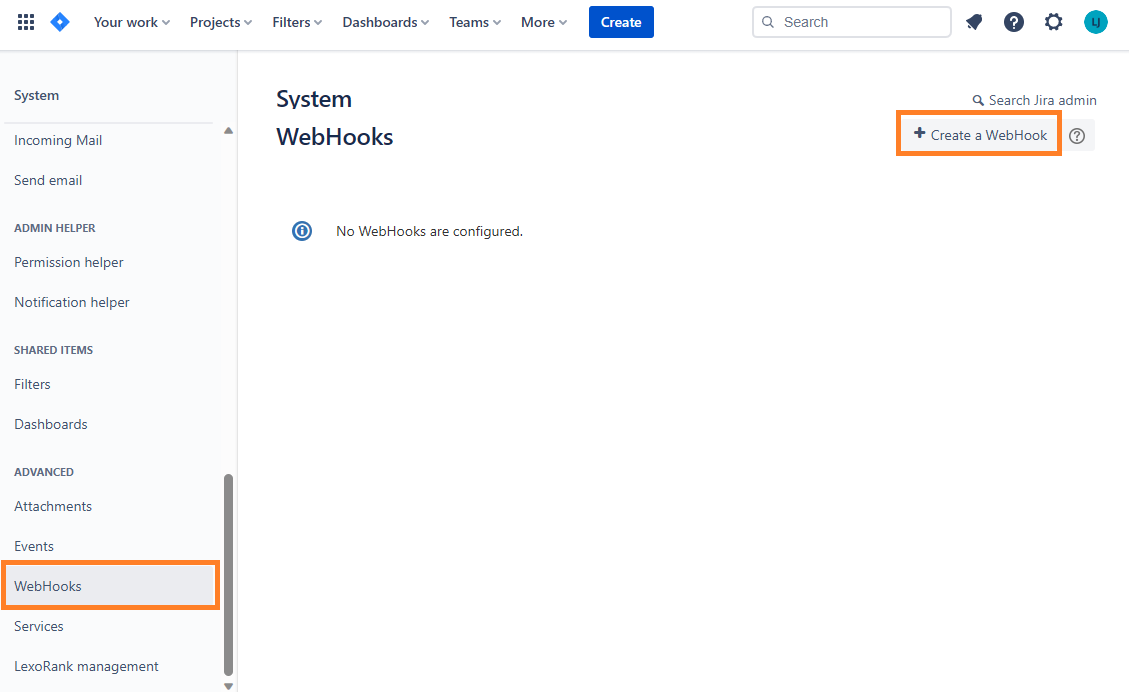
- Paste the URL endpoint from the Integration we created in AlertOps and select the Issues that will create alerts in AlertOps.
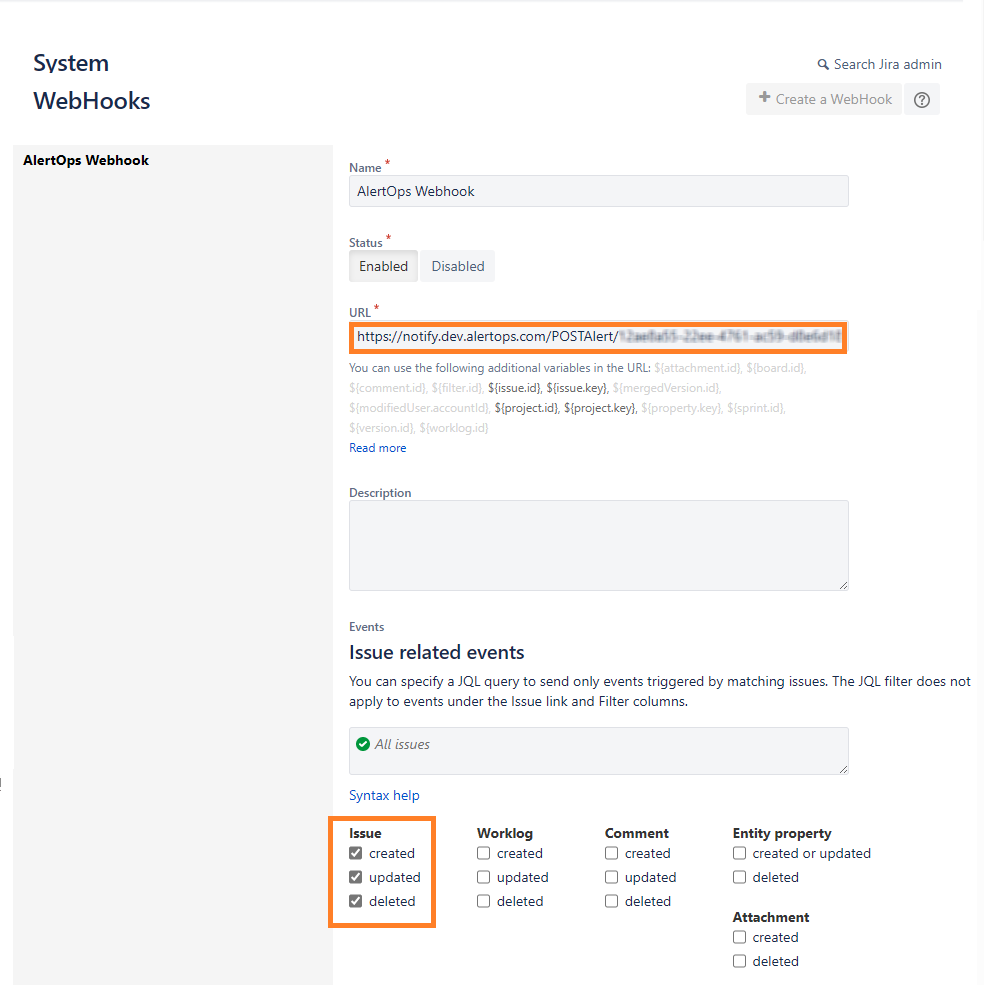
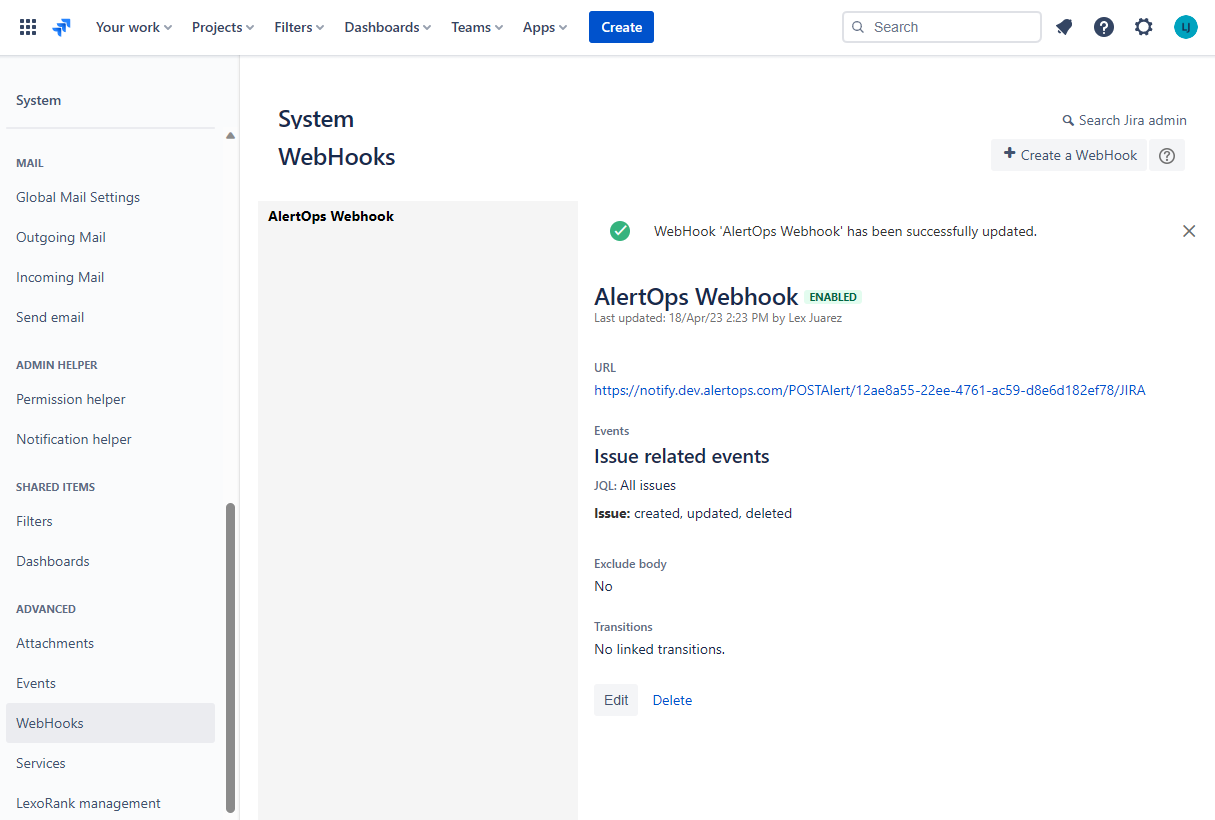
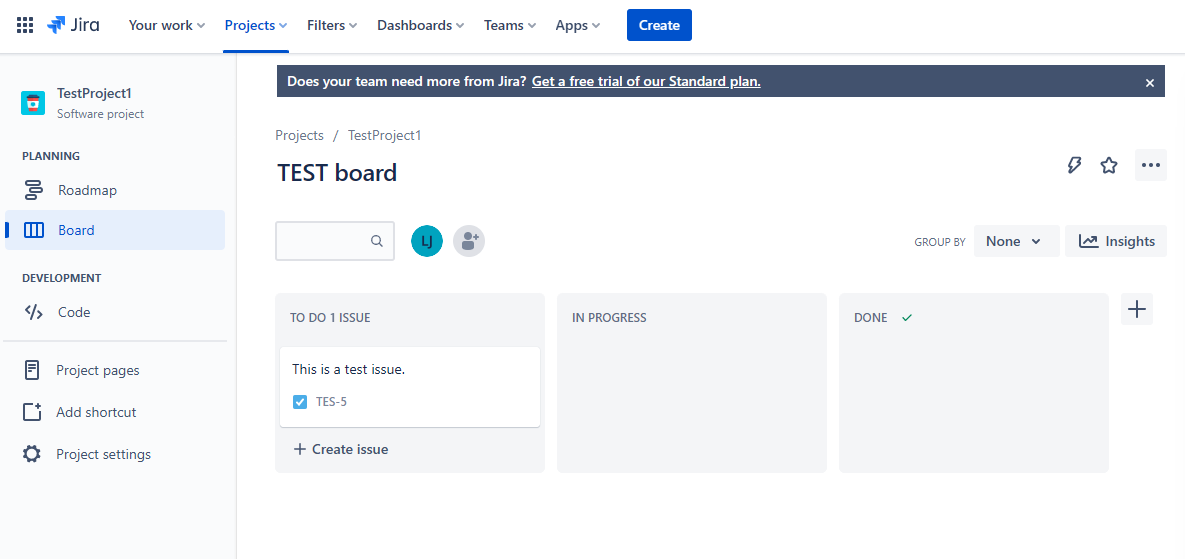
Issues coming from JIRA will now produce alerts.
JIRA Outbound
Add Custom Fields
In AlertOps, a Template is used to create custom attributes. In most cases, where only a small number of Attributes are created, extending the Standard Template is sufficient, though you can create a new one if you choose.
Create the following custom Attributes:

.png)
Outbound Integration Configuration
To create the Outbound Integration:
- Click Configuration on the main menu and select Integrations menu.
- In the Outbound Integrations section, click the Add Outbound button.
- Set the Integration Name as JIRA.
- Set the Web Security Type as Basic.
- Set the Username as your JIRA username.
- For the Password, enter the API Token for your JIRA account.
- Press Submit to save this Outbound Integration.
.png)
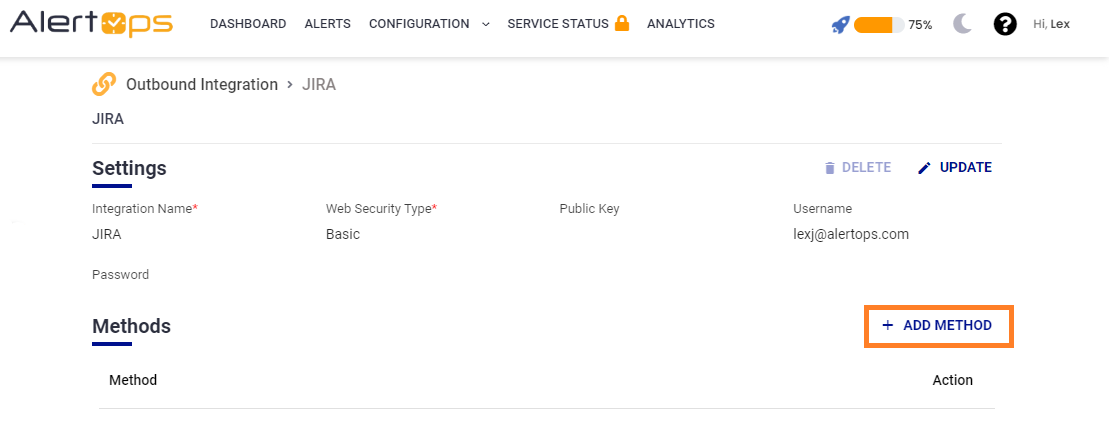
Create Methods
Once the integration has been saved, we can now create Methods to make changes in JIRA.
To add a Method to an Outbound Integration, click the Add Method button on the right.
Below we will configure three different Methods: Create Issue, Transition Issue, and Add Issue Comment.
Create Issue
.png)
//URI
//https://YourJiraEnvironment.atlassian.net/rest/api/2/issue

//Request Data
{"fields":{"project":{"key":"YourProjectKey"},"summary":" <<Alert.Topic>>","description":"<<Message.MessageText>>","issuetype":{"name":"Task"}}}

//Response Data
{"id":"<<Attribute.JIRAIssueID>>","key":"<<Attribute.JIRAIssueKey>>","self":"https://YourJiraEnvironment.atlassian.net/rest/api/2/issue/10007"}
Close (Transition) Issue
First, we need to input the Issue Key field in the URI that we mapped in our inbound integration to identify the issue to be updated.
In order to close an issue in JIRA, we need to identify the Transition ID that corresponds to whatever status is used as the closed issue state in your environment. These are client-environment specific, so you need to identify and customize these accordingly.
In this example, a closed state is 'Done' with a Transition ID of 21 so we would input that into the request data.
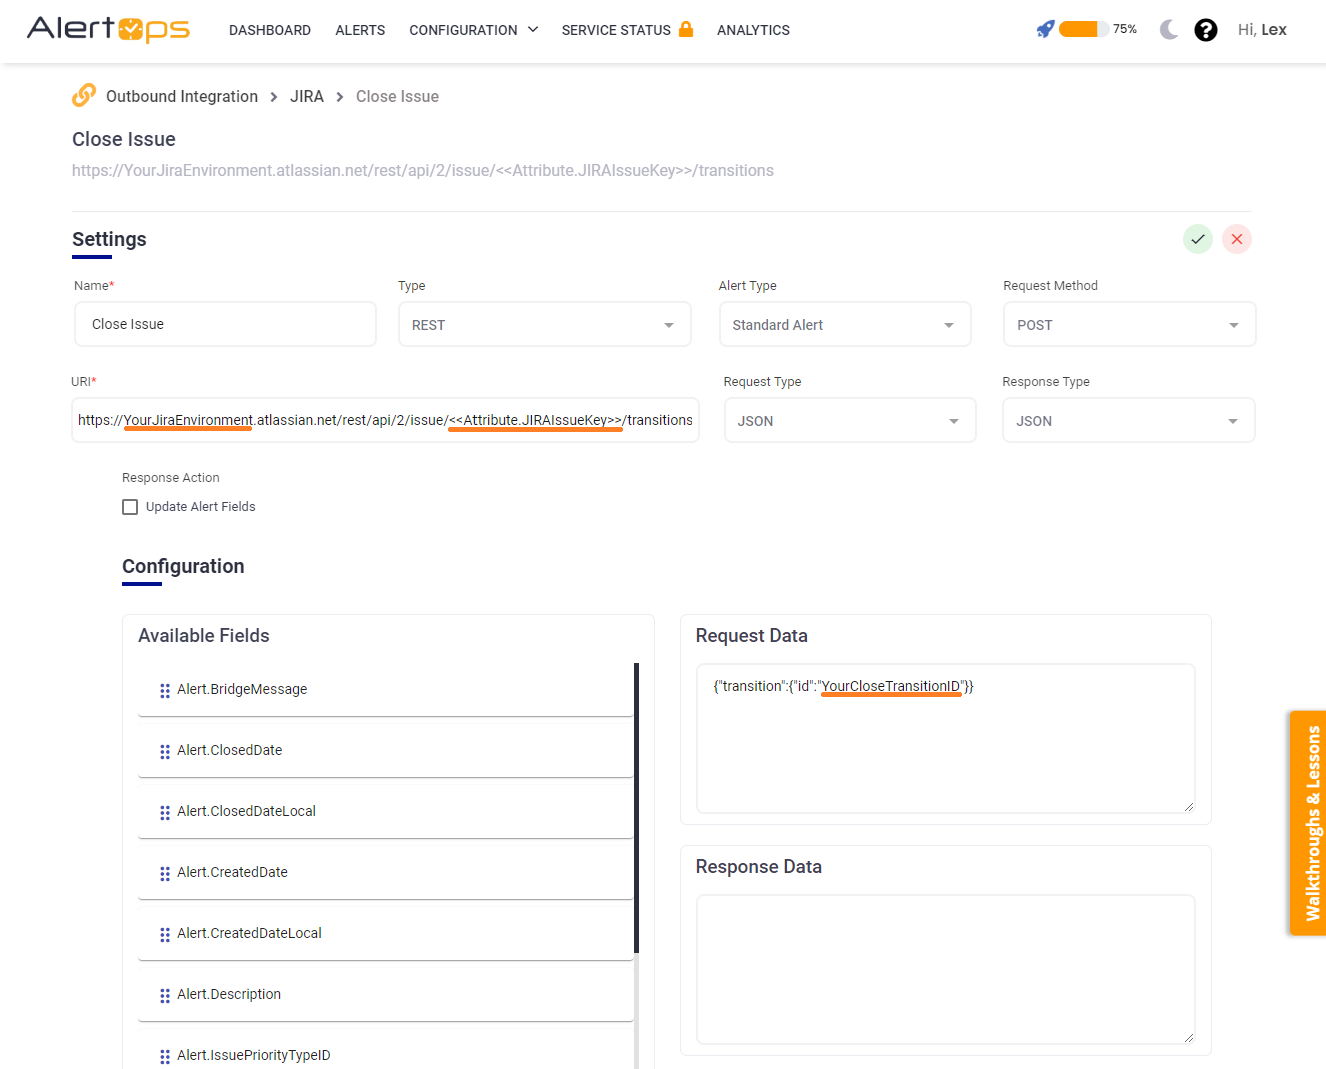
//URI
//https://YourJiraEnvironment.atlassian.net/rest/api/2/issue/<<Attribute.JIRAIssueKey>>/transitions

//Request Data
{"transition":{"id":"31"}}
Assign Issue (Optional)
In this example we will be assigning a user to an issue in JIRA when the user takes assignment from AlertOps.
It is important to note that we must store the user's corresponding JIRA assignee ID as the External Field in the user profile. If this is not stored here, the issue cannot be assigned from AlertOps.
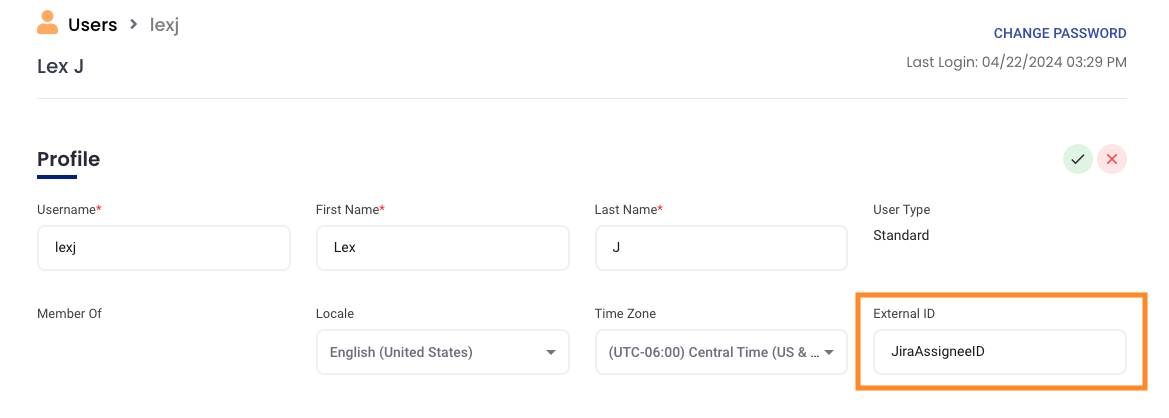 AlertOps User Profile
To create the Assign issue method, first input the Issue Key field in the URI that we mapped in our inbound integration to identify the issue to be updated.
The next step is to add the assignee in the Request Data. Here we can drag and drop the External ID field from the list of available fields.
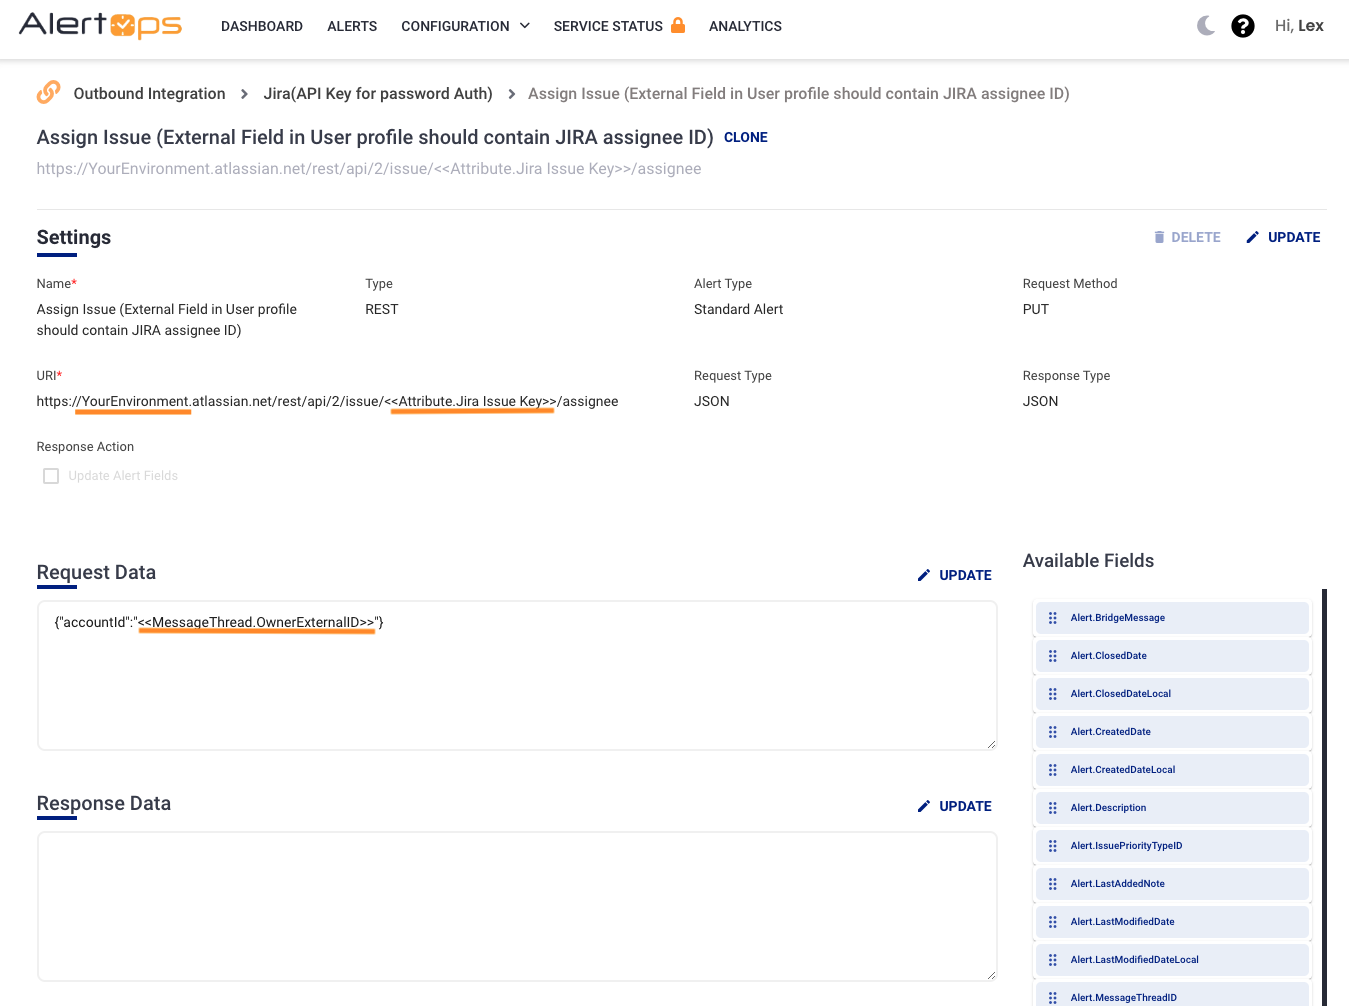
//URI
//https://YourJiraEnvironment.atlassian.net/rest/api/2/issue/<<Attribute.JIRAIssueKey>>/assignee

//Request Data
{"accountId":"<<MessageThread.OwnerExternalID>>"}
Add Issue Comment (Optional)
In this example we will be adding a comment to an issue when a user is assigned. This comment can be customized to use any available fields to suit your needs. In our example, we will be commenting the username of the assignee.
First we need to input the Issue Key field in the URI that we mapped in our inbound integration to identify the issue to be updated.
The next step is to add the assignee to the comment. We can drag and drop this field from the list of available fields.

//URI
//https://YourJiraEnvironment.atlassian.net/rest/api/2/issue/<<Attribute.JIRAIssueKey>>/comment

//Request Data
{"body":"Issue was Assigned to <<Alert.OwnerUserName>>"}
Workflow Configuration
Now that we have configured our Methods, we need to create Workflows to trigger the Outbound Integration.
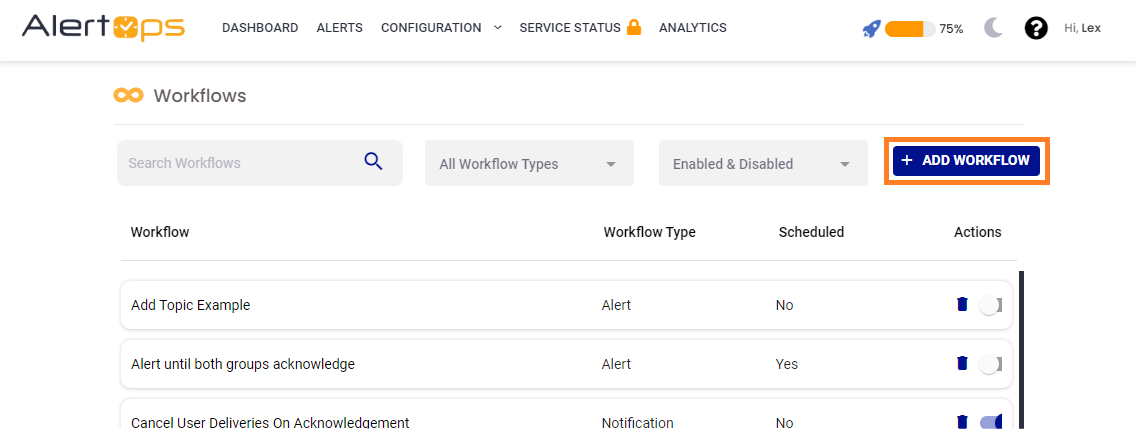
- Click Configurations from the main menu and select Workflows.
- Click the Add Workflow button.
Below we will create three Workflows with Actions to trigger the methods we have just created:
Create Issue Workflow

- For Type, select Alert.
- Name the workflow JIRA - Create Issue
- Set the Alert Type as a Standard Alert
- Click Submit to save.
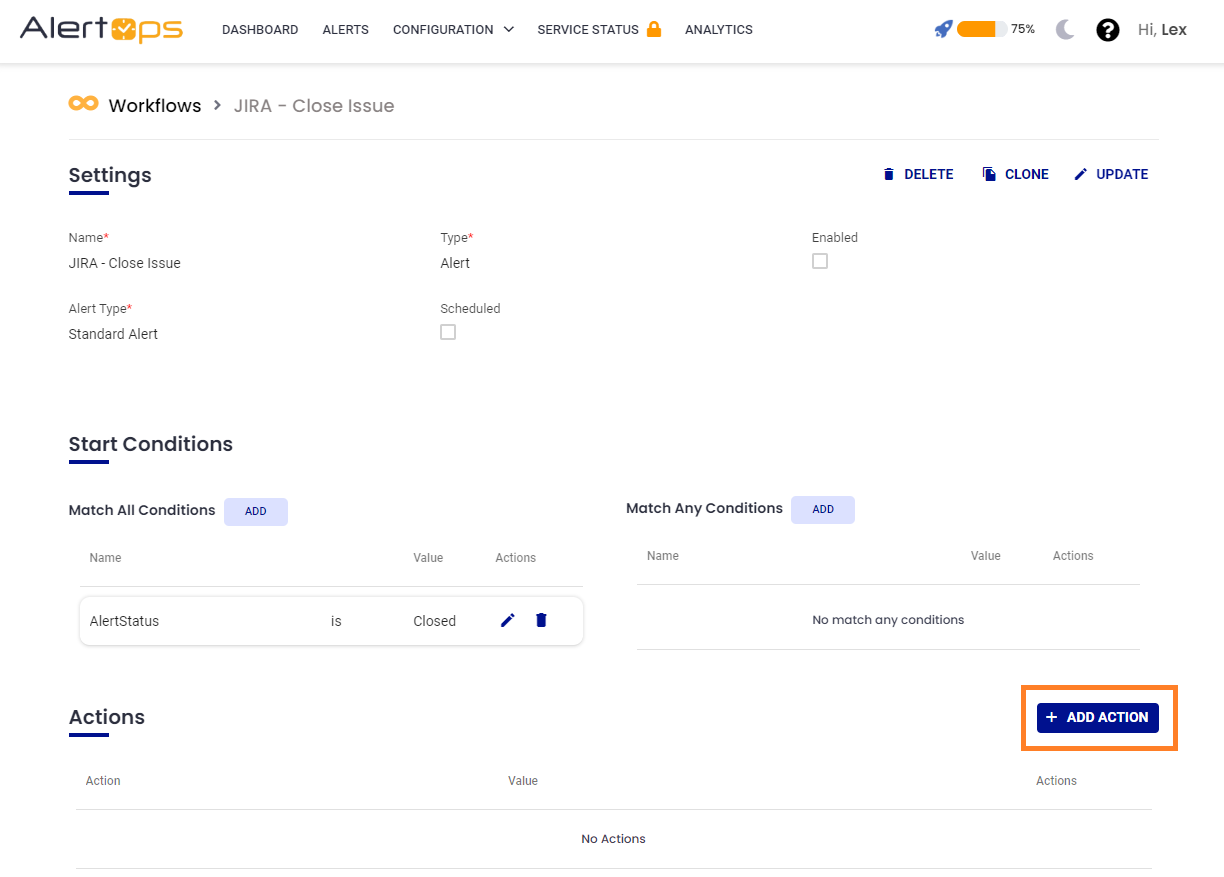
Once saved we can add Start Conditions to this Workflow:
- Using Match All Conditions.
- Add AlertStatus is Open.
- Check the green arrow to save.

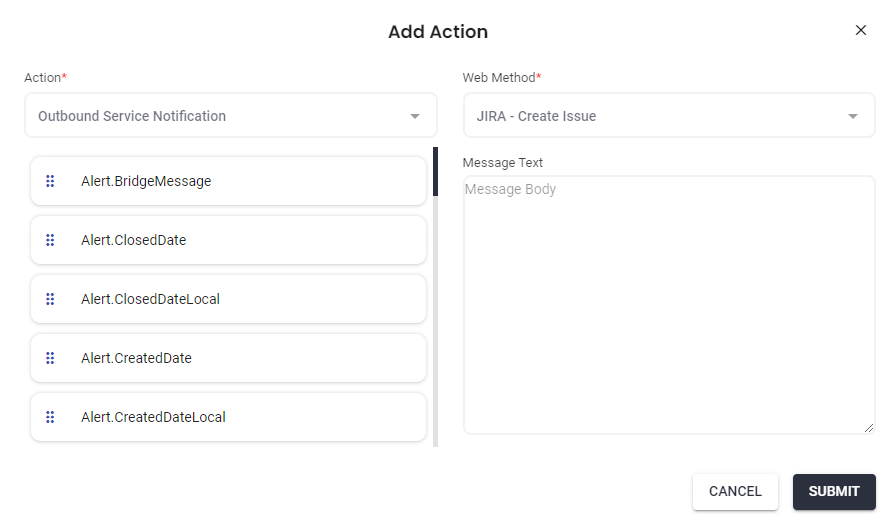
Next, we need to add an Actions to this Workflow. Click the Add Action Button.
.png)
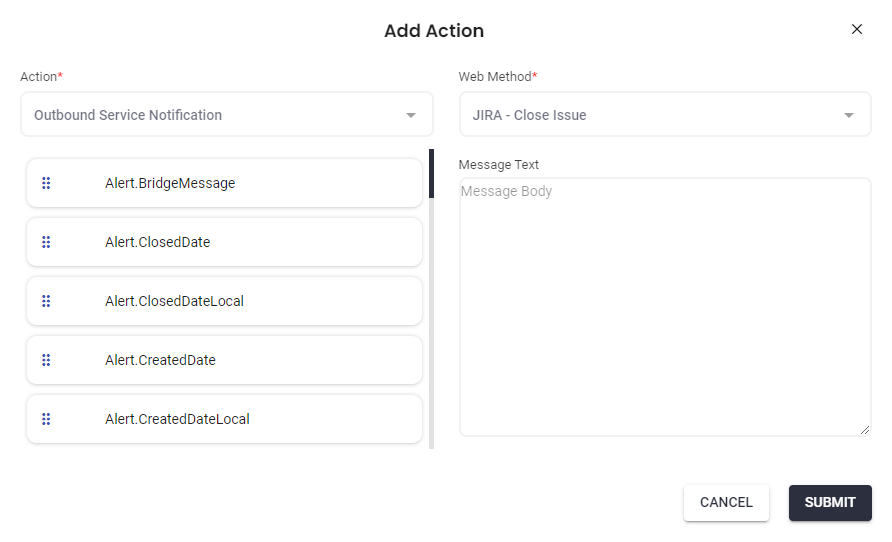
From here we are going to select Outbound Service Notification for the Action, and select the corresponding Method we want to trigger as the Web Method.
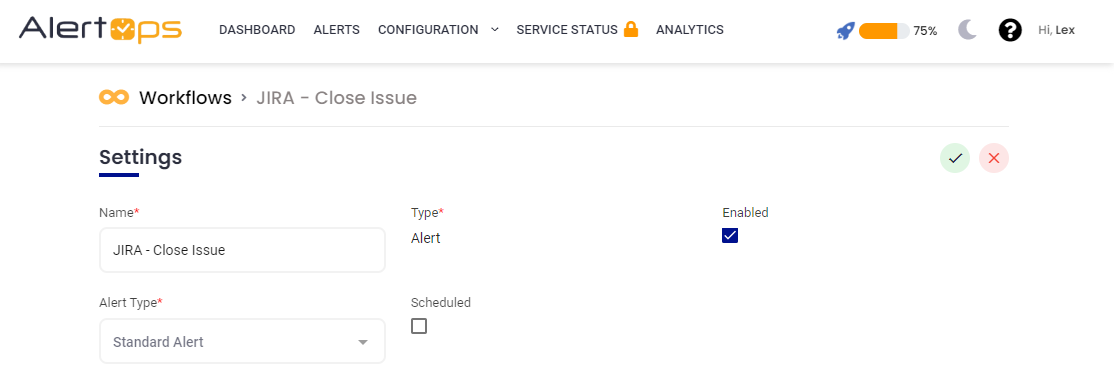
Once this has been saved, make sure to enable the Workflow before continuing.

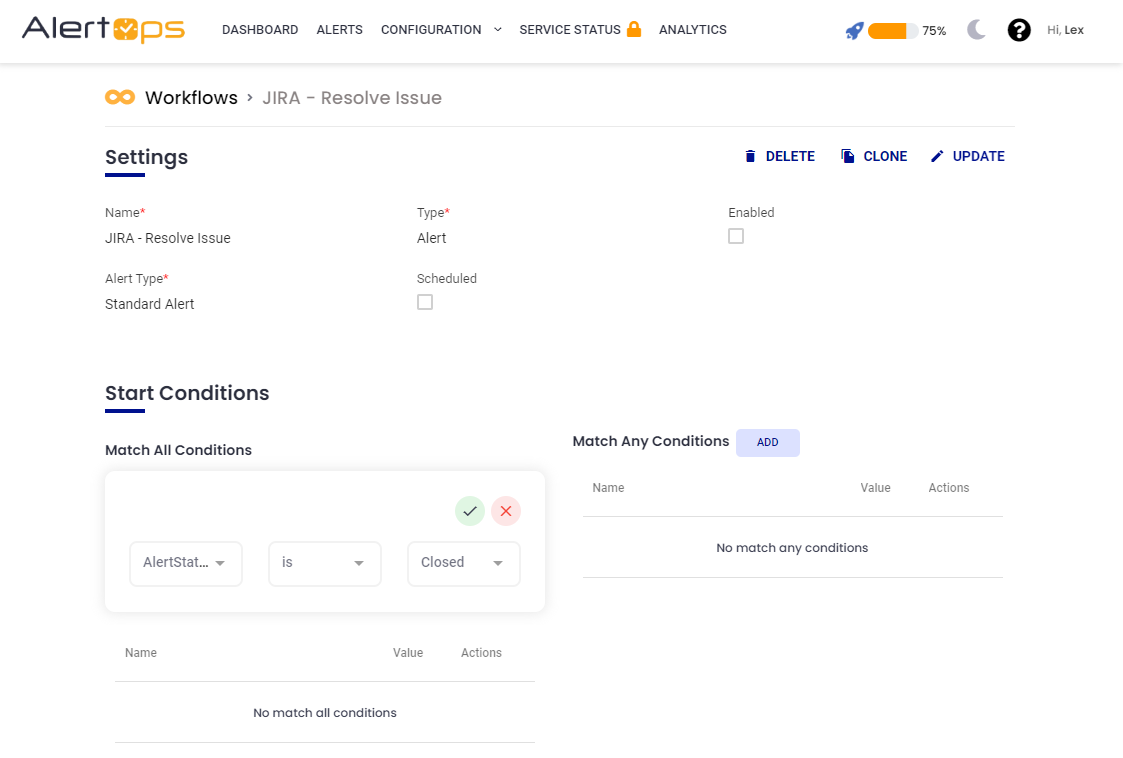
Close (Transition) Issue Workflow

- For Type select Alert
- Name this Workflow JIRA - Transition Issue
- Select Standard Alert for the Alert Type
- Click Submit to Save.
Once saved we can add Start Conditions to this Workflow:
- Using Match All Conditions.
- Add AlertStatus is Closed.
- Check the green arrow to save.
Next, we need to add an Actions to this Workflow. Click the Add Action Button.
From here we are going to select Outbound Service Notification for the Action, and select the corresponding Method we want to trigger as the Web Method.
Once this has been saved, make sure to enable the Workflow before continuing.
Assign User Workflow (optional)
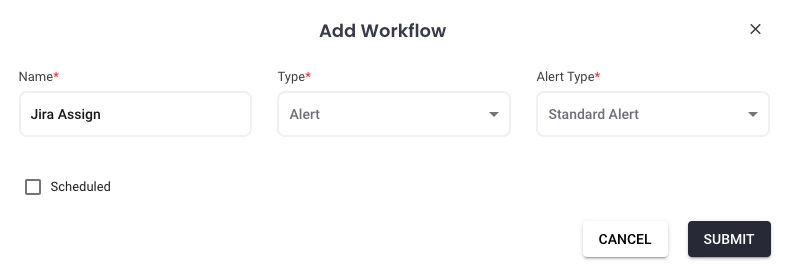
You can assign users to a JIRA Issue. In this example when alert is assigned in AlertOps, the same user will be assigned to the issue in Jira.
- For Type select Alert
- Name this Workflow Jira Assign
- Select Standard for the Alert Type.
- Click Submit to save.
Once saved we can add Start Conditions to this Workflow:
- Using Match All Conditions.
- Add AlertStatus is Assigned.
- Check the green arrow to save.

Next, we need to add an Actions to this Workflow. Click the Add Action Button.
From here we are going to select Outbound Service Notification for the Action and select the corresponding Method we want to trigger as the Web Method (Assign issue method).
Once this has been saved, make sure to enable the Workflow before continuing.
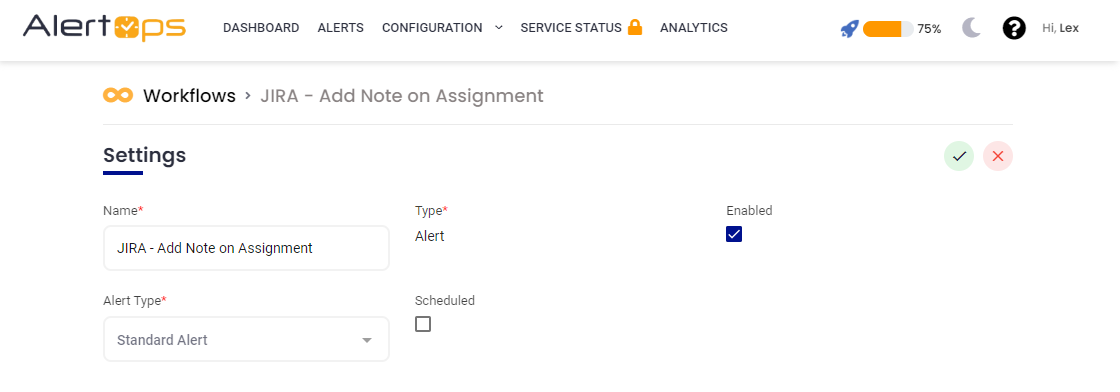
Add Comment on Assignment Workflow (optional)
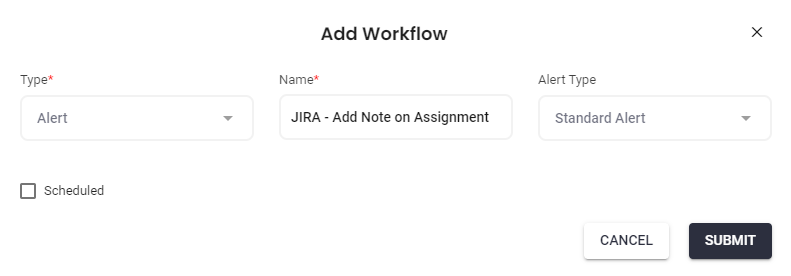
You can add comments to a JIRA Issue. In this example we will add a comment when an an alert is assigned.
- For Type select Alert
- Name this Workflow JIRA - Add Note on Assignment
- Select Standard for the Alert Type.
- Click Submit to save.
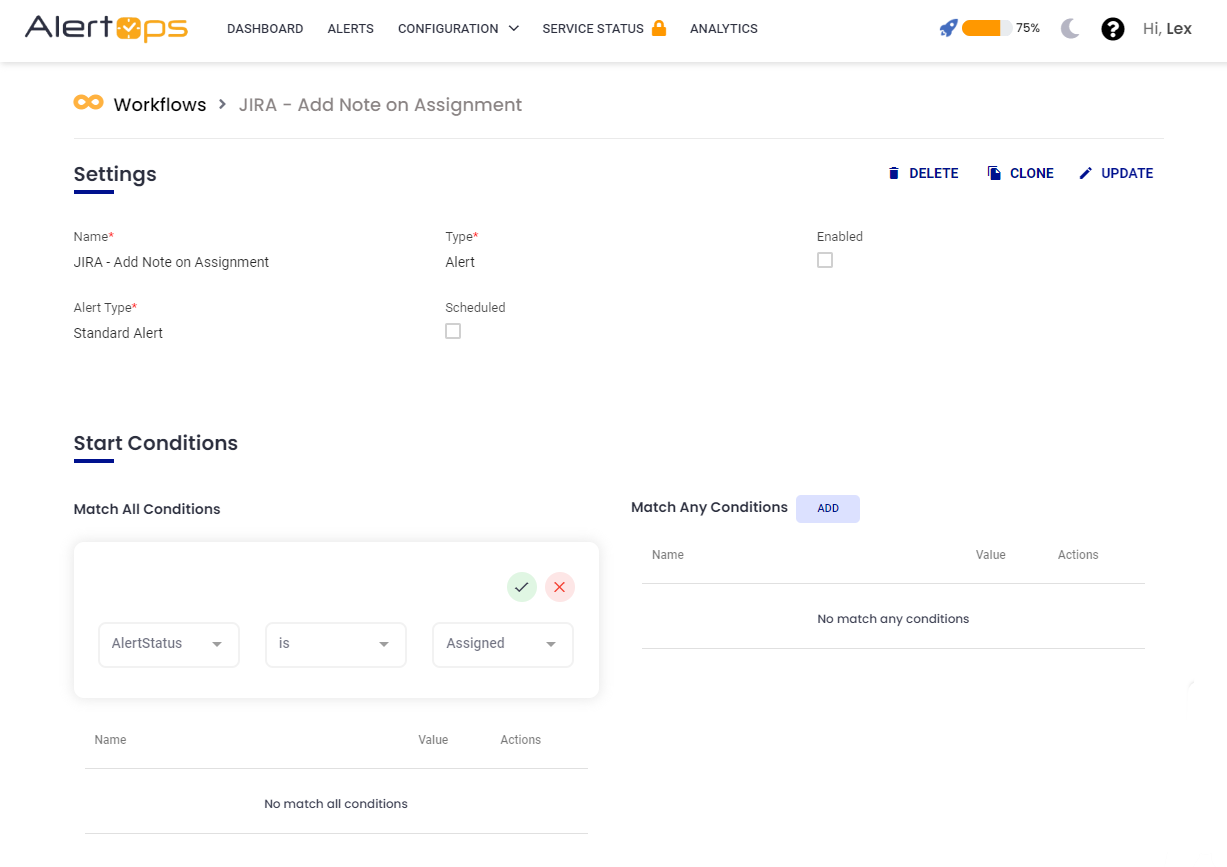
Once saved we can add Start Conditions to this Workflow:
- Using Match All Conditions.
- Add AlertStatus is Assigned.
- Check the green arrow to save.
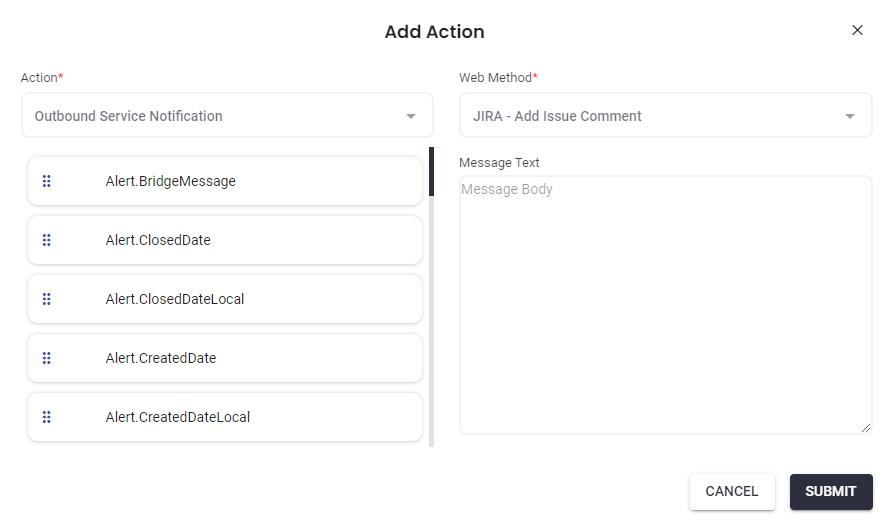
Next, we need to add an Actions to this Workflow. Click the Add Action Button.

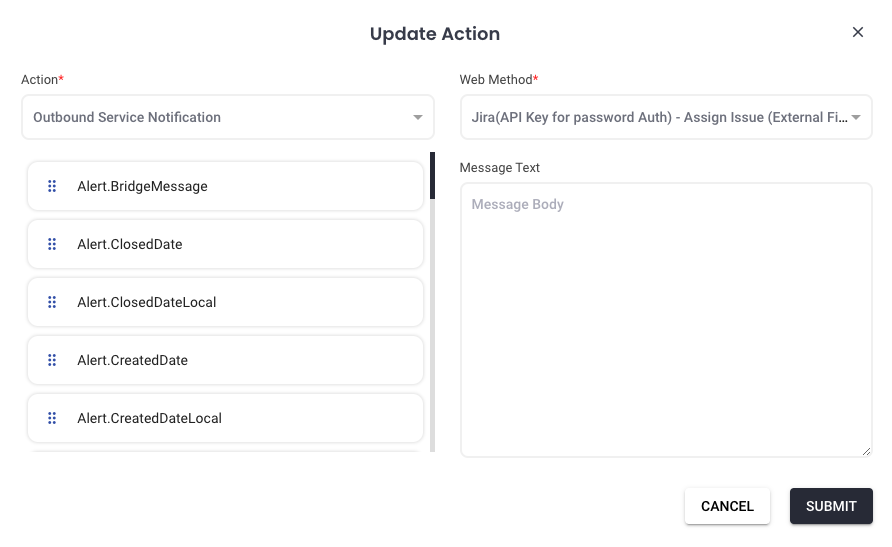
From here we are going to select Outbound Service Notification for the Action, and select the corresponding Method we want to trigger as the Web Method.
Once this has been saved, make sure to enable the Workflow before continuing.
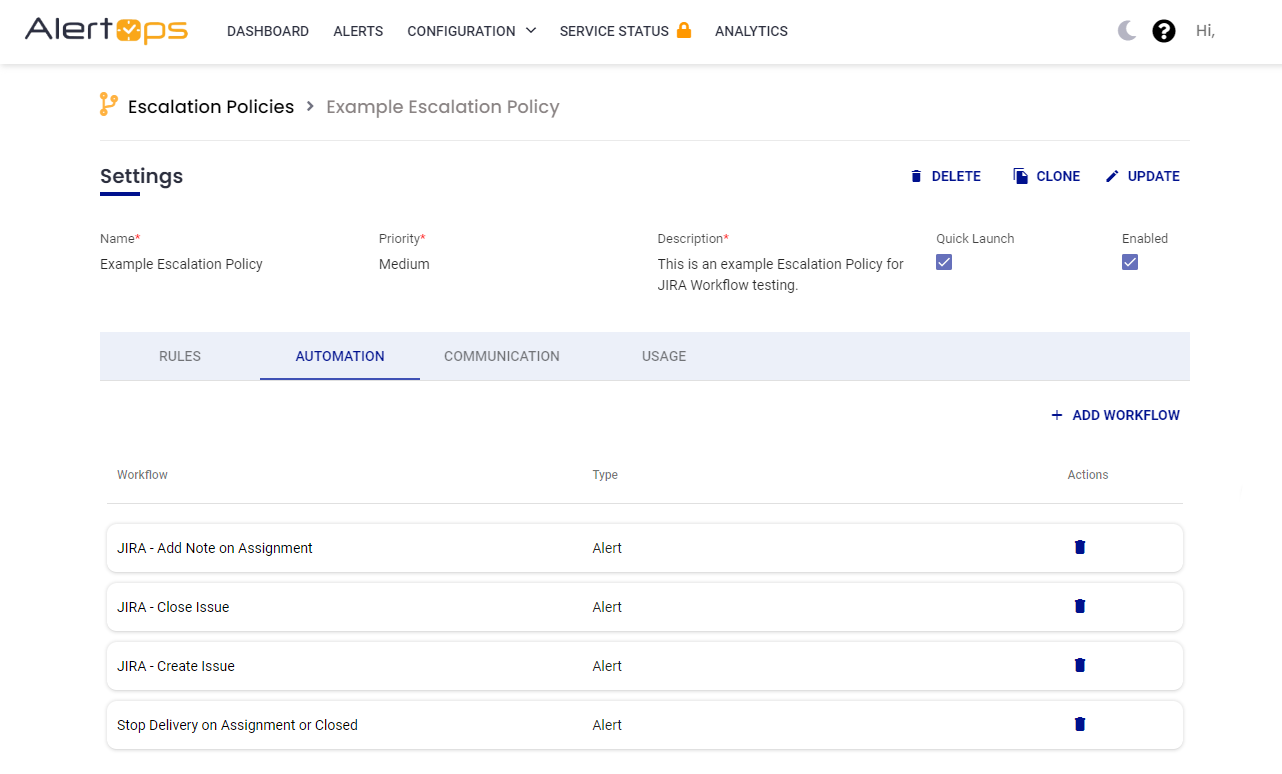
Using Workflows in Escalation Policies
The next step for workflows is to associate them with an Escalation Policy from the Automation tab.
Was this article helpful?