Workflows Overview
- 13 May 2024
- 5 Minutes to read
- Print
- DarkLight
- PDF
Workflows Overview
- Updated on 13 May 2024
- 5 Minutes to read
- Print
- DarkLight
- PDF
Article summary
Did you find this summary helpful?
Thank you for your feedback!
The following entitlements are required to make changes to Workflows:
- Workflows_Update - Create, Update, and Delete Workflows
- Workflows_View - View existing Workflows
The user roles with access to these integration entitlements are Owner and App Admin.
What is a Workflow?
Workflows are auxiliary actions in your Escalation Policy which are triggered based on defined conditions. AlertOps comes with a number of pre-built Workflows. Additionally, you may create new Workflows and edit existing ones. Workflows are only available for Enterprise Package and Custom Package clients.
Creating a Workflow
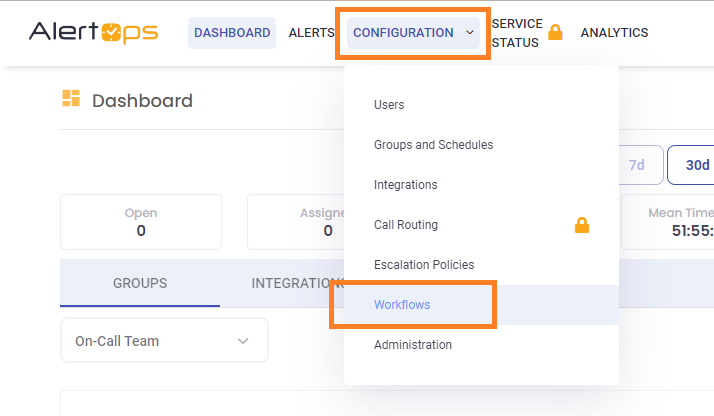
- Expand Configuration on the menu bar and select Workflows.
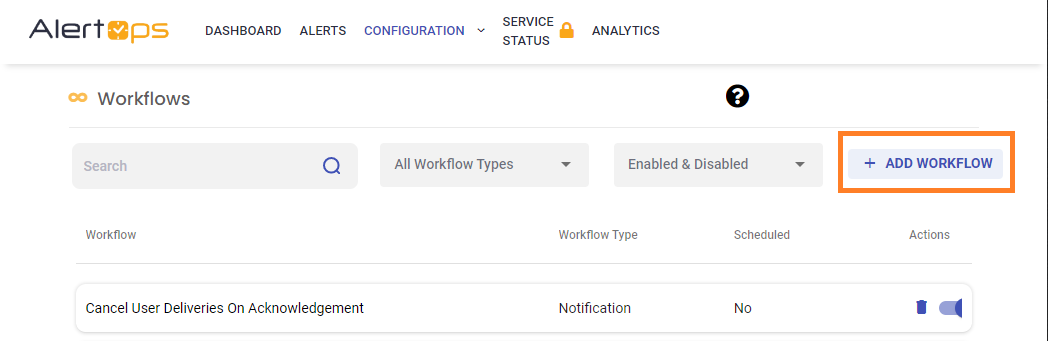
- Click the Add Workflow button on the top right of the page.
- Select a Type of workflow. There are three workflow Types:
- Alert – building workflow conditions based on standard and custom attributes.
- Message – building workflow conditions pertaining to an individual message that is part of an alert's thread.
- Notification – building workflow conditions upon delivery status of notifications within a message.
- Enter a unique Name to describe the workflow.
- Based on the Type of workflow selected you may need to add an Alert Type which designates which custom fields are available for the Workflow. There is no Alert Type for Notification.
- Check the Scheduled box if a workflow requires a time-based escalation. A Recurrence Interval will appear once the Scheduled checkbox is selected and can be configured in minutes.
- Click Submit to save this workflow.
.png)
Setting Workflow Conditions
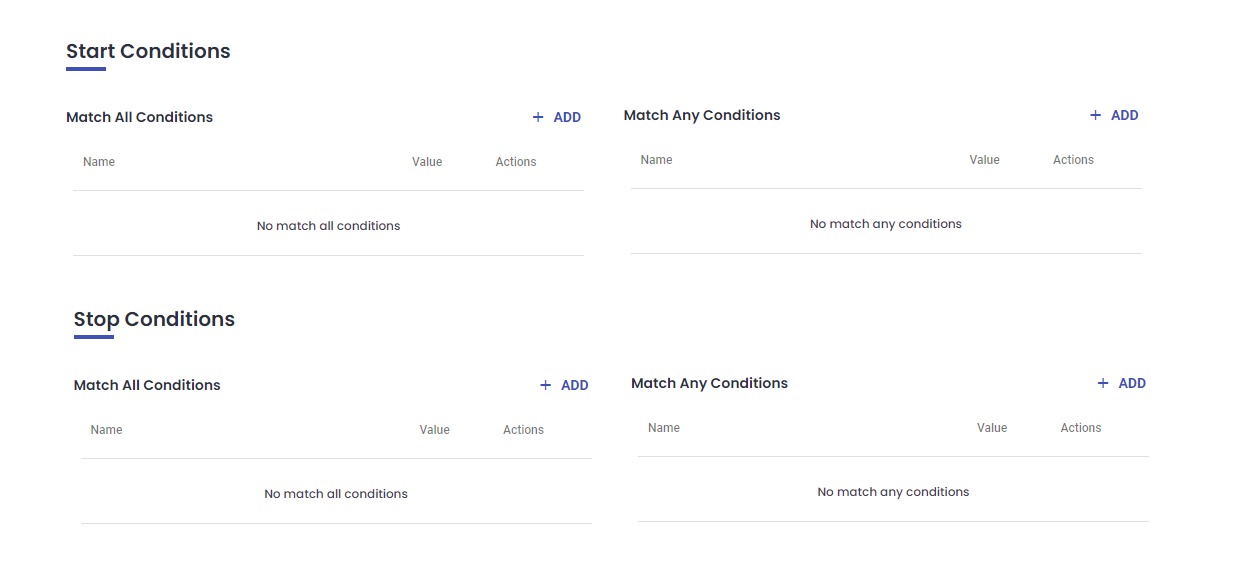
Once the Workflow has been saved, scroll down to the Start Conditions and Stop Conditions sections of the Workflow page. Start Conditions control the conditions under which the Workflow will trigger. Stop Conditions control the conditions under which the Workflow will stop. Stop Conditions are required when a workflow has a recurrence interval. They will become available (visible) when the recurrence is set, and must be provided to enable the workflow.
Start Conditions
Start Conditions
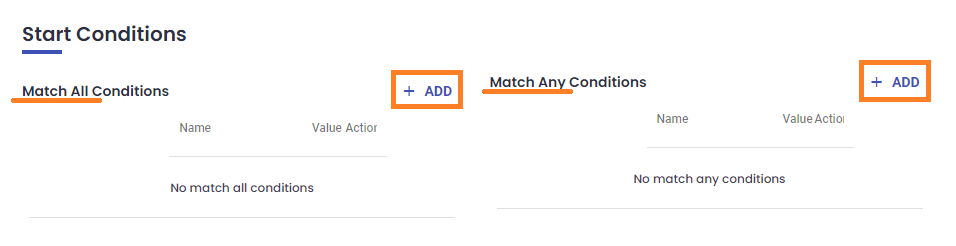
Once the Workflow has been saved, scroll down to the Start Conditions section of the Workflow page. Start Conditions control the conditions under which the Workflow will trigger.
- Click Add Start Condition on the Workflow page. You can choose between Match All or Match Any based on your needs.
Match All Conditions:
In the Match All section, conditions are required to be met simultaneously for the workflow to trigger. You can specify multiple conditions, and all of them must be true for the workflow to proceed.
Available Operators for Match All:
- Is: The attribute value must be exactly equal to the specified value.
- Is Not: The attribute value must not be equal to the specified value.
- Is Changed: The attribute value has changed since the last evaluation.
- Is Any: The attribute value matches any of the specified values.
- Not Is Any: The attribute value does not match any of the specified values.
- Contains Any: The attribute value contains any of the specified substrings.
- Not Contains Any: The attribute value does not contain any of the specified substrings.
- Matches Regex: The attribute value matches the specified regular expression pattern.
- Not Matches Regex: The attribute value does not match the specified regular expression pattern.
Match Any Conditions:
In the Match Any section, at least one condition needs to be met for the workflow to trigger. If any of the specified conditions are true, the workflow will proceed.
Available Operators for Match Any:
- Is: The attribute value must be exactly equal to the specified value.
- Is Not: The attribute value must not be equal to the specified value.
- Is Changed: The attribute value has changed since the last evaluation.
- Contains: The attribute value contains the specified substring.
- Not Contains: The attribute value does not contain the specified substring.
- Matches Regex: The attribute value matches the specified regular expression pattern.
- Not Matches Regex: The attribute value does not match the specified regular expression pattern.
Selecting Attributes and Conditions:
- Select the Attribute on which the condition will be based. Standard attributes include:
- Complete Delivery: All deliveries have been sent to all Recipients.
- AlertPriority:
- AlertStatus:
- Topic: Alert topic
- Note:
- Owner: Alert Owner
- Source:
- SourceName:
- Template: Alert Template
- TimeAfterSLA: Minutes after the alert Target SLA Date
- TimeBeforeSLA: Minutes before the alert Target SLA Date
- TimeFromBeginning: Minute from the Alert creation time
Modifying a Condition
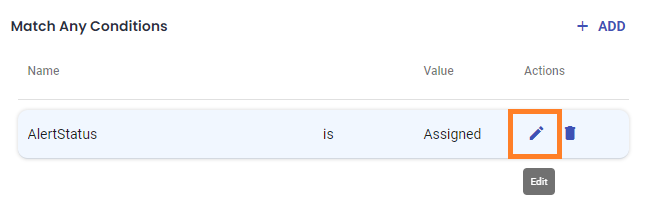
To modify a Condition, click the Edit icon next to the desired condition. Once you’ve made your changes click the Submit button to save.
Condition Examples
Example 1: Alert Status
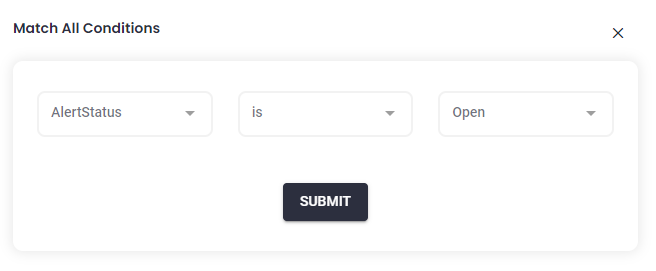
In this example, we chose the AlertStatus attribute. The value for AlertStatus can be Assigned, Cancelled, Closed, On Hold, or Open. This Workflow will start when AlertStatus is Open.
Example 2: Owner
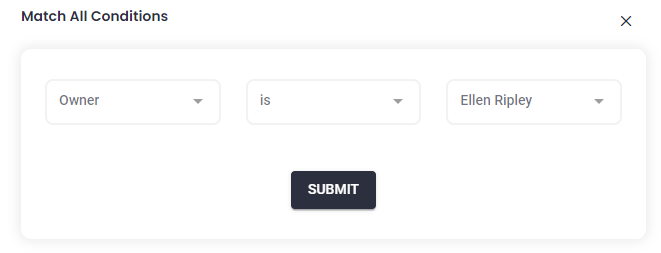
In this example, we chose the Owner attribute. The Value field will produce a dropdown of all available users. This example Workflow will start when the Value for Owner is Ellen Ripley.
Setting Workflow Actions
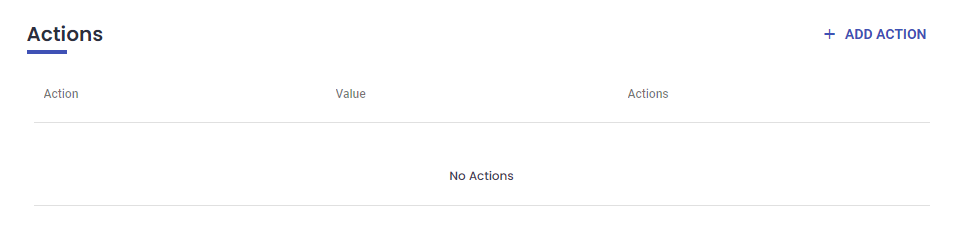
An Action is the activity that is triggered when start conditions are met. To view, edit, or add actions to a workflow, scroll down to the Actions section on the Workflow page.
Add an Action
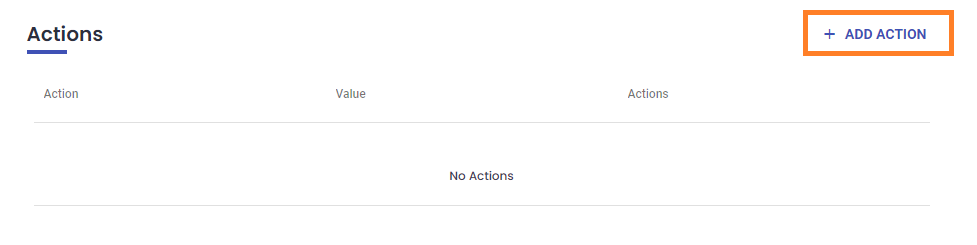
- Click Add Action on the right side of the Workflows page.
- Choose an Action from the dropdown field. Actions differ depending on the Alert Type. The most commonly used Action is SendMessage.
- Add details to the Action depending on the action type.
- Click Submit to save.
Action Examples
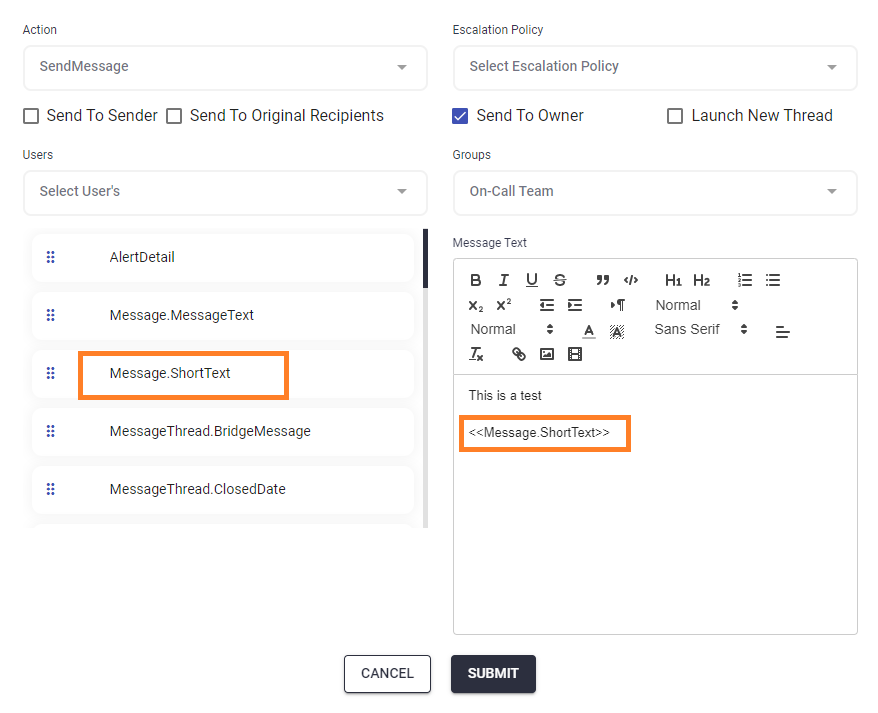
SendMessage Example
- First, select SendMessage for the action.
- Select an Escalation Policy. In this example we are choosing All hands all contacts to send the message to everyone through all saved contact methods.
- Then choose recipients by checking the boxes.
- Send to Sender sends the message to the creator of the Alert (Manual Alerts only).
- Send to Owner sends the message to the assigned Alert Owner.
- Send to Original Recipients sends the message to all recipients currently on the Alert Thread. Note that Recipients are not needed if the Escalation Rule has Recipients defined or the Escalation Rule is sending to a System, such as an Outbound Service.
- Launch New Thread will create a new message thread.
- If necessary, you may select Users or Groups to add them individually.
- Message Text is the text to be included in the Alert Message. It can be a combination of static and dynamic text using any Alert field or Template field. You can drag and drop Keywords into the Message Text to insert dynamic alert fields. Message Text is not needed if the selected Escalation Rule automatically sends a system message using an Outbound Integration or if the Escalation Rule has static text.
- Click Submit to save.
Select an Enabled status (On or Off). You may set the Enable status to 'On' only after creating one Condition and one Action for the Workflow.
Scheduled Workflow Example
In this example, a Scheduled Workflow is set to occur every 60 minutes when AlertStatus is "Assigned" for longer than 120 minutes. The workflow will stop when AlertStatus is "Closed".
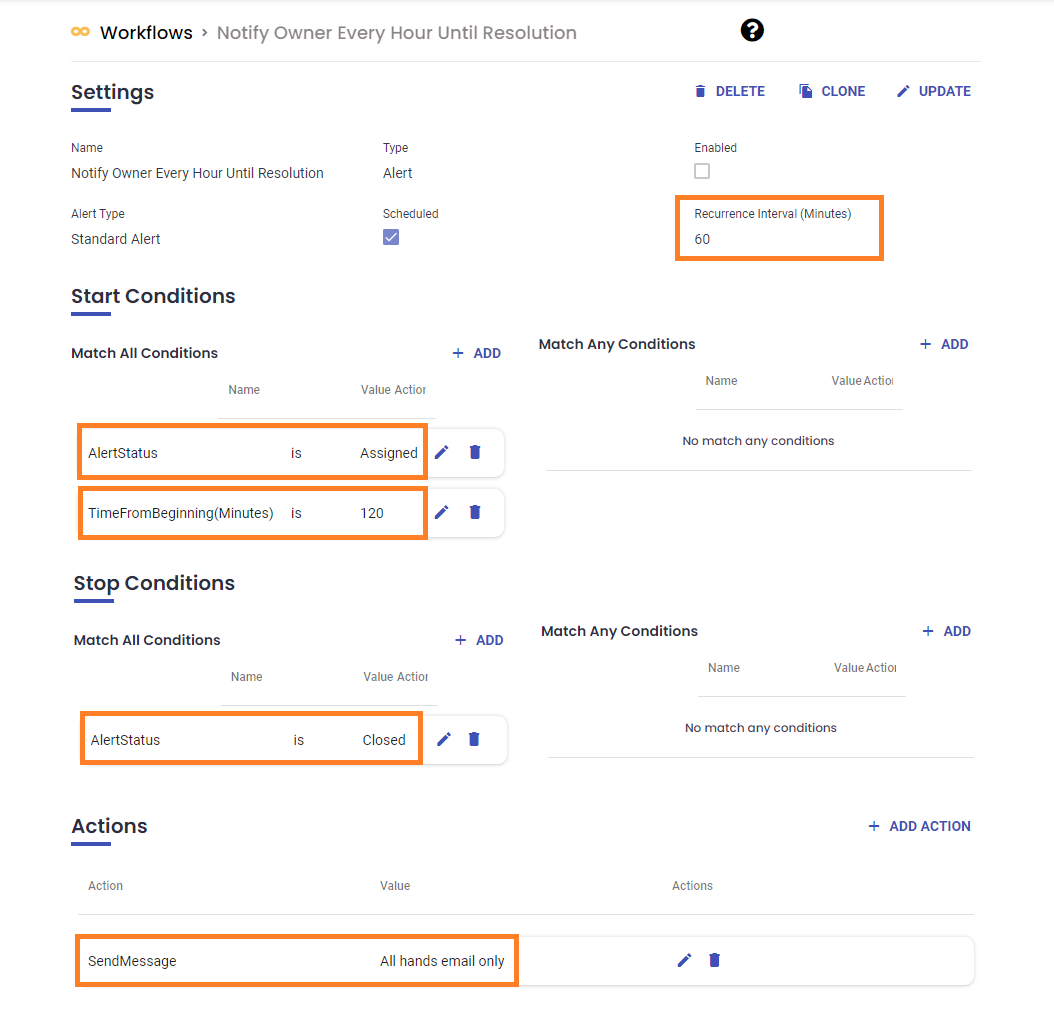
The associated action, SendMessage, is set up to send an email to the Alert Owner to remind them when the alert is still open.
.png)
Workflows in Escalation Policies
Workflows are invoked by Escalation Policies. To add a workflow to an escalation policy:
- From the main menu click Configuration and select Escalation Policies from the dropdown.
- Choose an Escalation Policy and expand the Automation tab.
- Click Add Workflow on the right side of the page.
- The Add Workflow dialogue box will appear. Here you can select from the list of available workflows and use the right arrow to assign it to this Escalation Policy. If the Escalation Policy is used in another Workflow it cannot have additional Workflows assigned, and the button will be grayed out.
.png)
Was this article helpful?