Scheduling Basics
- 25 Jan 2025
- 4 Minutes to read
- Print
- DarkLight
- PDF
Scheduling Basics
- Updated on 25 Jan 2025
- 4 Minutes to read
- Print
- DarkLight
- PDF
Article summary
Did you find this summary helpful?
Thank you for your feedback!
What is a Schedule?
A Schedule is comprised of configurable Shifts that give managers control over who is on-call for notifications. In other words, schedule define which team member gets alerted at any given time.
When a group does not have any set shifts in the schedule, escalations are based on user roles as well as the order of members as they are arranged in the members tab.
Creating a Shift for a Group
- From the menu bar, click on Configurations and select Groups & Schedules.
- Select the desired group to redirect to the group detail page.
- Select Shift Template
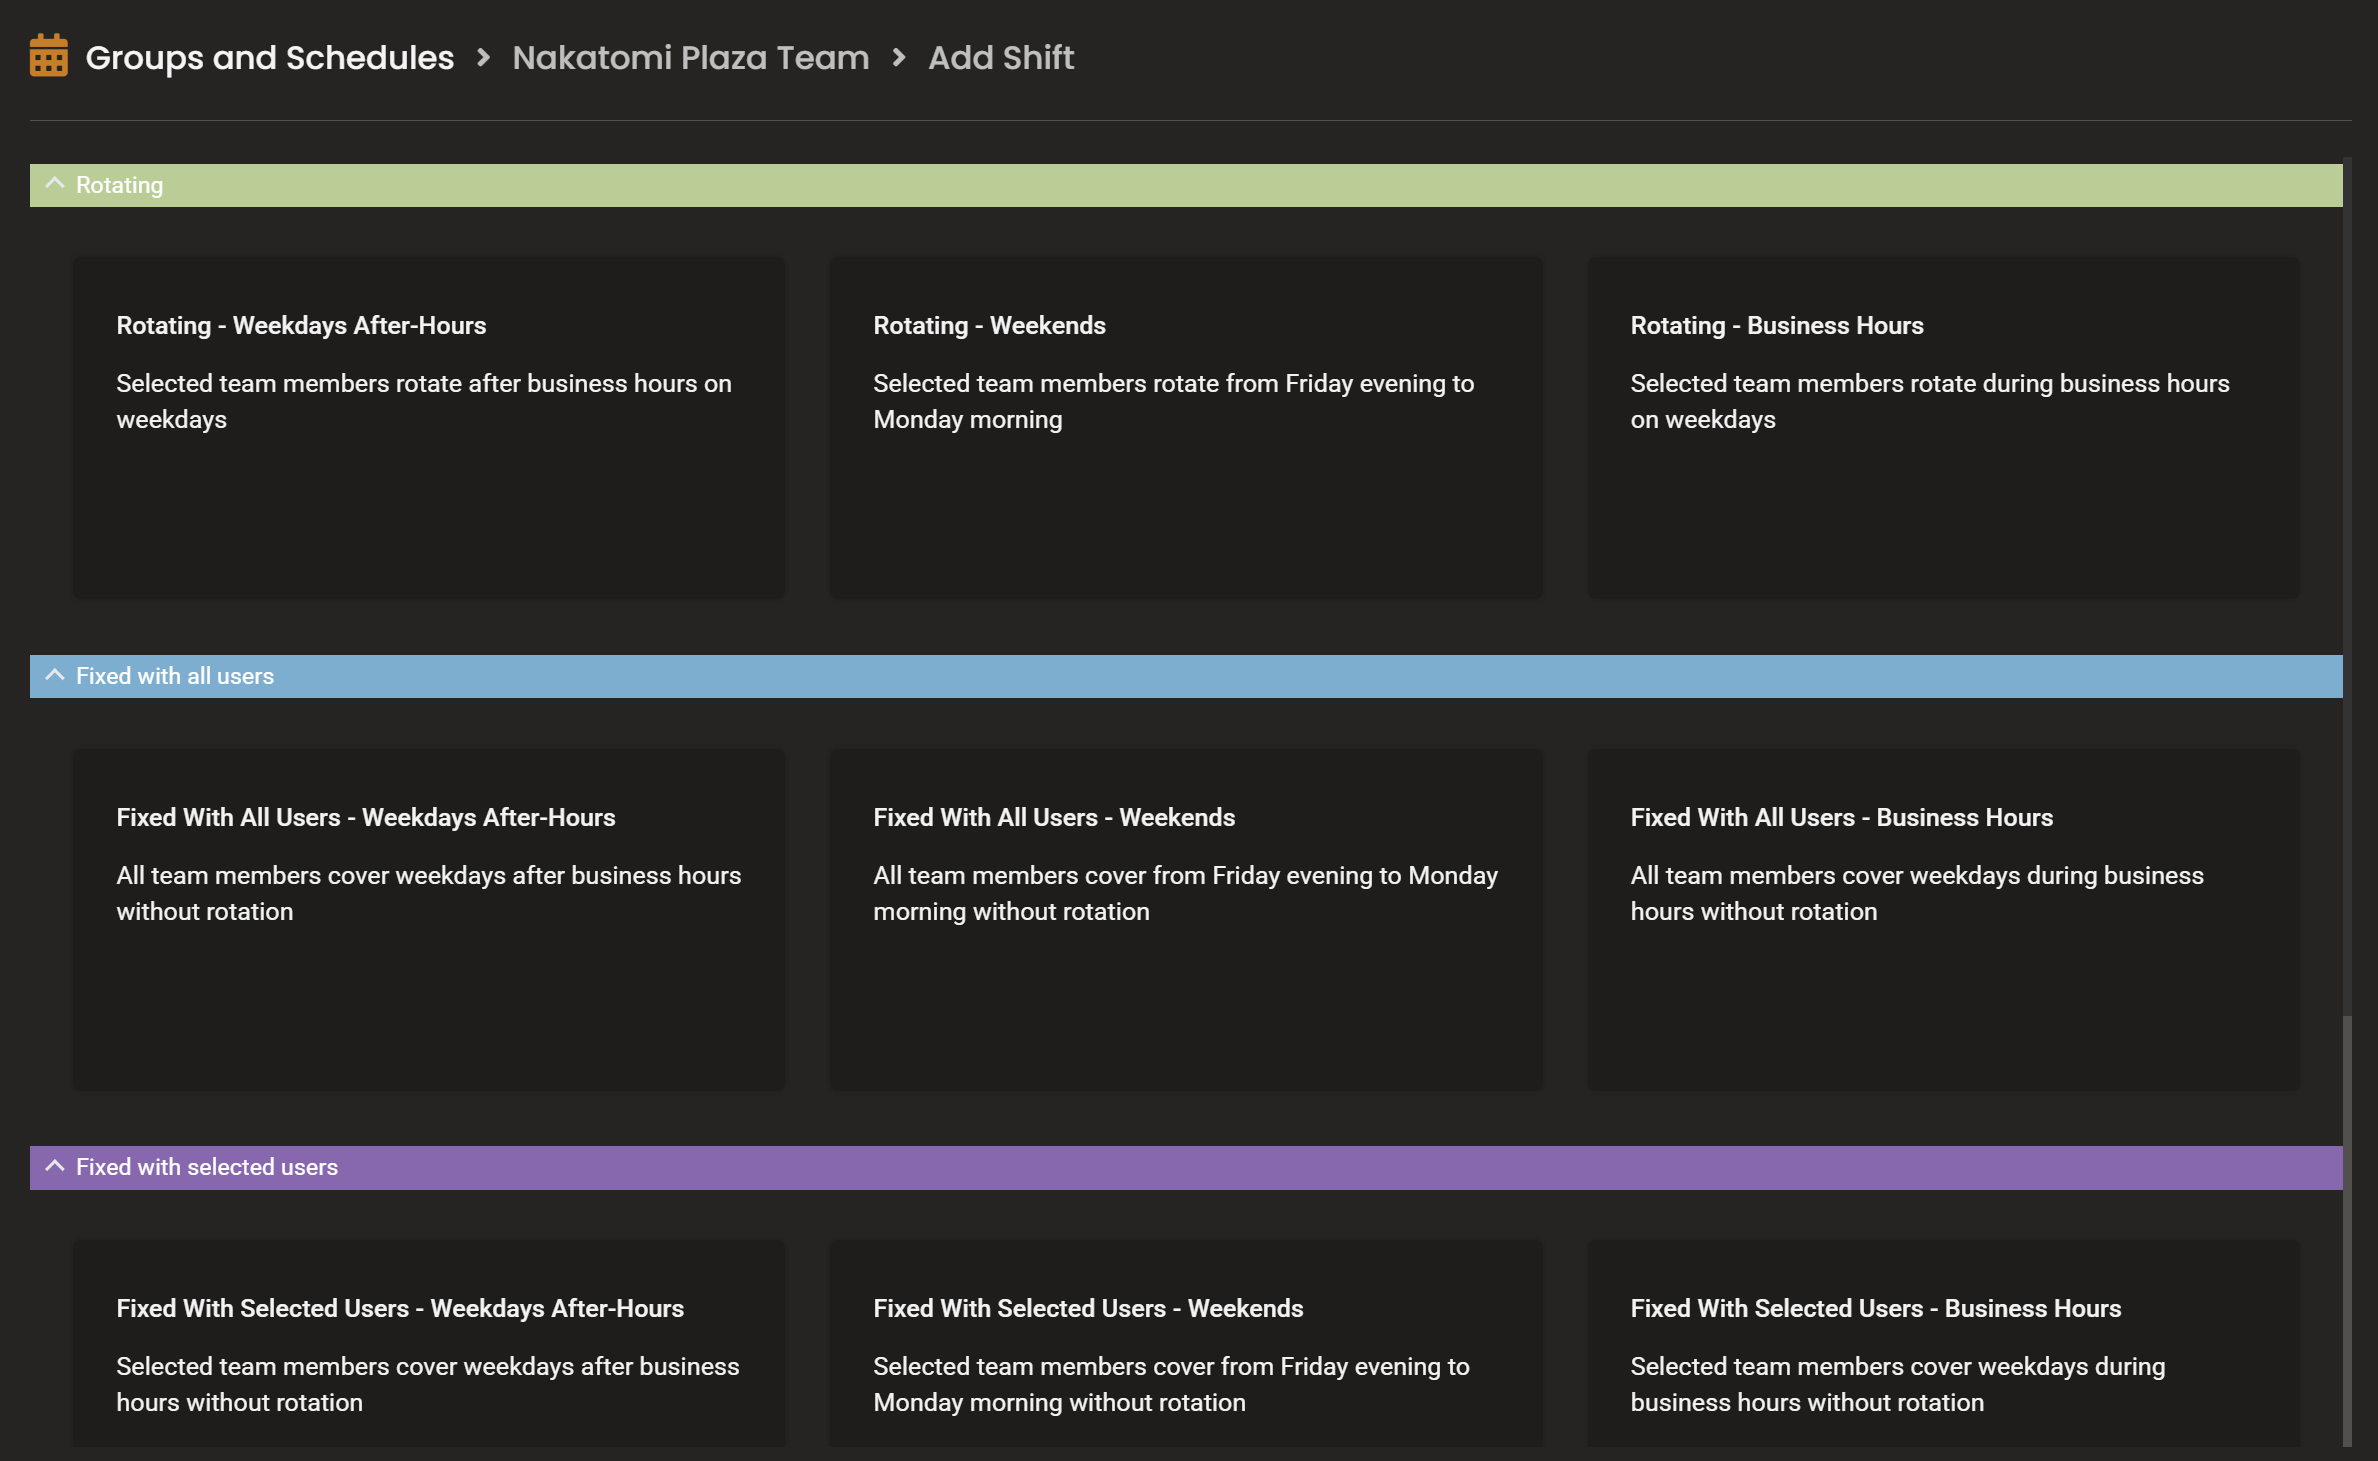
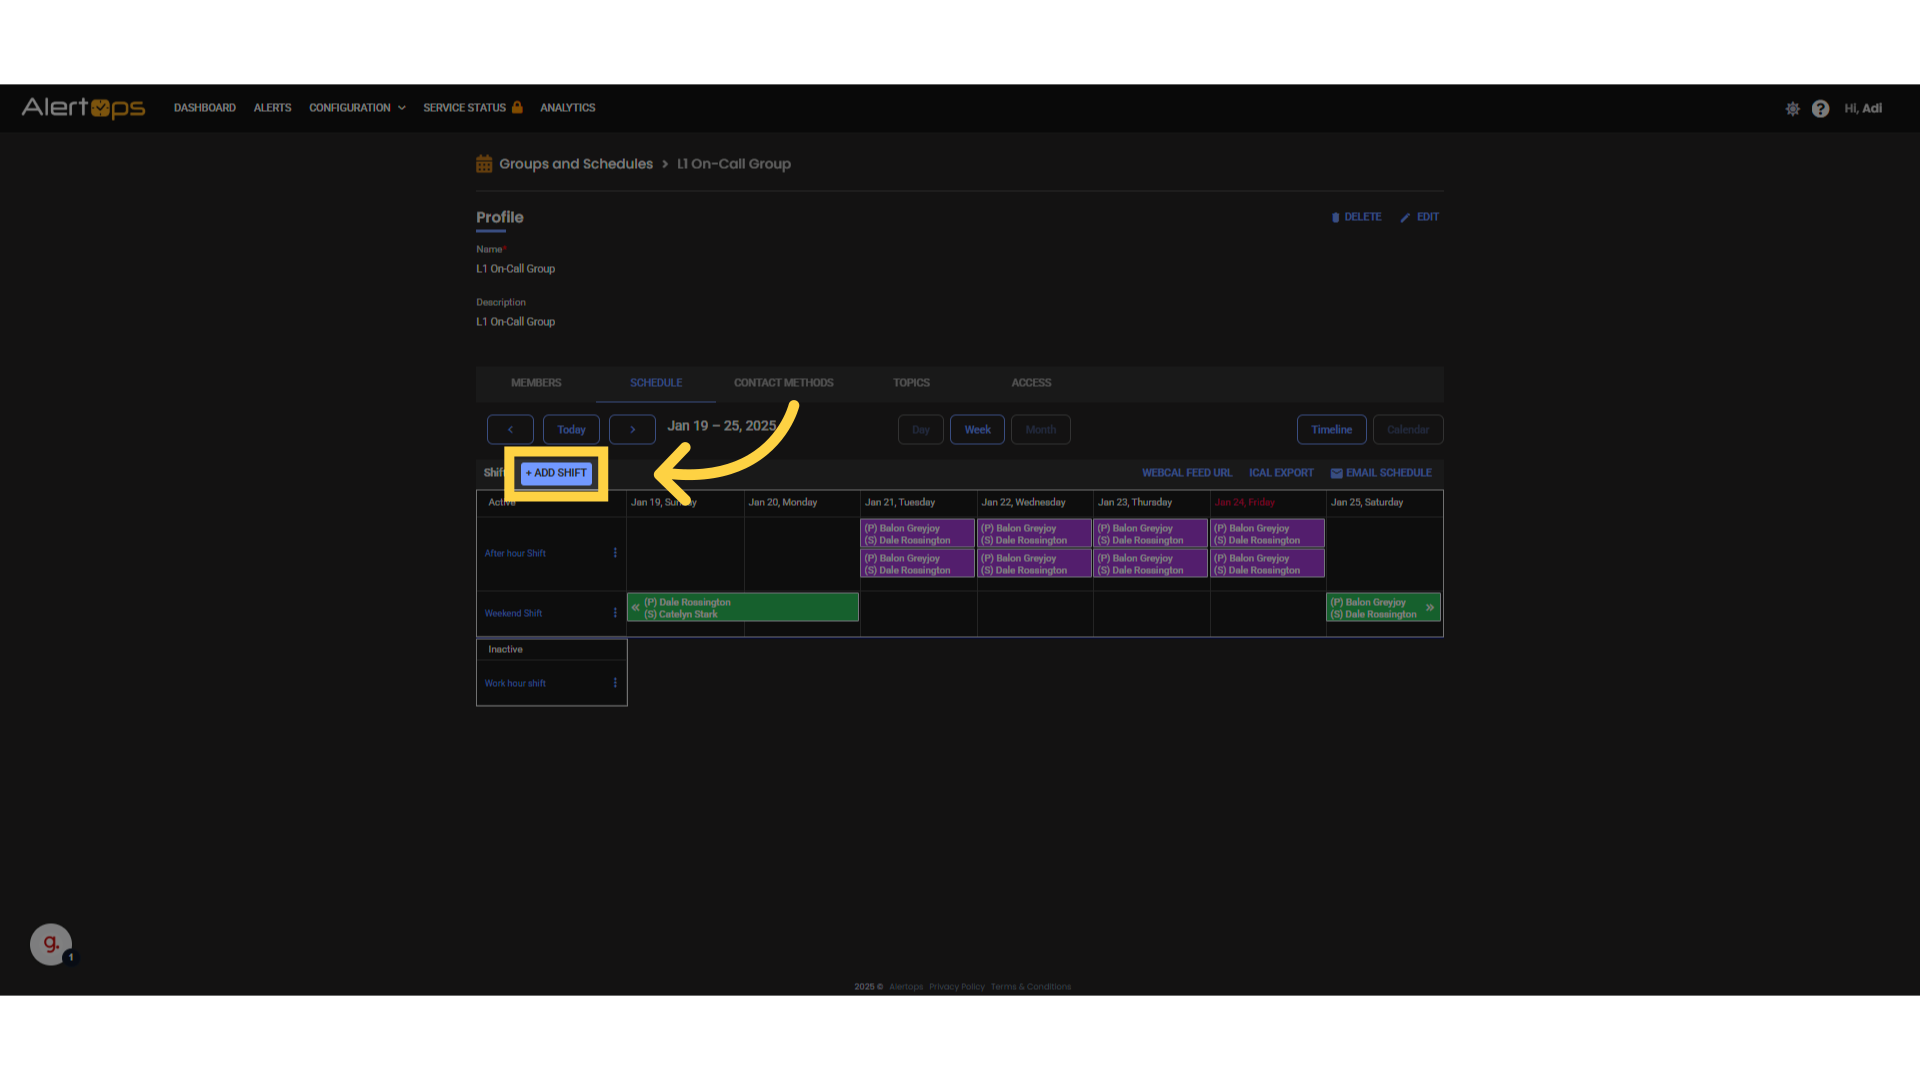
4. Click the Schedules tab. Then, click the Add Shift button. The Shift Template you select will determine the configuration options presented in the shift. A Custom template will present all options across shift types.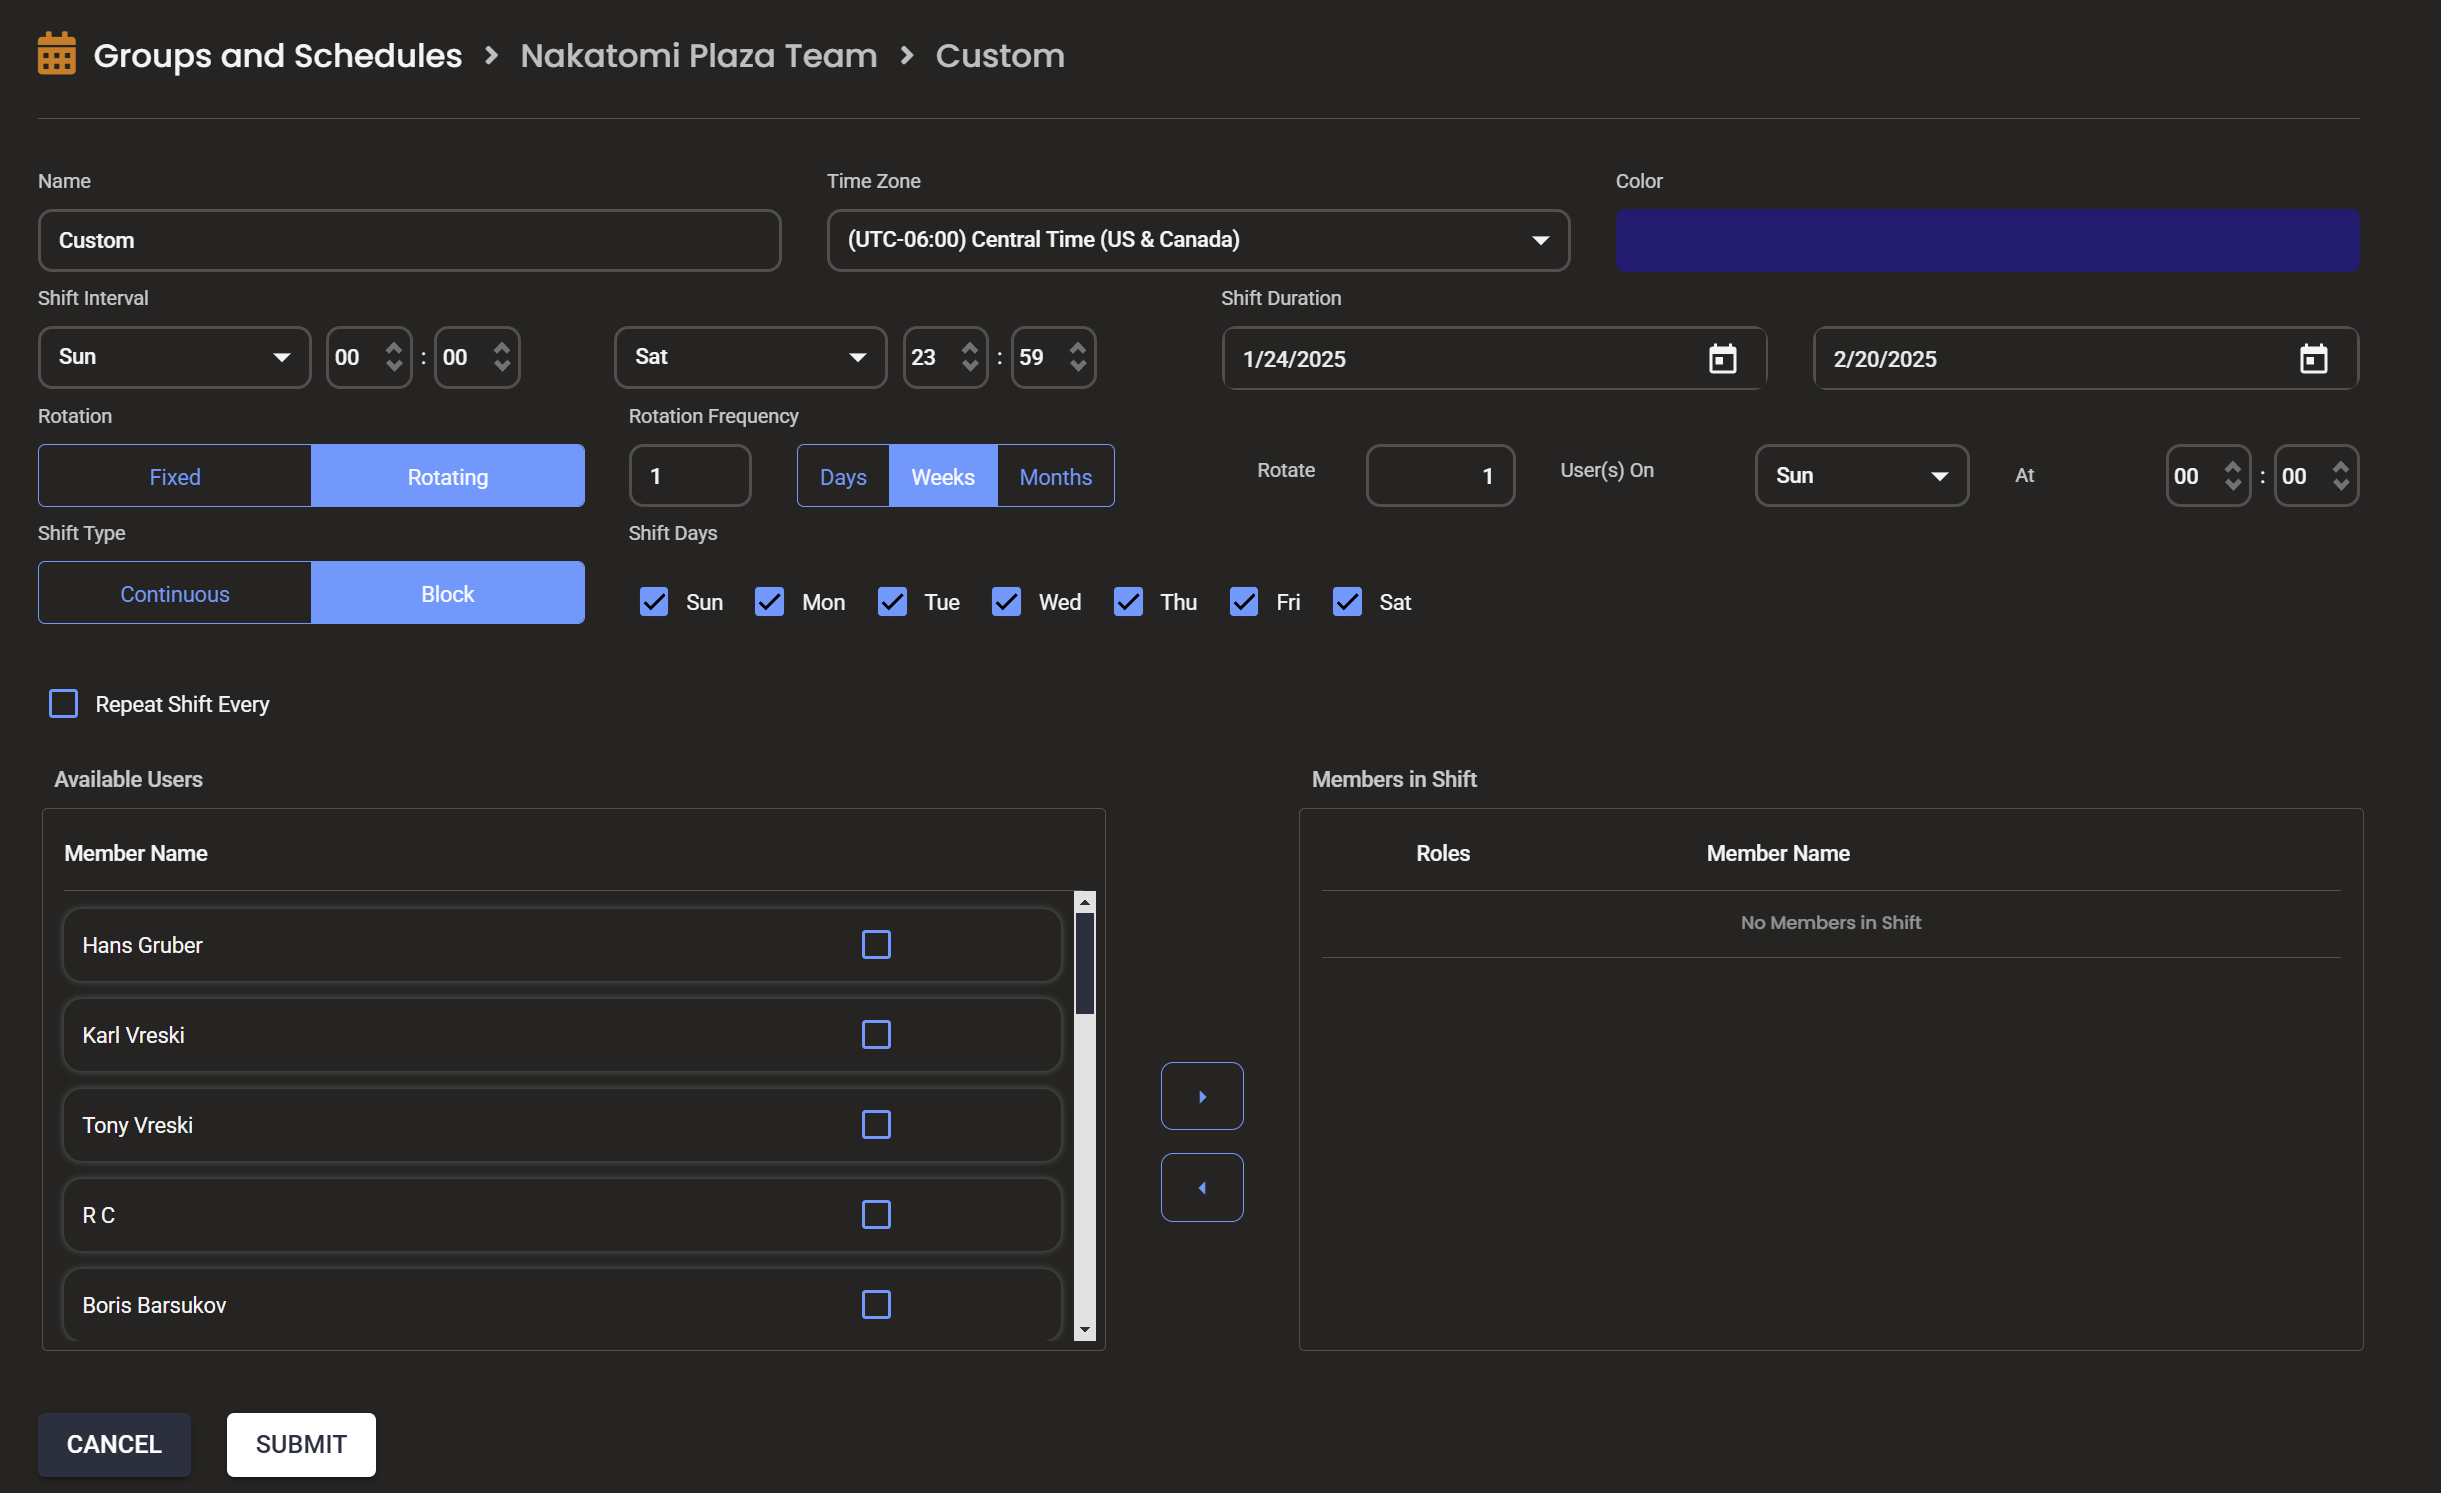
- In the Add Shift dialogue box, enter a unique group shift Name. Select a Time Zone. Your shift will be based on this time zone.
- Choose a Color to represent the shift on the Group Calendar. As a best practice, choose contrasting colors to distinguish between shifts on the calendar view.
- Choose a start and end time for the Shift Interval. A basic example would be a weekday shift that covers business hours.
- Enter a Start and End Date for the shift, or select No Start or End Date for a perpetual shift.
- A Fixed shift has fixed roles for team members over the shift period. A Rotating shift allows for roles to be rotated between members. The image above refers to a Rotating Shift Example
- For Fixed shifts, a schedule can be perpetual or for a set period.
- For Rotating shifts, you must enter a Start Date and End Date. This allows for periodic review of the rotation and is commonly set for six months to a year out. Rotating Shifts have a Rotation Frequency to determine when and how many group members rotate in the schedule.
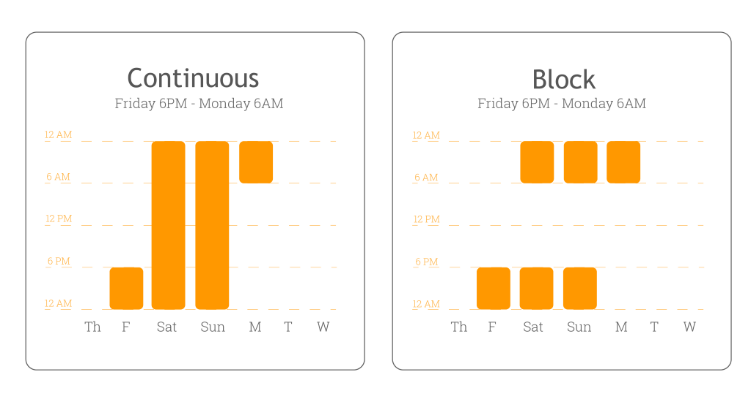
- A Continuous shift is uninterrupted, whereas a Block shift has a specific start and end day of the week. Daily time constraints will be based on the given specifications. as illustrated below.
- Set Shift Days for the shift to be in effect.
- For Fixed shifts, when the All Group Users option is checked, the shift will be in effect for everyone in the group. Add specific users to the shift by unchecking the All Group Users option.
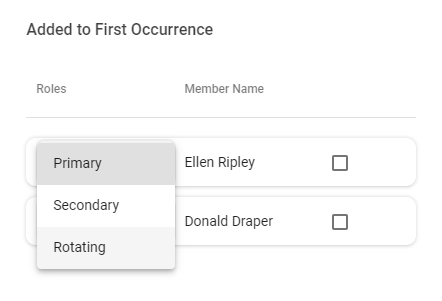
- For Rotating shifts, add users to the shift manually. To add users to the roster, click and drag available users into the Added to First Occurrence box. Then set the order that you would want them to rotate on-call and select a member role for each user in the schedule. A best practice is to set the top member in the list as Primary to align with the start date of the rotation.
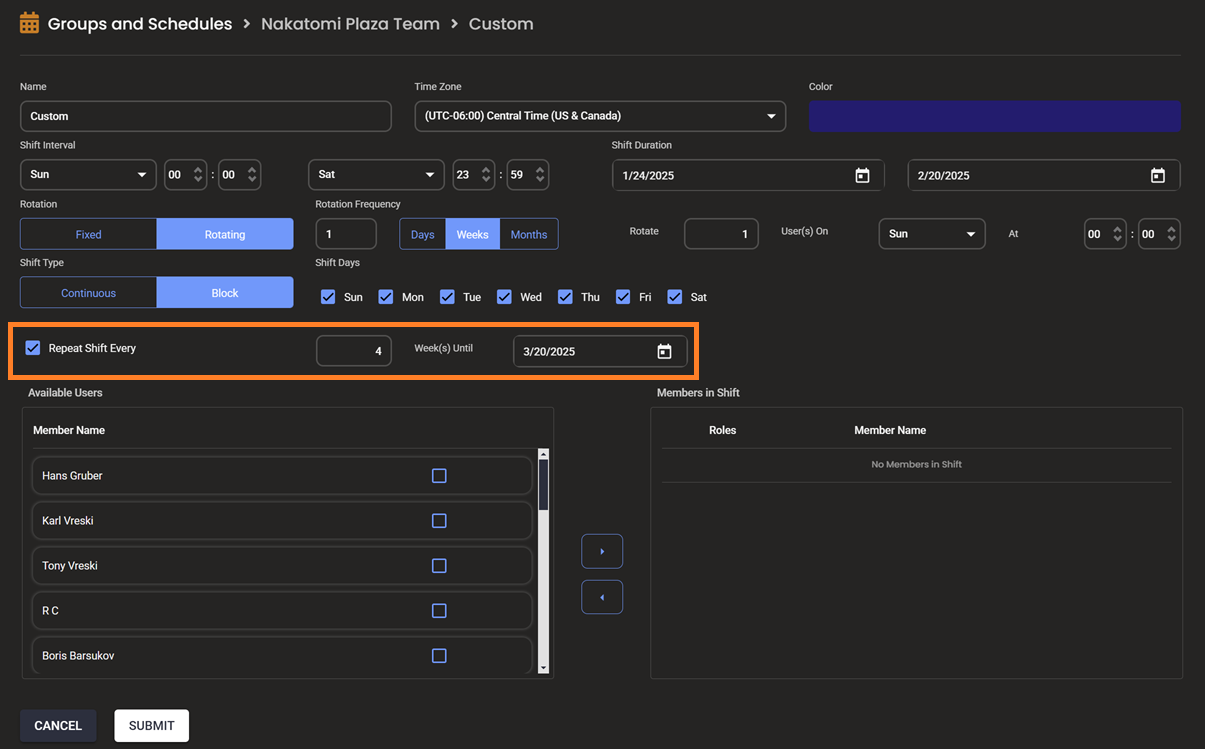
- The Repeat Shift option is available so users can easily set up a shift once and have it reset and repeat automatically at customizable intervals. Users can adjust the interval to match their specific scheduling requirements.
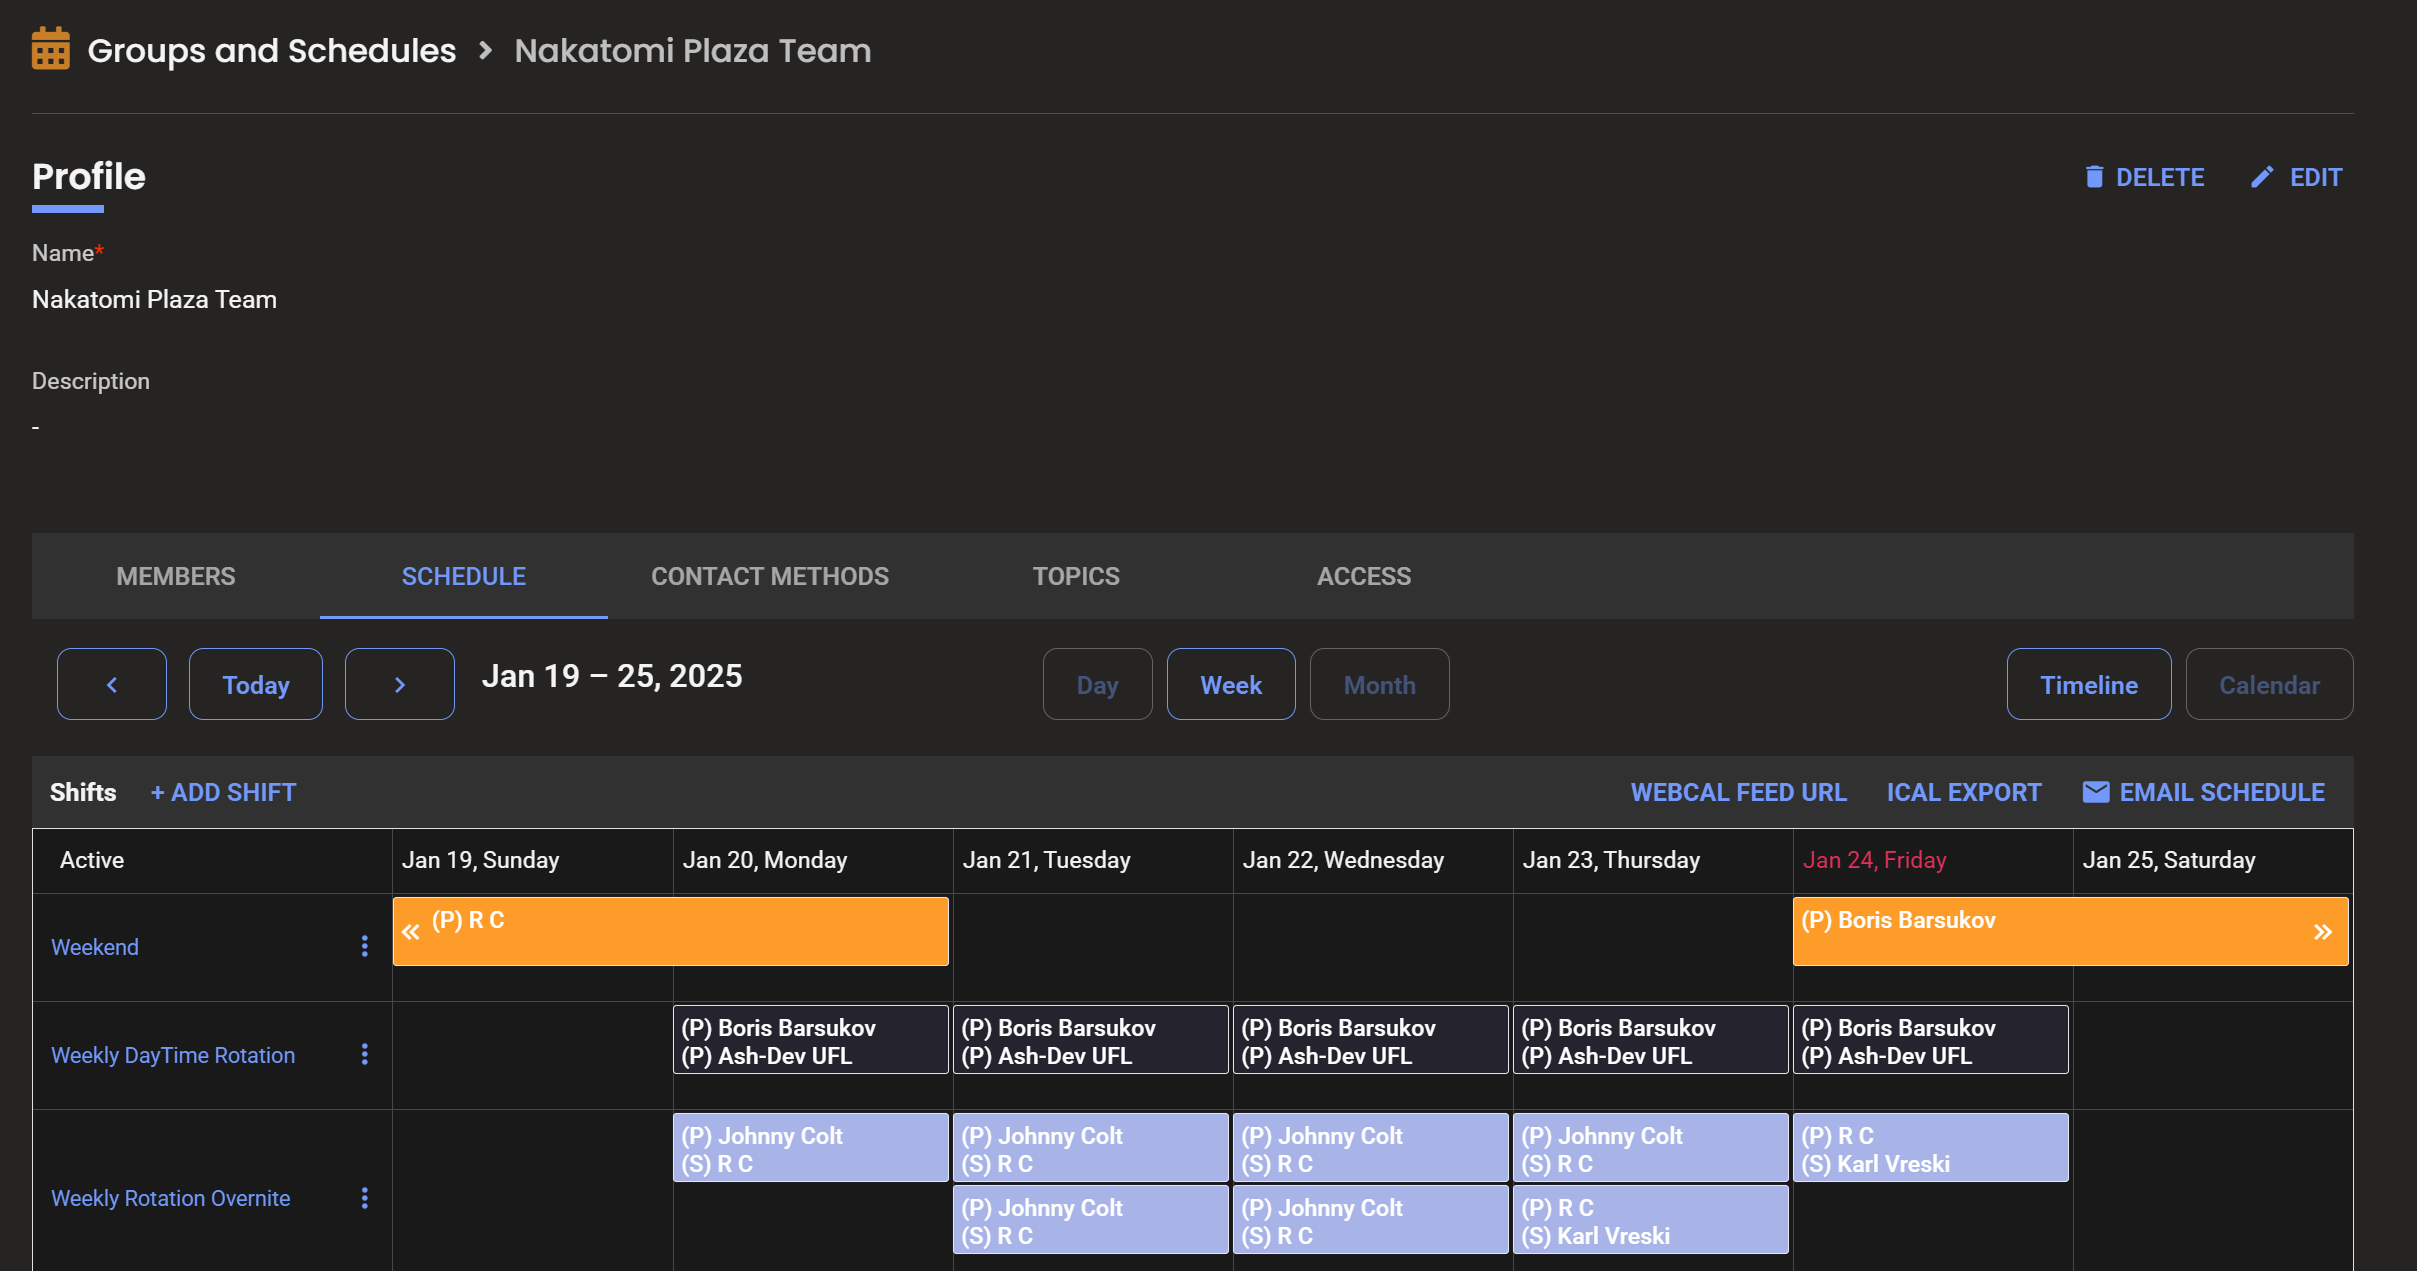
After saving your shift, you may view the schedule in the group calendar.
How to Remove a Shift
- Click the Schedules tab.
- Click the three-point menu to the right of the shift name and click Delete Shift.
- Click Delete to confirm.
Member Roles and Scheduling Users
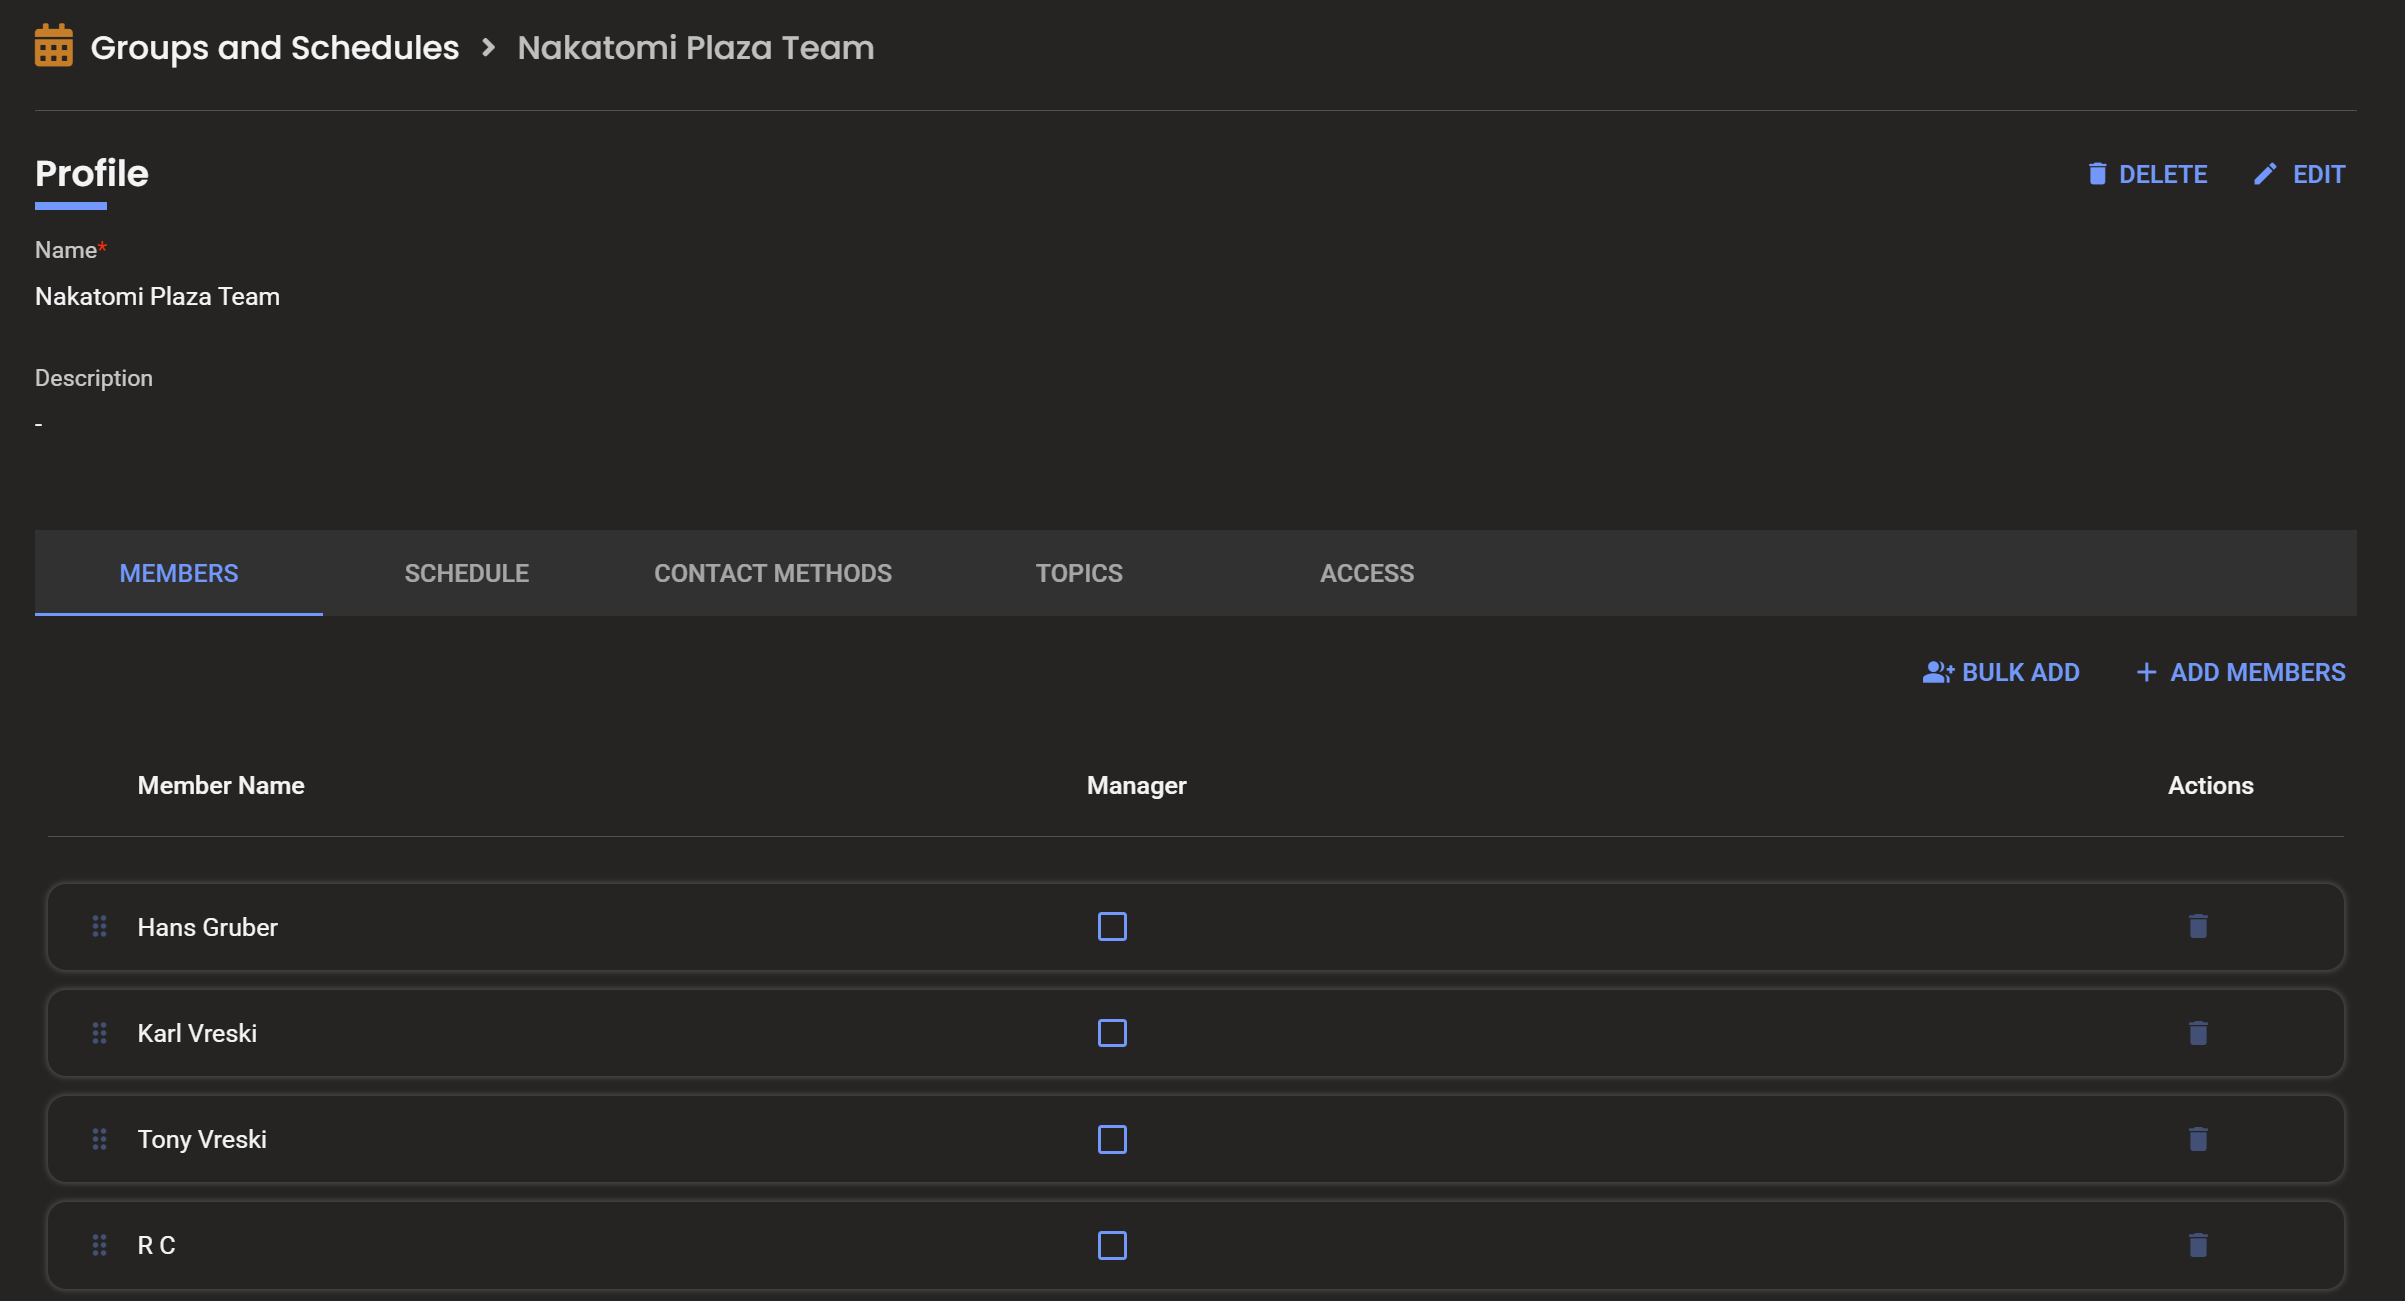
Users can have one of three active group member roles: Primary, Secondary, or Manager.
A member can also have Rotating non-active member role. Rotating members are not active during the current period but will rotate into active status later in the schedule.
Member Roles in Shifts
Different types of alerts will be delivered to group members based on the user's member roles. Timing of these alerts depends on the order in which members are Added to First Occurrence. Scheduling gives teams flexibility and allows member roles to be consistent or in rotation. This is important because the same people may not be available to be on-call all the time.
Fixed Shifts
Fixed Shifts allow you to set up user roles that will not change for the duration of the shift. The only user roles available for fixed shifts are Primary and Secondary.
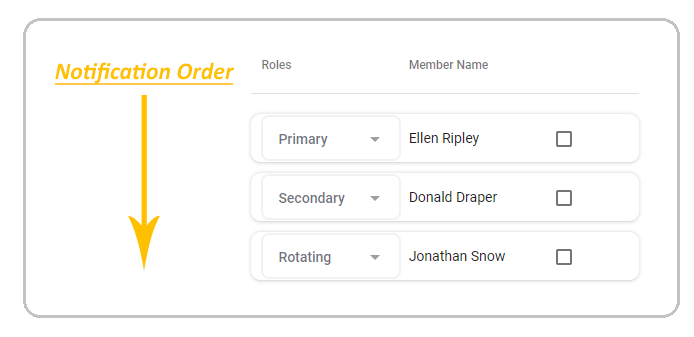
A fixed shift will notify primaries first, followed by secondaries. If you have multiple group members with the same role, the order they are organized determines the sequence. In the example below Ellen will be notified before Donald.

Rotating Shifts
Rotating shifts allow groups to rotate roles between the members. To set up a rotational group select the Primary and Secondary member roles for group members who will be on-call for the first period. Then you may choose the Rotating role for users on Standby- these users will rotate into a role later.
Removing Users From Shifts
These instructions will allow you to remove a user from a shift.
- Click the three-dot menu next to the schedule you want to remove the user from and select Edit Shift.
- In the Edit Shift dialog, scroll down to Members in Shift.
- Check the box next to the user you want to remove.
- Click the left arrow to move the user back to Available Users and click submit.
Note: In order to delete a user from a group, you must remove them from all shifts first.
Notification Order
The primary purpose of creating a shift is to set an on-call group member. This shows AlertOps which team member should be contacted during various time-frames. When you create a shift with multiple members on-call, the members listed will be notified starting from the top moving downward. Rotating members (an option only available with rotating shifts) will not be notified until they are rotated into active roles.
Rotation Order
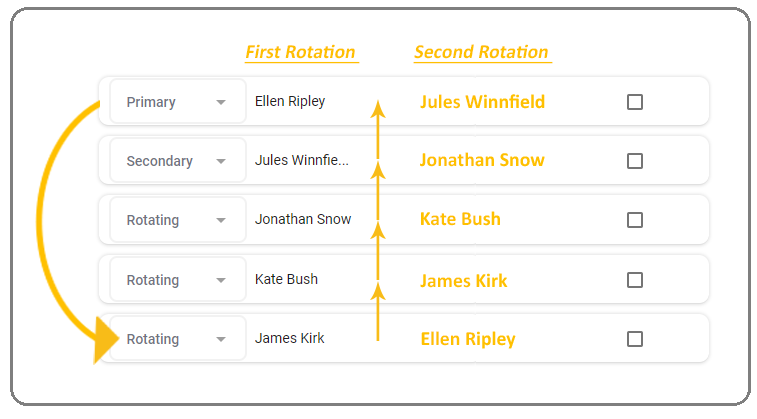
The rotation of roles works so that the user at the top will be moved to the bottom of the list. As users rotate, they assume the role that the previous member of that rotation held.
In the example rotation presented below, the current primary, Ellen Ripley, will be moved to the bottom of the queue and assume a rotational role. The current secondary, Jules Winnfield, will become the next primary and the user at the top of the standby will become the next secondary.
Was this article helpful?