- 17 Jul 2023
- 3 Minutes to read
- Print
- DarkLight
- PDF
Group Management
- Updated on 17 Jul 2023
- 3 Minutes to read
- Print
- DarkLight
- PDF
The following entitlements are needed to make changes to Groups:
- Groups_Add_GlobalAccess - Create Groups
- Groups_Update_GlobalAccess –Update and Delete all Groups
- Groups_Update_GroupAccess - Update and Delete Groups of which individual user is already a member
- Groups_View_GlobalAccess - View All Groups within the Environment.
- Groups_View_GroupAccess - View Groups and members for groups they are in.
The user roles with access to these integration entitlements are:
- Owner
- App Admin
- Group Admin
- Integrations Admin (Groups_View_GlobalAccess entitlement)
What is a Group?
Groups are collections of Users. The purpose of a group is to allow businesses to set priorities about who gets notified first and what happens when an alert is not acknowledged. They are often set up to reflect teams within a business, but they can also contain any combination of users regardless of business units.
A Group can consist of standard users or stakeholder users. Standard users are generally individuals responsible for taking action. These individuals can take response action such as Assignment, Escalation, and reply to alerts. Stakeholder users simply receive the notifications and cannot take response actions.
Groups contain individual Schedules which provide a structure for alerts that can be applied based on the business timetable. A basic example would be separate Schedules for office hours vs non-office hours. Schedules also give groups the flexibility to create shifts of rotating member roles.
Additionally, Groups may be nested within other Groups, allowing for layered organization and contrasting schedules.
Lastly, Topics can be associated to a Group. Topics are situational pre-configured messages that can be delivered quickly if that situation occurs.
Creating a Group
.png)
- From the menu bar, click on Configurations and select Groups & Schedules.
- Click the Add Group button in the top right corner.
- Enter a unique Group Name
- Check the Dynamic Box if needed (link to Dynamic page)
- Click Submit to save the group.
Remove an Existing Group
- From the menu bar, click on Configurations and select Groups & Schedules.
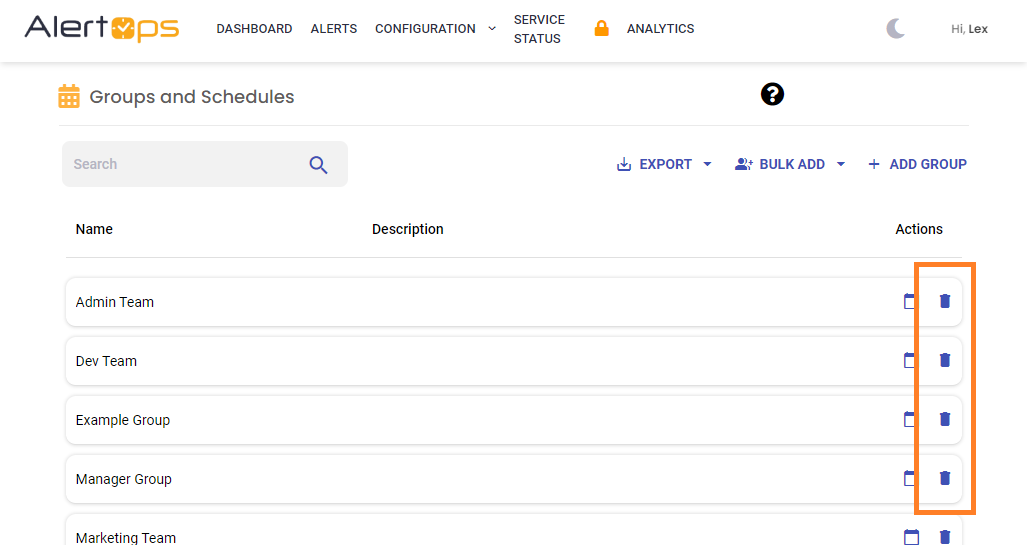
- On the Groups & Schedules page, click the Delete icon next to the group you wish to remove.
- Click Delete to confirm.

Editing Groups

Add Members to a Group
- From the Groups and Schedules page select a group to view the group profile page
- In the Members tab, click the Add Members button
- Choose between adding Users or Group
- Select the desired, available users or groups and use the right arrow to move them into the selected members column.
- Click Submit to save.
.png)
Remove Members from a Group
If a member is involved in a group schedule, you cannot remove that user from the group and the trashcan icon will be greyed out. Members must be removed from group Schedules before they can be removed from a Group or deleted from the system.
- To remove a member from a group select the desired group from the Groups and Schedules page.
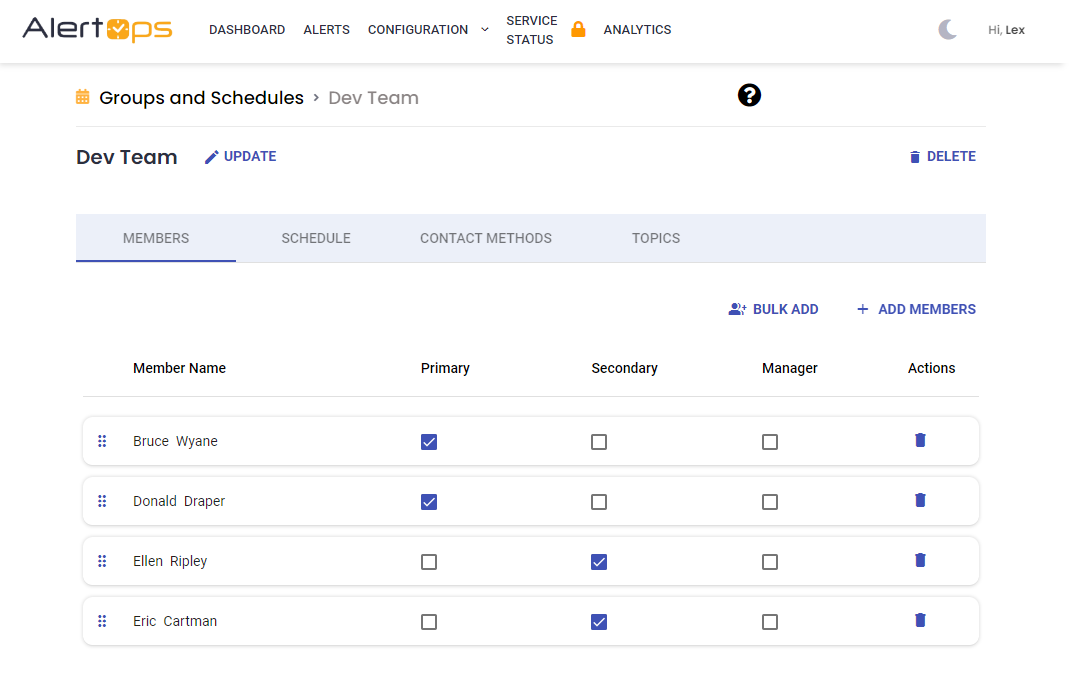
- In the Members tab, press the trash can icon in the Action column to remove a Member from the Group. The user will remain in the system but will be removed from the Group.
Members
There are three Member Roles in a group: Primary, Secondary, and Manager.
- Primary – first set of users contacted.
- Secondary – second set of users contacted.
- Manager – final set of users contacted. A manager can also be a Primary or Secondary role member.
Group roles provide a very basic escalation sequence between group members; however, the sequence of escalation is set according to the order in which users are arranged within the Members tab.
.png)
Schedules
Add shifts to the group schedule and view group calendars from the Schedule tab within a selected group detail page. Groups can contain multiple shifts which can be fixed or rotating. You may also create shift overrides. Group schedules can be toggled between timeline and calendar format on the right of the screen.
To add a shift to the schedule, select the Schedule tab and click the Add Shift button on the left of the screen.
Contact Methods
In the Contact Methods tab, you can add group contact methods such as email distribution lists, SMS, or phone, or group chat channels (Microsoft Teams and Slack).
Topics
Use topics to quickly route alerts to the right Group. Topics are communication templates that can be connected to Groups. Build rich messages before incidents occur, then rapidly notify your team when needed. A Topic must be configured previously to add it to a group.
To add an existing Topic to a group:
- Select a group from the Groups and Schedules page to redirect to the group profile page.
- Select the Topics tab
- Click the Add Topic button on the right of the screen
- Search the Topic Name
- Click Add


