Schedules
- 04 Aug 2022
- 1 Minute to read
- Print
- DarkLight
- PDF
Schedules
- Updated on 04 Aug 2022
- 1 Minute to read
- Print
- DarkLight
- PDF
Article summary
Did you find this summary helpful?
Thank you for your feedback!
Navigate to Schedules to browse and view your and your group’s schedules by clicking schedules on the main menu.
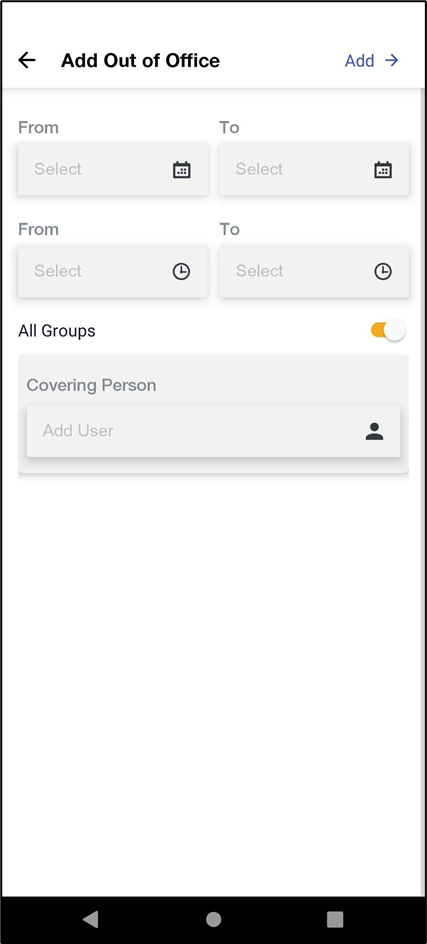
Schedules cannot be added and edited through the mobile app; this can be achieved through the Web UI.
Schedules can be sorted by
- Day: View the schedules for the day
- Week: View the current week schedule
- Month: View the current Month schedule
- Navigate to the menu
 and select Schedule; the following screen opens
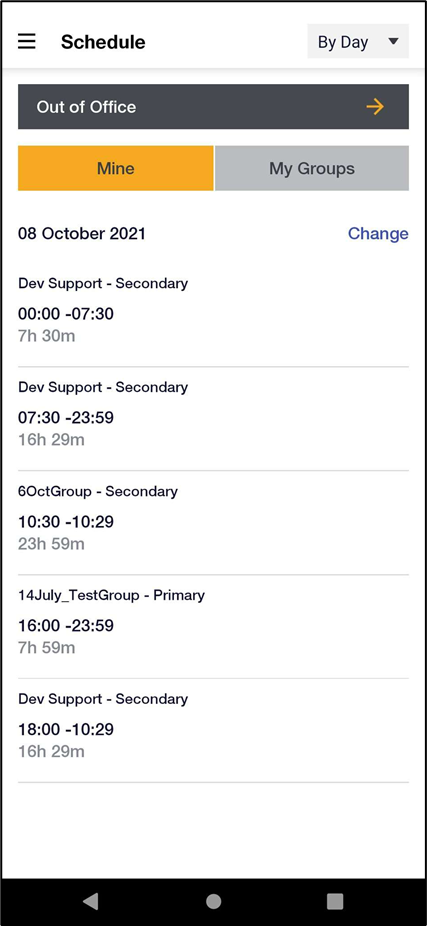
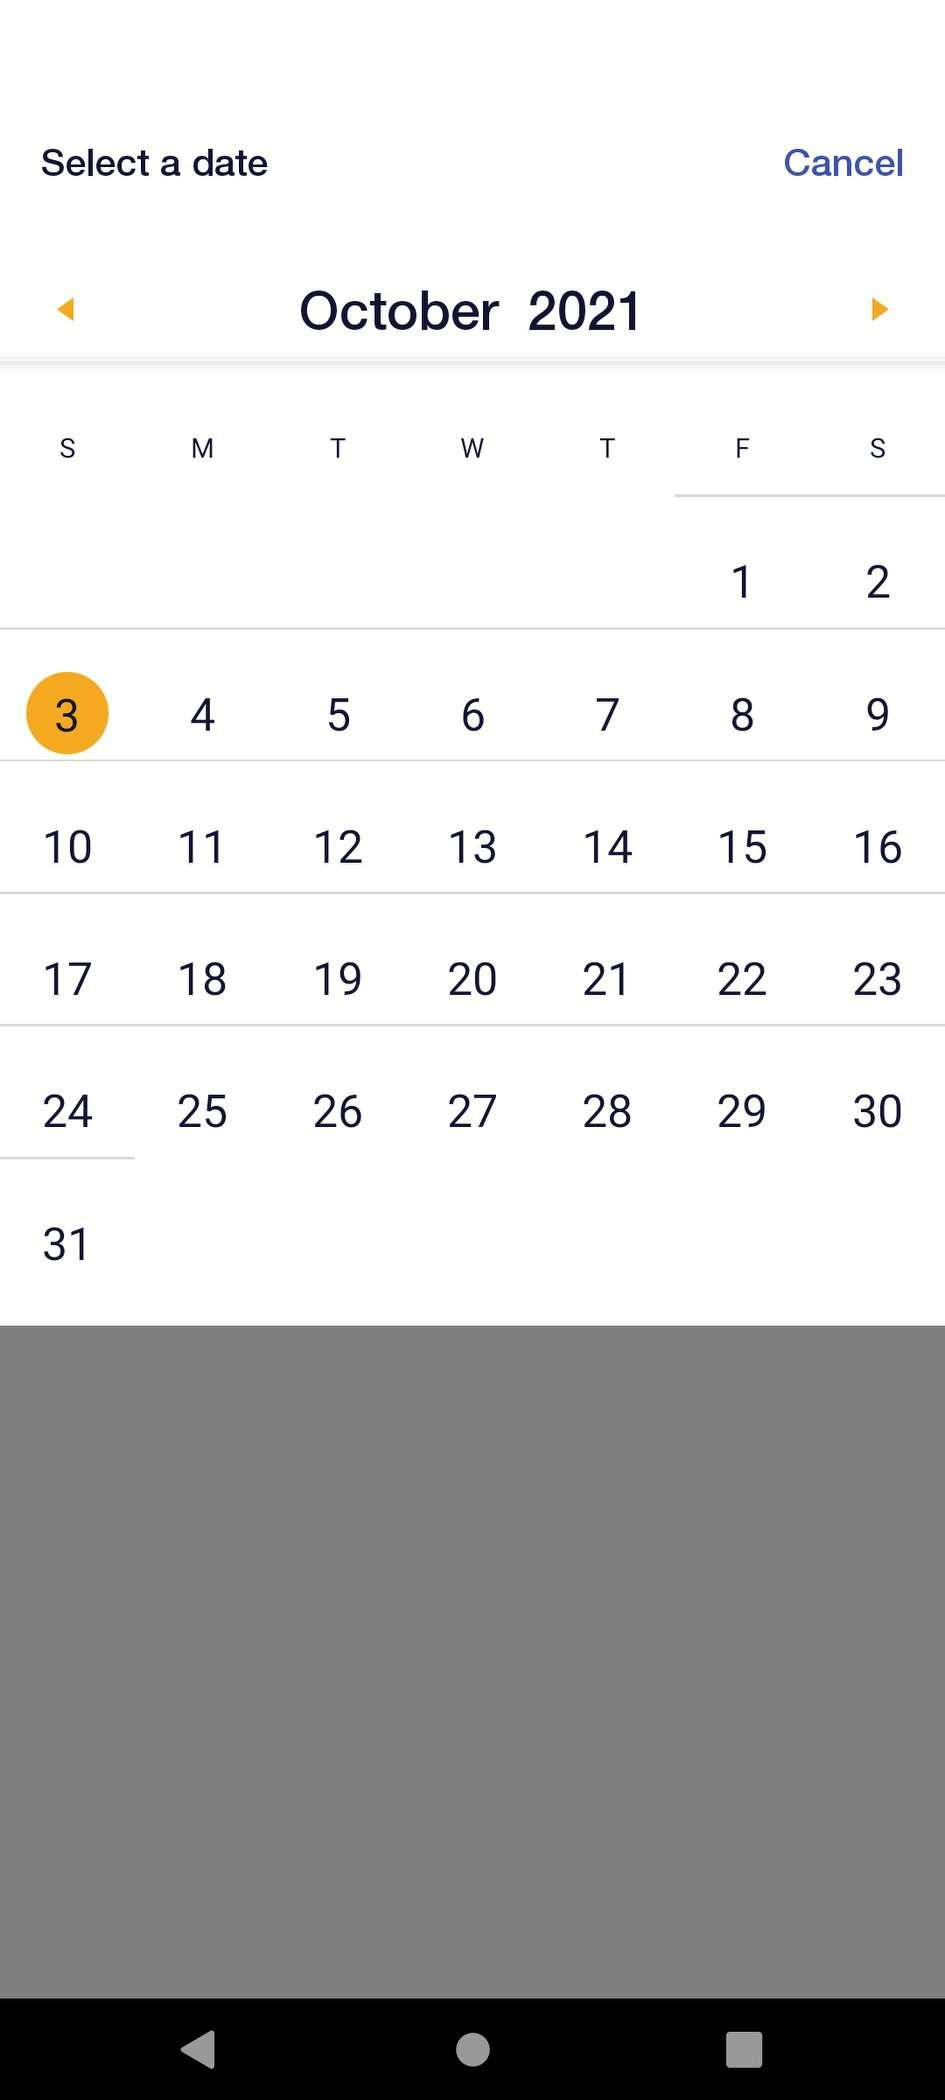
- Click the Change option to select the date ranges (By Day, By Week and By Month) to view the schedules.
Out of Office
- Enter a start date and end date.
- Enter the Start time and end Time
- You can create entries for entire days or partial days during the out of office period.
For example, for the entire day coverage, set the start time as 00:00 and the end time as 23:59.
- Set the Covering Person.
- You can designate a single covering person for all groups. Or you can assign a covering person for each specific group. You may specify a covering person for each team, or you may choose to select a cover for only some teams. In this case, you will still receive notifications for teams you did not designate a covering person.
- Click Add Out of Office (OOF) details, an email will be sent to the covering person.
Was this article helpful?