Quick Start Guide
- 06 Mar 2023
- 4 Minutes to read
- Print
- DarkLight
- PDF
Quick Start Guide
- Updated on 06 Mar 2023
- 4 Minutes to read
- Print
- DarkLight
- PDF
Article summary
Did you find this summary helpful?
Thank you for your feedback!
Creating and Editing Users
.png)
Creating Users
- From the menu bar, click on Configuration and select Users from the dropdown.
- From the Users page, click on Add Users button in the top right corner.
- Enter a username and email for the user. Then, enter the first and last name.
- Select type of user.
- Select the desired role for the user.
- Click Submit.
Each user must have a unique username and an official email address. After clicking Submit, a login link will be sent to the user’s official email address so they may reset their password.
.png)
Editing User Information
On the User page you can also add or edit contact information, view or edit user security roles, as well as view their group membership and schedules.
To manage user information:
- Click on Configuration on the menu bar and select Users from the dropdown.
- On the Users page, click on the desired user.
When you've selected a specific user, you will be redirected to that user's profile page. Here you can edit and make changes to user information.
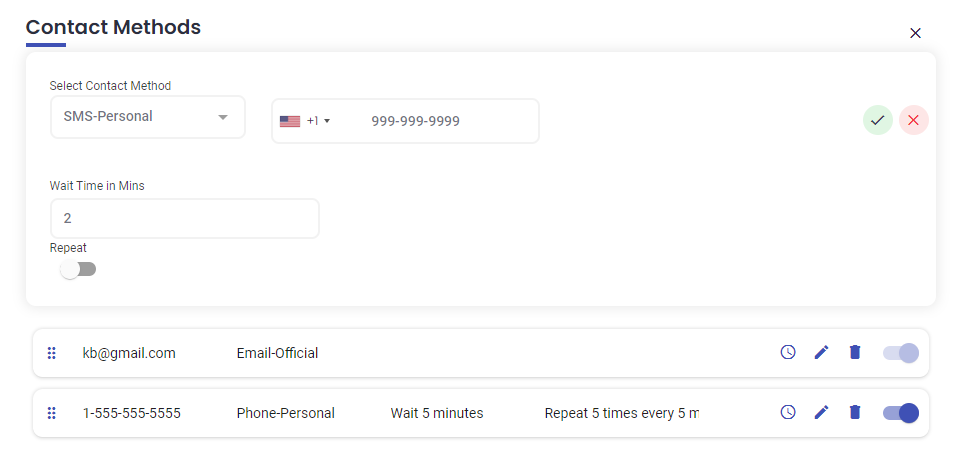
Adding Contact Methods and Information
Add a contact method to route alerts to users. Modes of contact include email, SMS, or by phone call. Push notifications are available once a user logs into the AlertOps mobile app.
To add a contact method:
- In a user's profile page, click the Add Contact Method button on the bottom, right-hand corner.
- Select a Contact Method from the drop-down menu that appears.
- Enter pertinent contact information in the field next to the contact method selected and click on the green checkmark to save.
Creating and Editing Groups
.png)
Creating Groups
- From the menu bar, click on Configuration and select Groups & Schedules from the dropdown menu.
- On the Groups & Schedules page, click on the Add Group button in the top, right-hand corner.
- Enter a unique Group Name.
- Check the Dynamic box to set up groups for user attributes (ADD link)
- Click Submit
Editing Group Information
On the Group & Schedules page, you can add members to a group, create schedules, add group contact methods, and add topics.
To reach this page:
- From the menu bar, click on Configuration and select Groups & Schedules from the dropdown menu.
- Select the desired group. Once you have selected a specific group you will be redirected to that group's profile page.
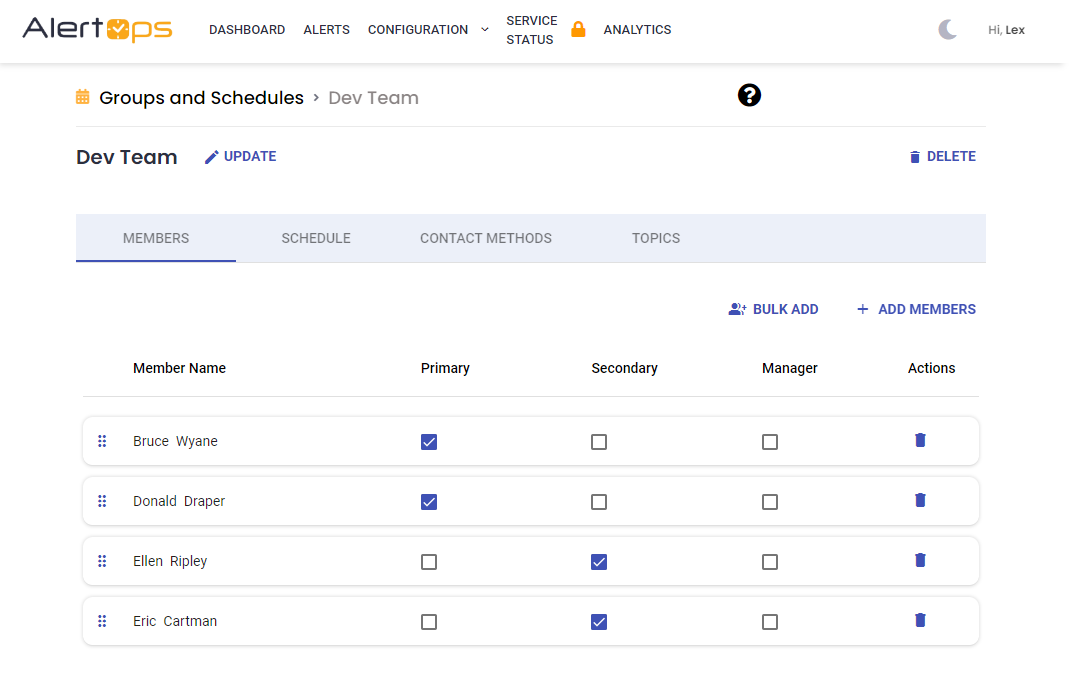
Adding Users to a Group
.png)
- On the Groups & Schedules page, select the desired group.
- In the Members tab, click Add Members button on top, right-hand corner of the page.
- Select a desired user from the available users column and click the right arrow to move them into the selected members column.
- Click Submit to save changes.
Creating Schedules
A group can exist with no set schedules. In this case the basic user member role sequence is used for escalations. A group can also have multiple set schedules. Click here for an in-depth look at creating schedules.
Adding Integrations
.png)
AlertOps comes with a number of pre-built Integrations for various monitoring and ticketing systems. Below are instructions to get you up and running quickly with a pre-built API, Email, Chat, and Heartbeat integrations.
Setting Up Integrations
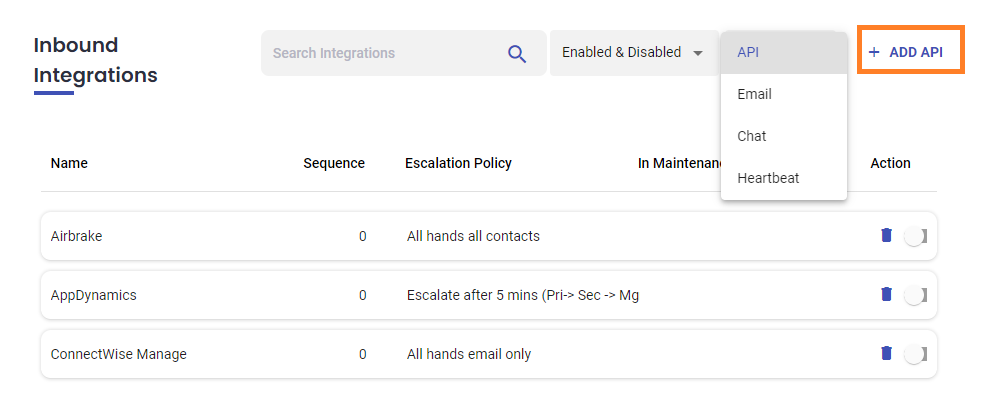
- From the menu bar, click on Configuration and select Integrations from the dropdown menu.
- At the top of the Integration page, you will see a section called Inbound Integrations. Here you can select between the API, Email, Chat OR Heartbeat from the dropdown at the top left of the screen.
- Once you’ve selected the desired type of integration click Add button. The label on the Add button will change according to the type of integration you've selected.
- You will be redirected to a menu of available pre-built integration options based on the selected integration type. Select your integration.
- Here you must select an Escalation Policy, Recipient Groups or Recipient Users and click the Submit button.
Manually Create an Alert
.png)
In cases of major incident management, business will often have a need for manual alerts. Click here for more information on Manual Alerts. To send a manual alert:
- Click on Alerts in the menu-bar.
- Click the Create Alert Button on the top right of the screen.
- Select an Escalation Policy.
- Click the Add Recipient(s) button to add alert recipients.
- Enter a Subject and Description for the alert.
- Click Submit to save.
Was this article helpful?