OKTA SSO
- 23 Aug 2023
- 1 Minute to read
- Print
- DarkLight
- PDF
OKTA SSO
- Updated on 23 Aug 2023
- 1 Minute to read
- Print
- DarkLight
- PDF
Article summary
Did you find this summary helpful?
Thank you for your feedback!
OKTA Configuration
- In your OKTA environment, expand Application and select Applications from the menu on the left.
- In the search bar, browse and open the AlertOps SAML application.
.png)
- From the Alertops application page, click the Add Integration button.
.png)
- In the General Settings tab, select New Endpoint.
- Enter your subdomain based on your AlertOps environment URL. In this example, the AlertOps environment URL is https://app.alertops.com/account, and account is the subdomain.
.png)
- Click on the Sign On tab and expand More Details.
.png)
- Copy and download the Sign on URL, Issuer, and Signing Certificate for the AlertOps configuration.
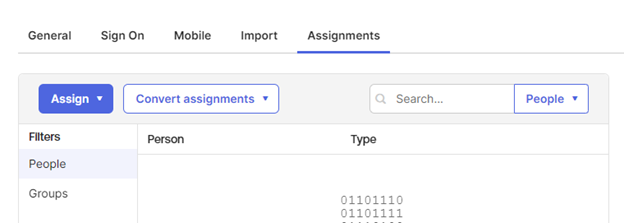
- Expand the Assignments Tab, and click Assign to add users or groups to the application.
AlertOps SSO Configuration
- From the AlertOps web application, navigate to your User Account settings from the top right-hand side of the screen and click Account Settings.
(1).png)
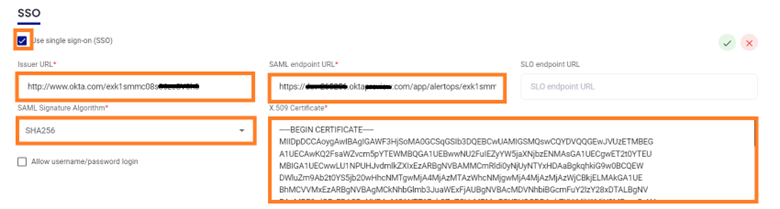
- Click the UPDATE SSO button and check the Use Single Sign On (SSO)box.
- Enter the following:
- Issue URL: Paste Issuer copied from Okta.
- SAML endpoint URL: Paste Sign on URL copied from Okta.
- SAML Signature Algorithm: Select SHA256 from the dropdown menu.
- X.509 Certificate: Copy and paste the contents of the downloaded Signing Certificate from Okta.
- Click the green arrow to save the SSO.
Was this article helpful?