Looping Escalation Policy
- 23 Aug 2023
- 2 Minutes to read
- Print
- DarkLight
- PDF
Looping Escalation Policy
- Updated on 23 Aug 2023
- 2 Minutes to read
- Print
- DarkLight
- PDF
Article summary
Did you find this summary helpful?
Thank you for your feedback!
In this article, we will explain how to configure an escalation policy that will loop alerts through the notification chain indefinitely until the alert is closed or assigned.
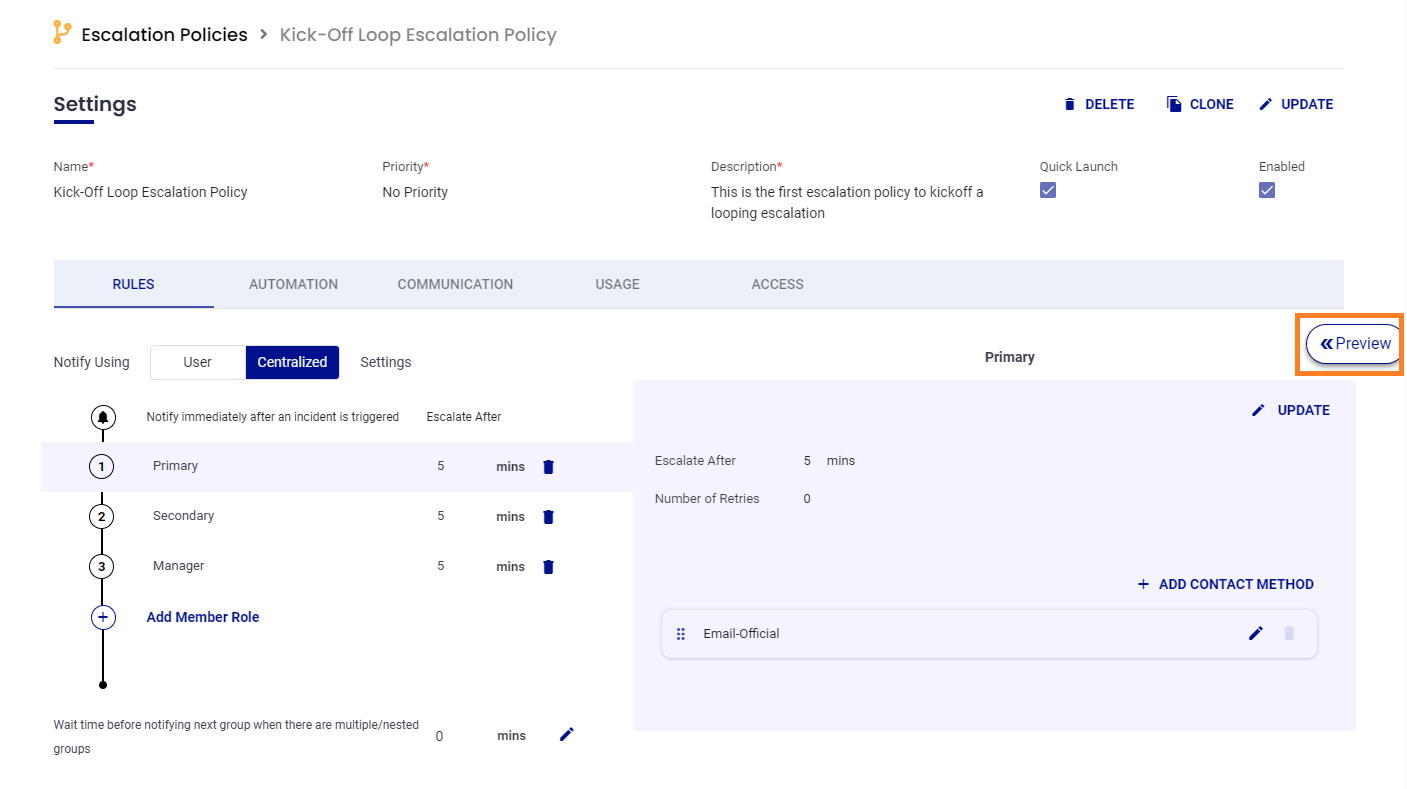
Main Escalation Policy
Open the escalation policy upon which you would like to indefinitely loop until the alert is closed or assigned.
- Click the Preview button on the right.
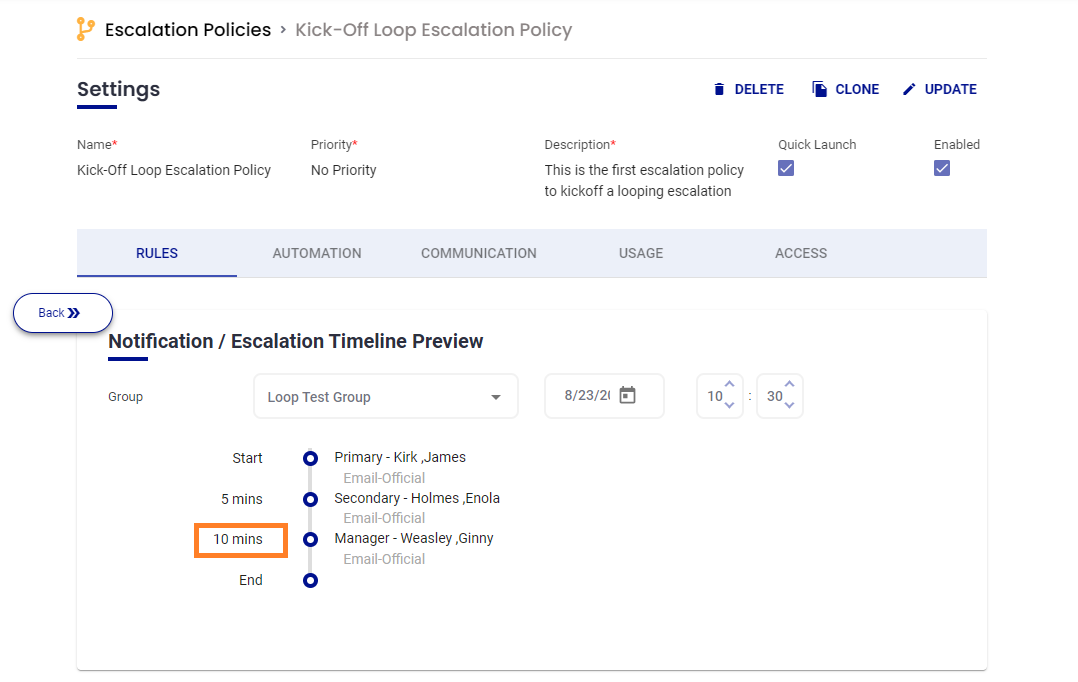
- Select the group that will be using this escalation policy and note the end time. In this example, the escalation policy will take 10 minutes to complete.
Looping Escalation Policy
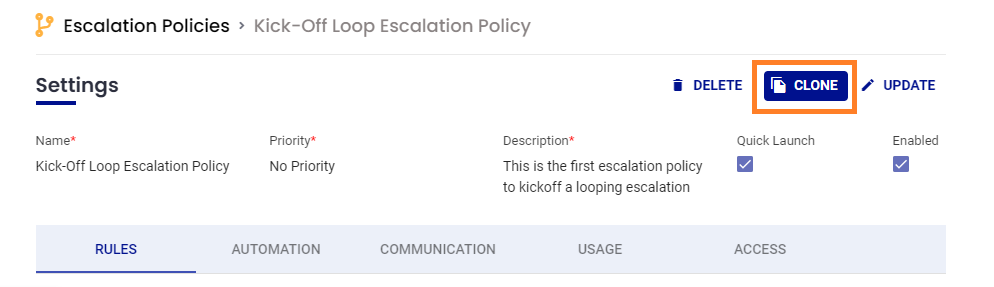
Next, we need to configure a separate escalation policy that will be triggered on a loop. This escalation will be a copy of the main Escalation Policy.
- Click the CLONE button in the top right corner to create a copy of the main Escalation Policy.
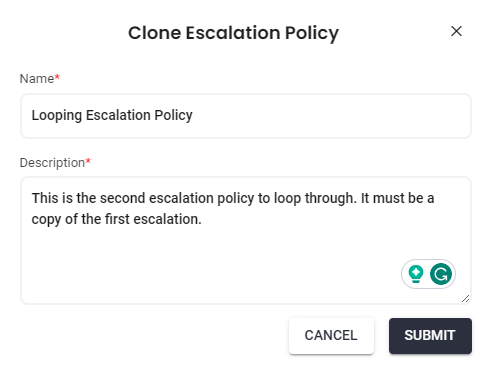
- Name the cloned Escalation Policy. In this example, we have named the clone 'Looping Escalation Policy'.
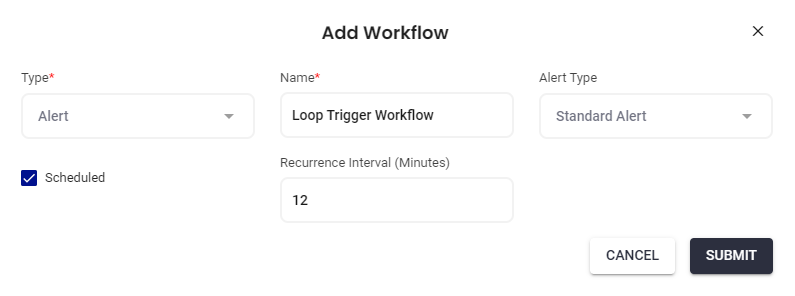
Loop Trigger Workflow
Create Workflow
To trigger the looping escalation policy, we need to configure a workflow.
- From the main menu, click on Configuration and click on Workflows.
- Click the +ADD WORKFLOW button in the top right corner of the Workflows page.
- Set the Type as Alert, and the Alert Type as Standard Alert.
- Name the Workflow. In this example, the workflow is named 'Loop Trigger Workflow'.
- Check the Scheduled box and set a Recurrence Interval. This is going to be the time interval in minutes between the escalation policy loop. The initial escalation end period is a good reference point for how long the intervals should be, although we recommend a two-minute cushion. Our main escalation took 10 minutes to complete, so in this example, we will set the Recurrence Interval at 12 minutes.
Start Conditions
Set two start conditions under Match All Conditions:
- Set AlertStatus is Open.
- Set the TimeFromBeginning(Minutes). In this example, we have set the value as 11, which provides a one-minute padding time from the end time of the initial escalation.

These two start conditions together mean that if an alert still has an open status after 11 minutes, the action in this workflow (the loop) will be triggered.
Stop Conditions
Set two stop conditions under Match Any Conditions:
- Set AlertStatus is Assigned.
- Set AlertStatus is Closed.
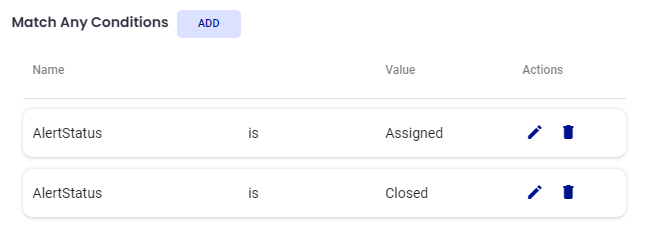
These two stop conditions under Match Any Condition mean that if an alert is assigned OR closed, the action in this workflow (the loop) will be stopped.
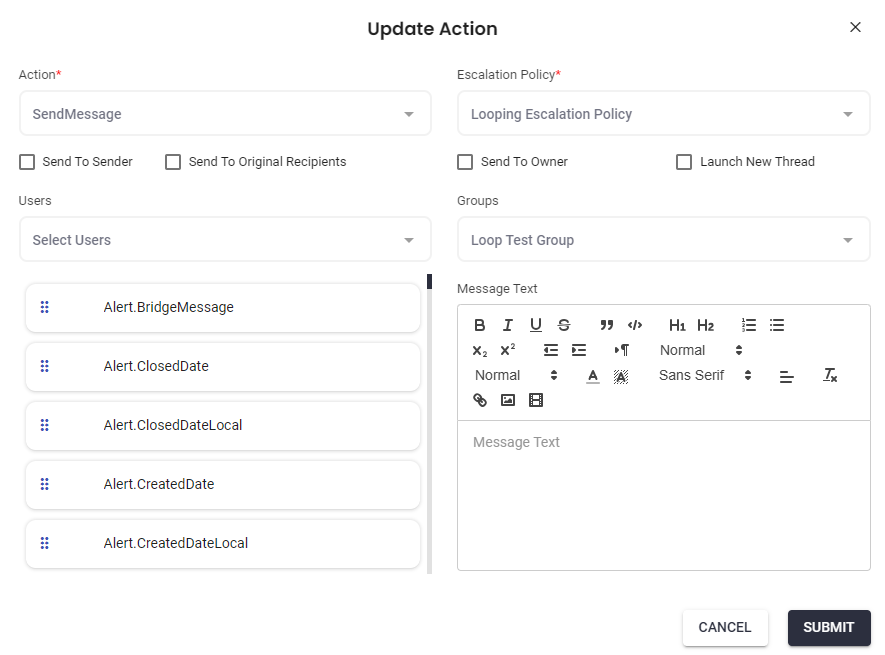
Actions
- Scroll down to the Actions section and click the +ADD ACTION button.
- For the Action, select SendMessage.
- Select the Looping Escalation Policy as the Escalation Policy.
- Select the group that will be using the escalation policy.
As a final step for the workflow configuration, scroll back up to the top of this workflow, and click the UPDATE button. Check the Enabled box and click the green checkmark to save. This workflow is now ready to use.
Final Configurations
The last step is to associate the workflow we just created with the initial Escalation Policy.
- Return to the Main Escalation Policy.
- Expand the Automation Tab.
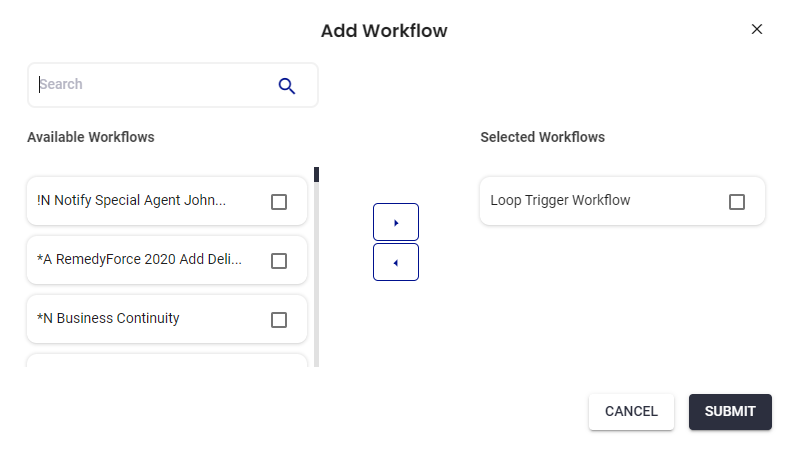
- In the Workflow section, click the +ADD WORKFLOW button.
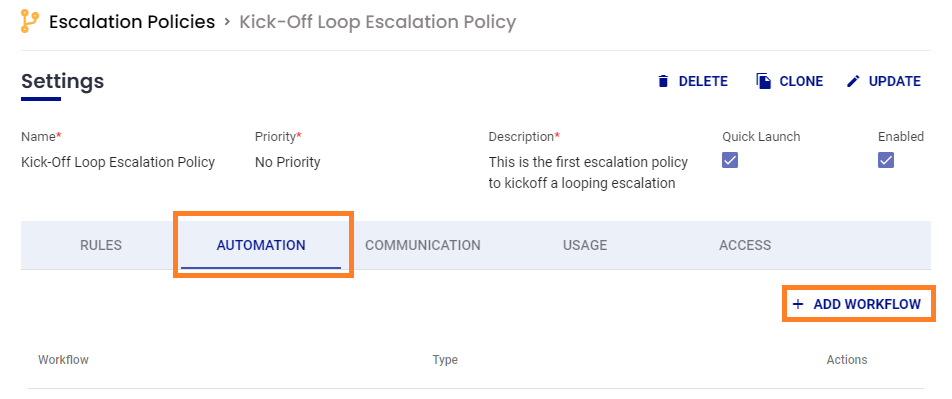
- From the list of available workflows, select the one we just created and click Submit.
This workflow has now been associated with the main Escalation Policy and will trigger the Looping Escalation Policy when this escalation policy ends if an alert has not been assigned or closed.
Was this article helpful?