Google SSO
- 06 Apr 2023
- 1 Minute to read
- Print
- DarkLight
- PDF
Google SSO
- Updated on 06 Apr 2023
- 1 Minute to read
- Print
- DarkLight
- PDF
Article summary
Did you find this summary helpful?
Thank you for your feedback!
- Sign into your Google Admin Console and click on Apps, and then click on SAML apps.
.png)
.png)
- Click + add on bottom right and then click Setup My Own Custom App at the bottom.
.png)
- In the Google IdP Information screen, copy the SSO URL and download the Certificate. You will use these later when configuring the AlertOps SSO settings.
(1).png)
- Next, enter Basic information and Service provider Details for Custom App.
(1).png)
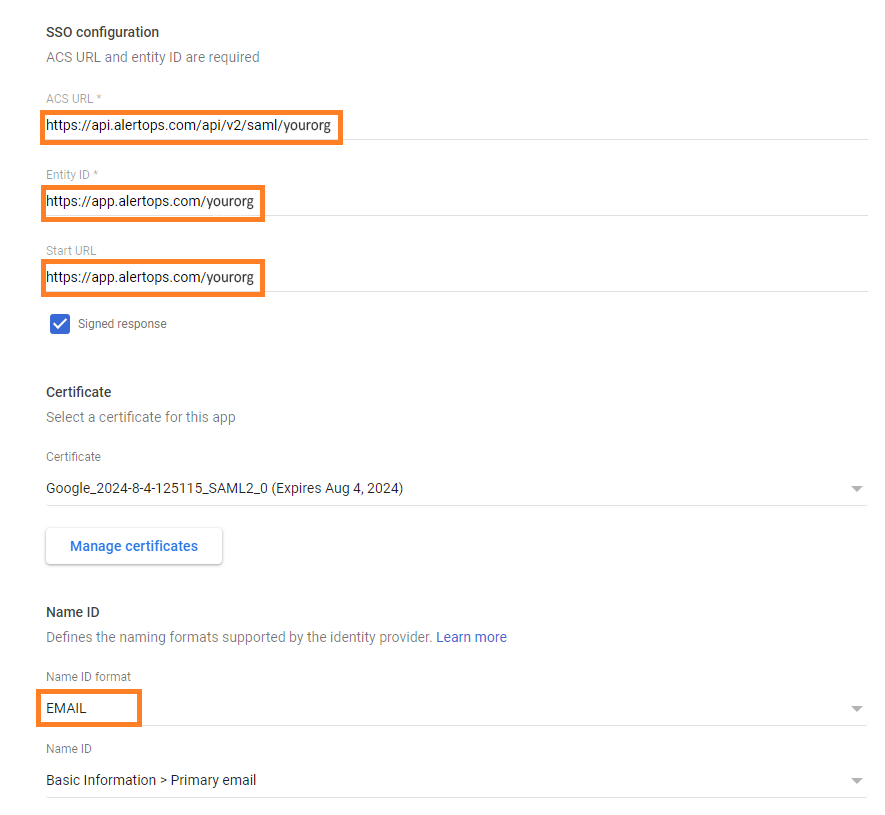
- Next provide the following Service Provider Details:
- ACS URL: https://api.alertops.com/api/v2/saml/yourorg
- Entity ID : https://app.alertops.com
- Start URL: https://api.alertops.com/api/v2/saml/yourorg
- Name ID Format: EMAIL

- Click Finish and you should see this message:
(1).png)
- In Apps>>SAML Apps, set the AlertOps Status to ON for everyone.
.png)
AlertOps SSO Configuration
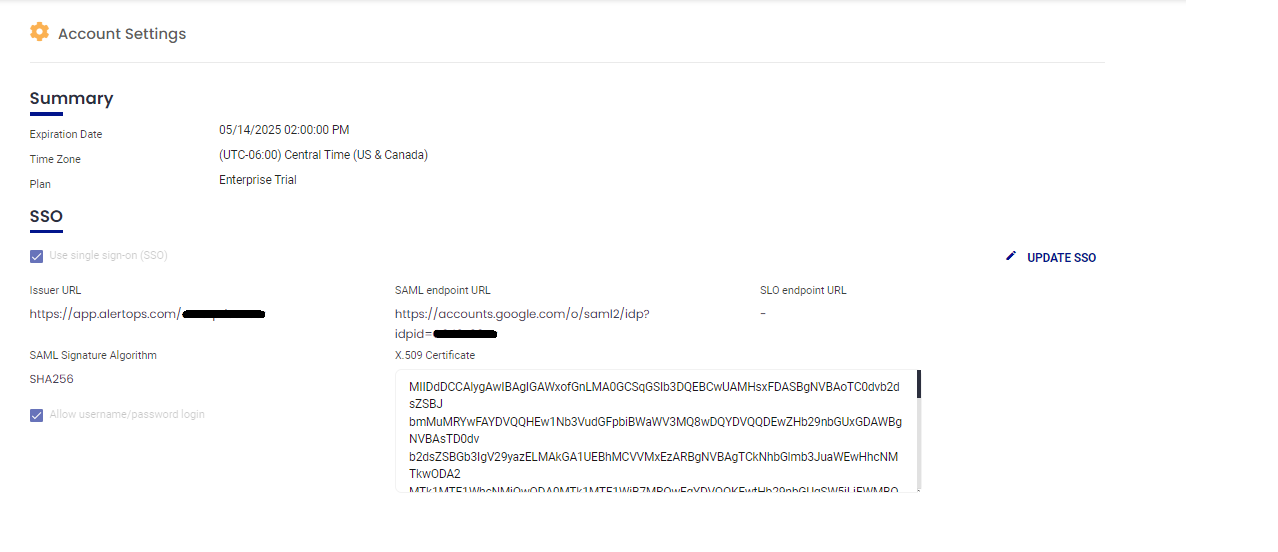
- From the AlertOps web application, navigate to your User Account settings from the top right-hand side of the screen and click Account Settings.
(2).png)
- Click UPDATE SSO and check the Use Single Sign On (SSO)box and enter and save the following enter and save the following:
- Issue URL: https://app.alertops.com/yourorg
- SAML endpoint URL: paste the Google IdP (SSO URL) from step 3.
- SLO endpoint URL: paste the Google IdP (SSO URL) from step 3.
- SAML Signature Algorithm: select SHA256 from the dropdown menu.
- X.509 Certificate: Copy and paste the Certificate you downloaded in step 3.

Was this article helpful?


