FireHydrant
- 30 Mar 2022
- 4 Minutes to read
- Print
- DarkLight
- PDF
FireHydrant
- Updated on 30 Mar 2022
- 4 Minutes to read
- Print
- DarkLight
- PDF
Article summary
Did you find this summary helpful?
Thank you for your feedback!
AlertOps and FireHydrant
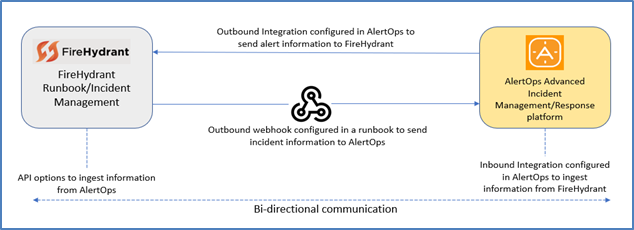
AlertOps’ modern and advanced incident/alert management system can used for bi-directional communication to and from AlertOps to leverage capabilities of both platforms. AlertOps, owing to its flexible API/Webhook configurations can be utilized to provide a salient/full-fledged integration with FireHydrant’s capabilities. Incidents created in FireHydrant, can be automatically opened in AlertOps and its advanced escalation policies, call-routing abilities, workflows, and other enterprise level capabilities can be utilized.
AlertOps Inbound Integration
We can define rulesets in AlertOps so that FireHydrant can send outbound incidents (through Webhooks) to the AlertOps platform. AlertOps would ensure based on these incidents received, that it would always reach out and assign to the correct person/team by utilizing its escalation policies, schedules, and workflow features. AlertOps provides Inbound Integrations to integrate with numerous monitoring, chat and ITSM tools. You can configure a custom inbound integration for FireHydrant incidents.
A high-level flow would be something like the diagram specified below. We create an inbound integration in AlertOps, so that an incident declared in FireHydrant is created here as well, through the outbound webhook that is triggered in a runbook. On the other side, an alert in AlertOps can also be declared as an incident in FireHydrant by utilizing its API endpoints, through an Outbound Integration.
To configure an Inbound Integration in AlertOps to receive incidents from FireHydrant:
- Navigate to Configuration àIntegrations àAdd API Integration à API Integration Detail page
- Select FireHydrant
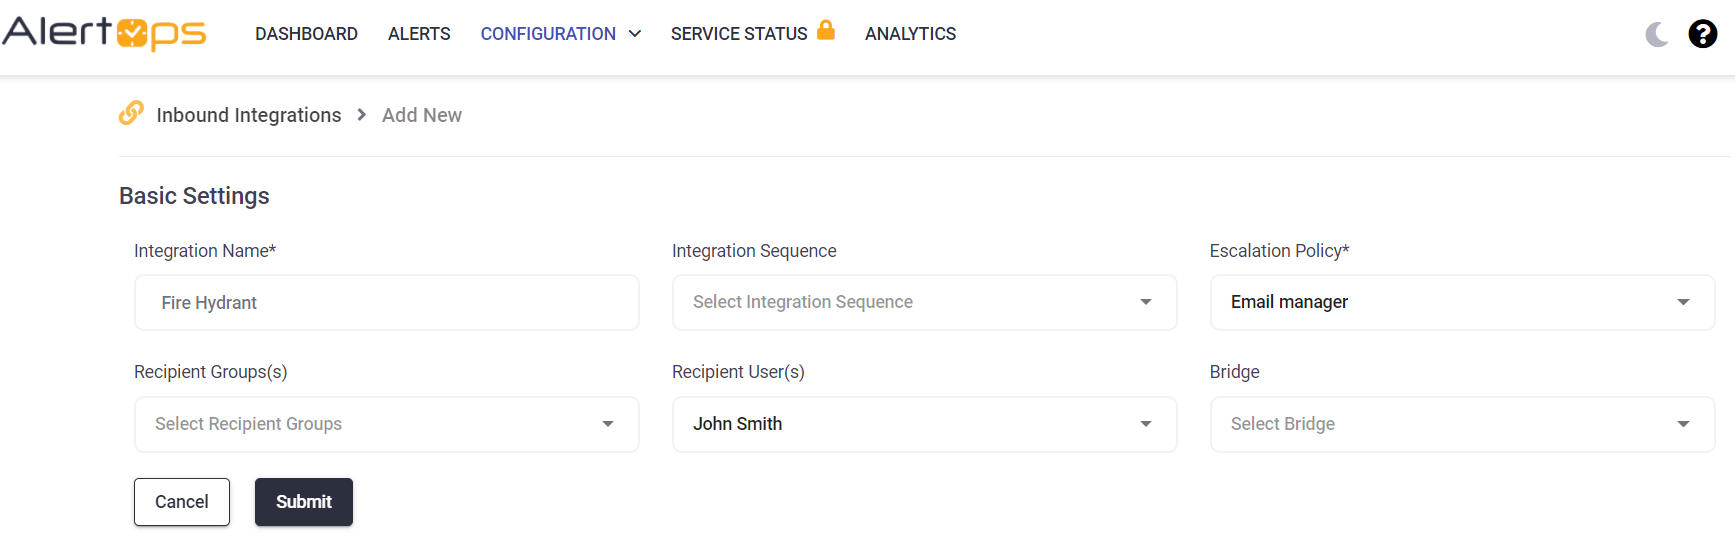
- Specify Basic Settings like the Integration Name, Escalation Policy, names of the recipients/groups for which the alerts must be assigned to.
- Click Submit, the API Integration will be created, and a unique URL is provided which acts as the access point and needs to be configured at the source (in this case FireHydrant), to send alerts.
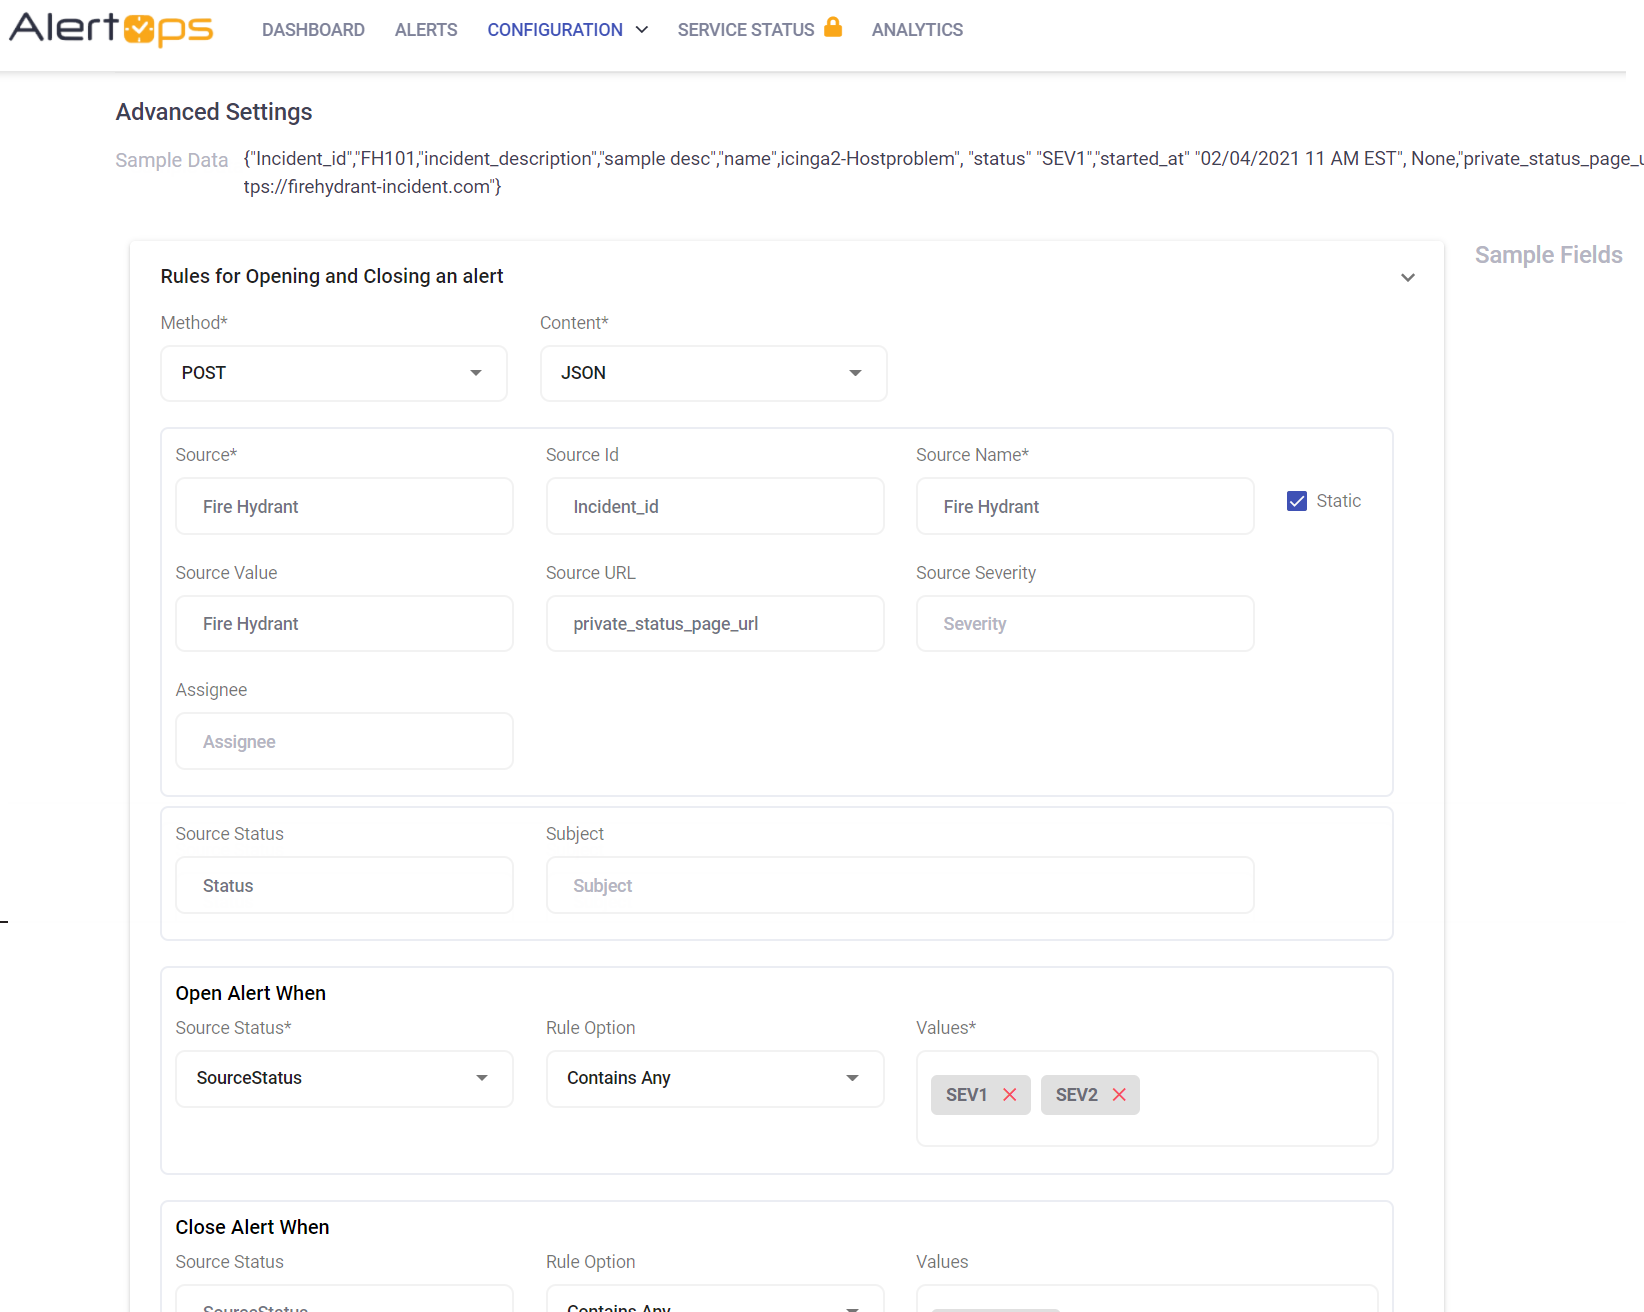
- You can find the integration you just created, and you can give advanced settings and define various configurations for the alerts to be received and processed. For example, you can define when to open and close alerts based on the payload obtained from the API call, filters etc.
- Make a note of the API URL, which will be used in FireHydrant, so it calls a HTTP POST request to this URL with the body in JSON format containing the incident specific information. Incidents/Alerts will be recorded in the ‘Inbound Messages’ section table. AlertOps automatically creates an alert when the status is SEV1 or SEV2. The incident will also be closed automatically when the status ‘Resolved’ is received. You can customize configurations for opening, closing alerts, attaching workflows, escalations etc., as, and how you need it.
Configuration of FireHydrant for AlertOps Integration
Now that we have setup AlertOps with an Inbound Integration, along with a unique API URL; we can now define a Webhook connection in FireHydrant Runbook to access this API and send out incidents to AlertOps.
Runbooks in FireHydrant allow you to set robust and configurable incident trigger and execution policies that enable you to get better assessment, milestones, actions, and logging of incidents.
To create a runbook in FireHydrant,
- Select Runbooks in the left navigation pane àCreate New àCreate Blank Runbook.
- Enter a runbook name, description and configure it to trigger when severity is of type SEV1 or SEV2 (remember severities can be mapped as well)
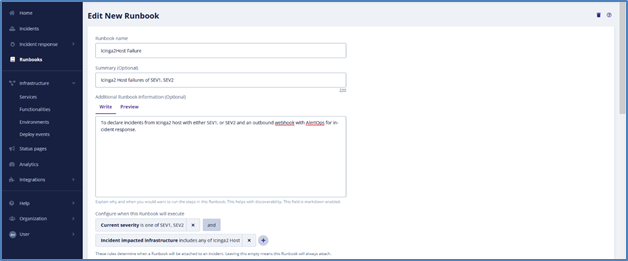
After setting the trigger conditions, you can select from the list of available steps to execute once the incident is declared. A lot of options are available. Since we want to send a webhook with the incident information to AlertOps, we can choose the option ‘Send a Webhook’ in the Available Steps section. Here you can put the API URL which you generated while creating the inbound integration in the previous section.
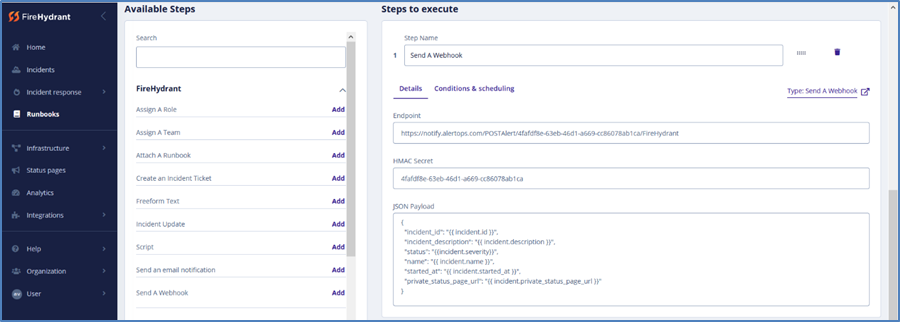
- You can also define conditions and time-scheduling options to make sure that the webhook is sent as and how it is required. Once you have defined the conditions, you can save the configuration and test the runbook by clicking the ‘Test Runbook’ button.
- Once you run the test, you should see an incident created/declared with information overview and options to handle it (assign teams, roles, milestones etc.). You can also see an incident timeline in the right side, that shows all the incident updates. You can verify here that the webhook has been sent properly (it will show an error if there was a proble
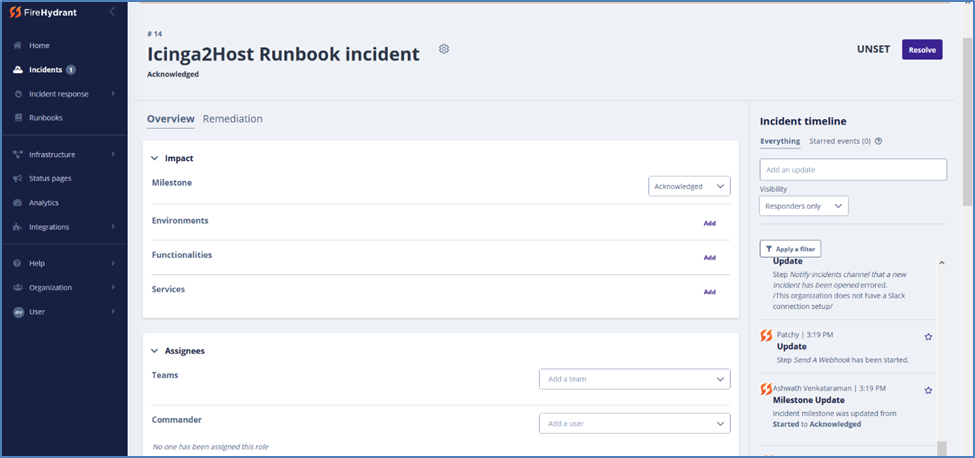
- If everything worked correctly, you should have received the incident in AlertOps. You can view the alert in AlertOps, in the Inbound Logs/Alerts (if one was received/triggered), and process it using the multitude of options that AlertOps provides.

Alert Triggering Information:
AlertOps will automatically create an incident when a new alert is received from FireHydrant when the status field contains “SEV1” or “SEV2”.
If an alert with status “SEV1” or “SEV2” matches an existing Open Alert, AlertOps will recognize the new alert as a duplicate and ignore the alert. The alert will be recorded in the Inbound Messages table as “Mapped Appended.”
AlertOps will automatically close the same incident when an alert with a status contains “Resolved”
Was this article helpful?