Escalation Policy Overview
- 19 Apr 2024
- 6 Minutes to read
- Print
- DarkLight
- PDF
Escalation Policy Overview
- Updated on 19 Apr 2024
- 6 Minutes to read
- Print
- DarkLight
- PDF
Article summary
Did you find this summary helpful?
Thank you for your feedback!
The following entitlements are required to make changes to Escalation Policies:
- Message_Rule_Update - Add and Update existing Escalation Rules
- Message_Rule_View - View existing Escalation Rules
Owner and App Admin user roles have access to these entitlements.
An Escalation Policy is the plotted pathway between user roles that will guide your alert deliveries. Each alert has an Escalation Policy assigned to answer to whom, where, and when an alert will be delivered.
Escalation Policies not only let us know exactly which user to contact but also when to escalate an alert to the next user.
In this article, we will explain each detail that can be configured in an escalation policy.
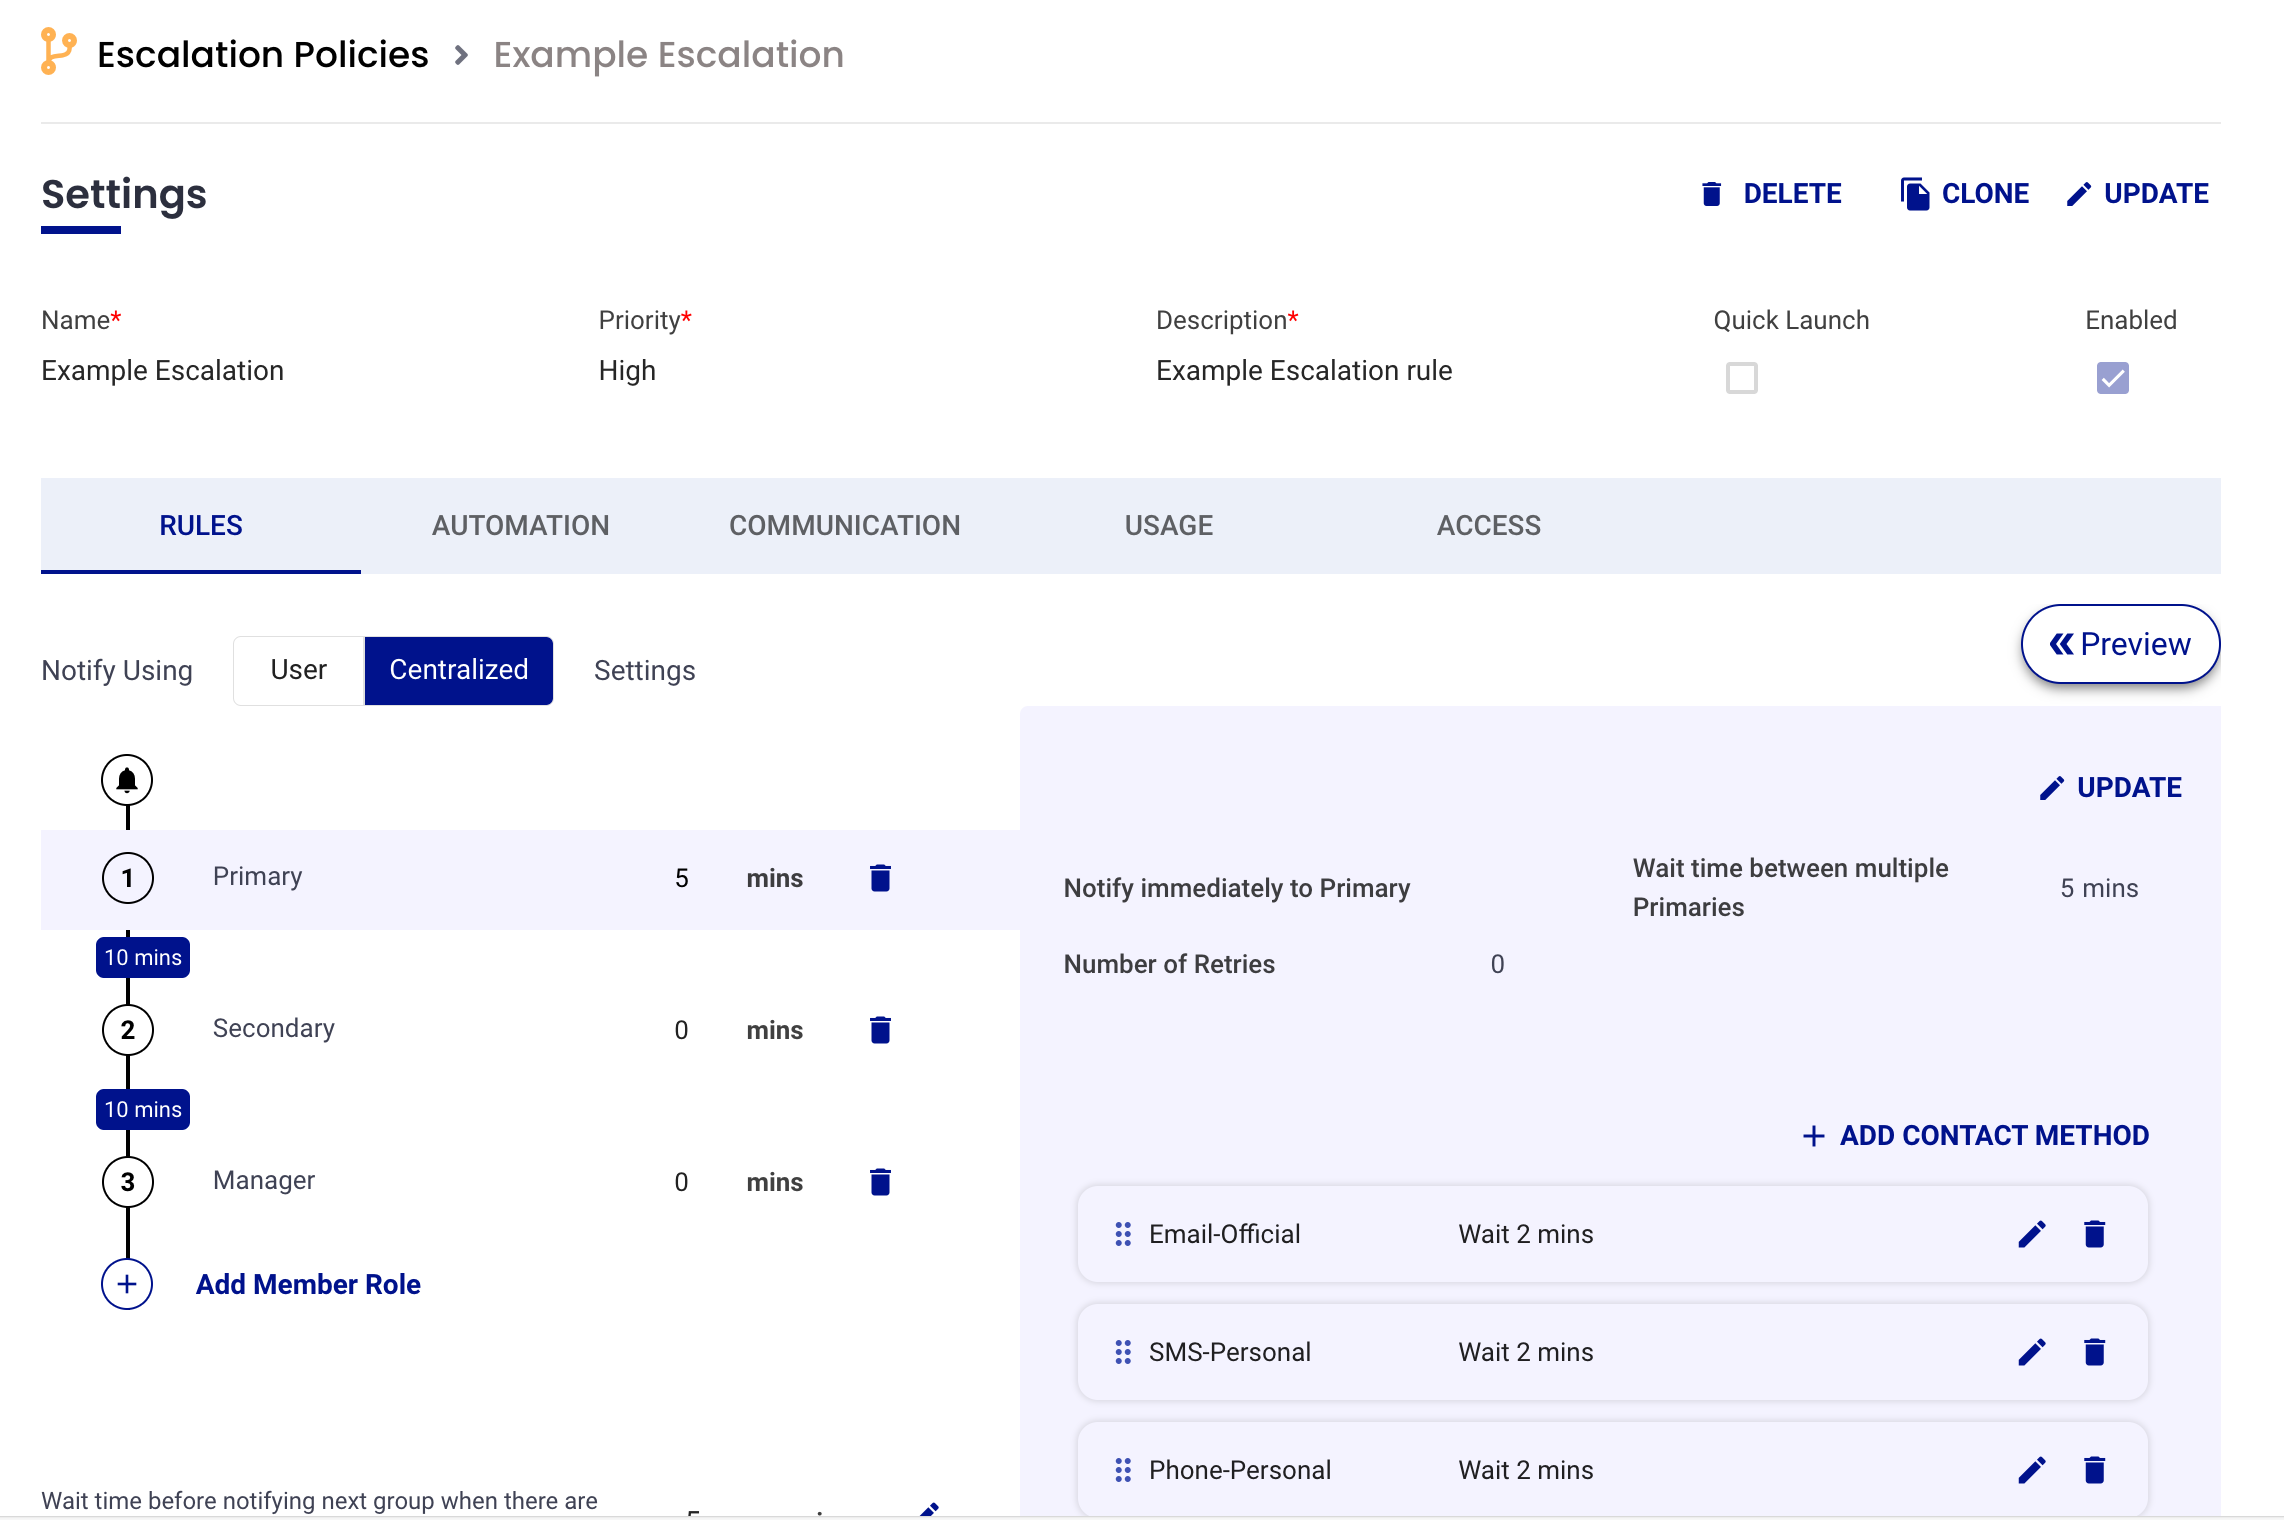
Settings
At the top of the escalation policy detail page, you will find the Settings section. Here you can edit the escalation policy name, priority, and description by clicking the Update button in the top right corner.
The Enabled check box will enable/disable the escalation rule.
The Quick Launch box will make the Escalation Rule available for Manual Alerts from the Create Alert menu.
Rules Tab
The Rules tab will auto open when you click on an escalation policy and is the starting point to build your escalations.
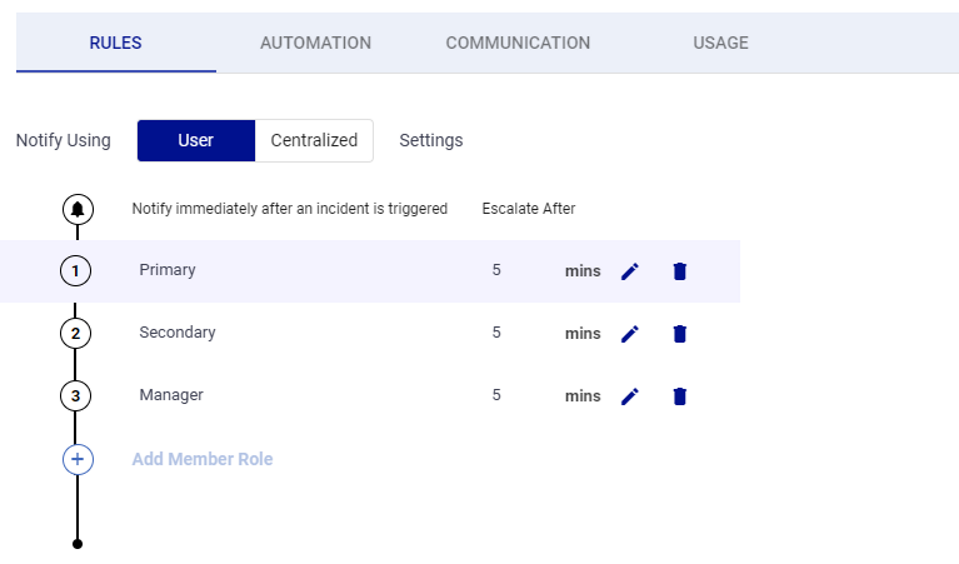
Notify Using Setting
In the Rules Tab, toggle the Notify Using setting between centralized or user.
- User will escalate alerts using contact methods and escalation policies which are set up by each user in their user profile.
- Centralized will allow you to override user preferences, and set standardized admin preferences within the escalation policy.
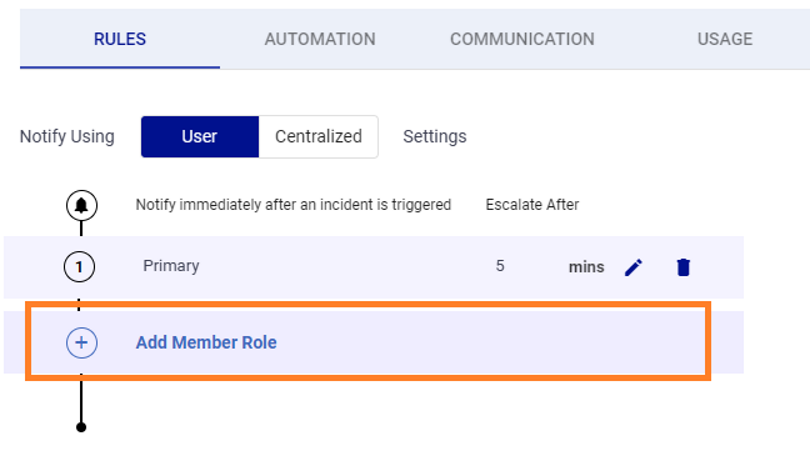
Add Member Role
The Add Member button allows you to plot the notification chain. By default, a primary member role will be included in the escalation. You can add as many member roles as needed.

Wait Time Between Multiples
The interval (measured in minutes) can be set in each role to establish a wait time before escalating to the next member role in the sequence as well as the wait time between multiple members that have the same role, e.g. multiple primaries or secondaries.
.png)
The first role that is added to the escalation policy is always notified immediately. A delay in alerting can only be set at the integration level. In the example above, you can see that the first primary will be notified immediately, and then the second primary will be notified five minutes after.
Wait Time Before Escalating
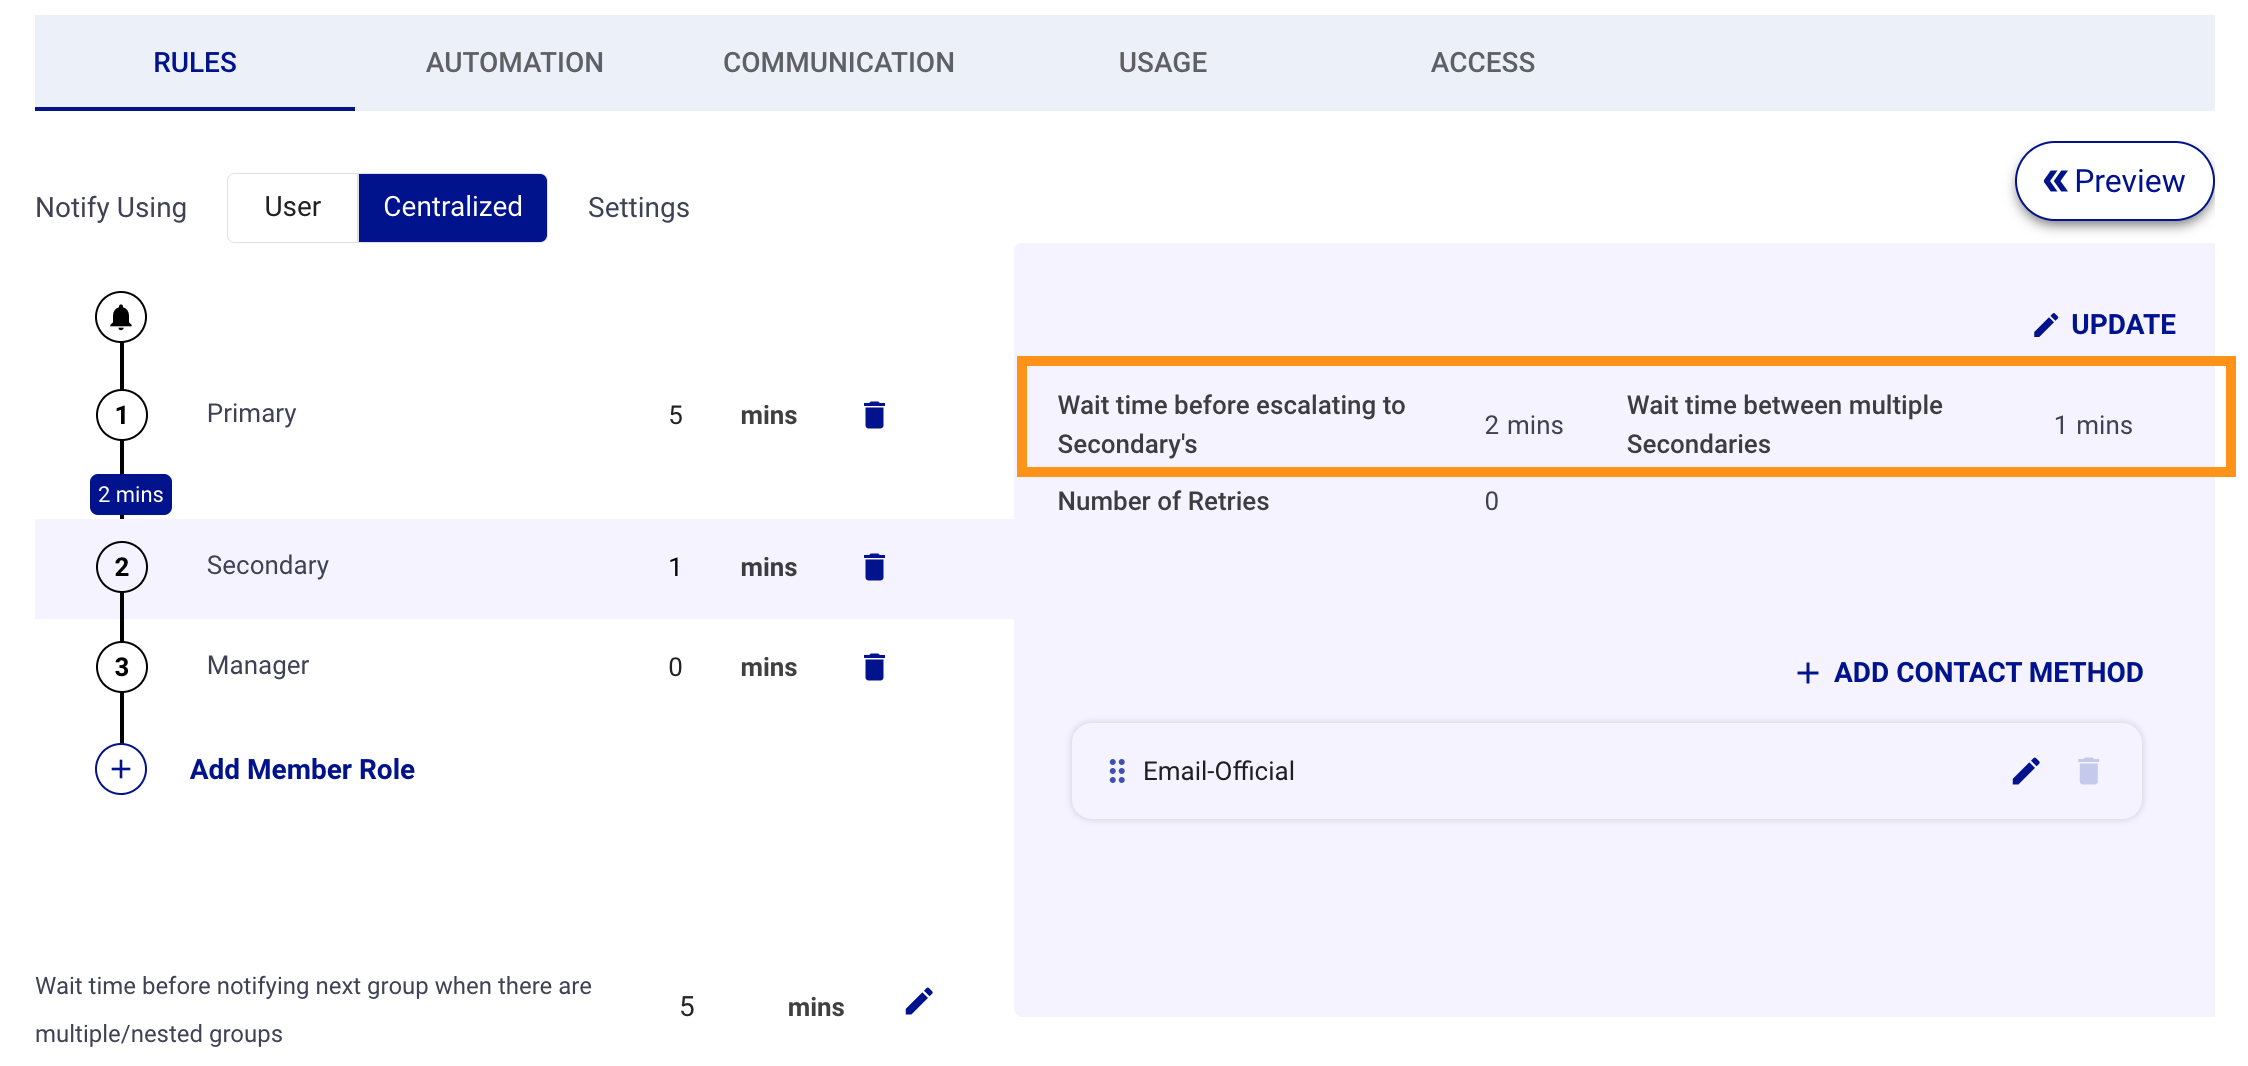
Admins can include a wait time before escalating to the next role. In the example above, the escalation will notify all primaries, then wait 2 minutes before notifying the first secondary.
Number of Retries
Define the number of retries for each member before moving on to the next member in the sequence. This can be set when adding a member role or by selecting a member role to edit.
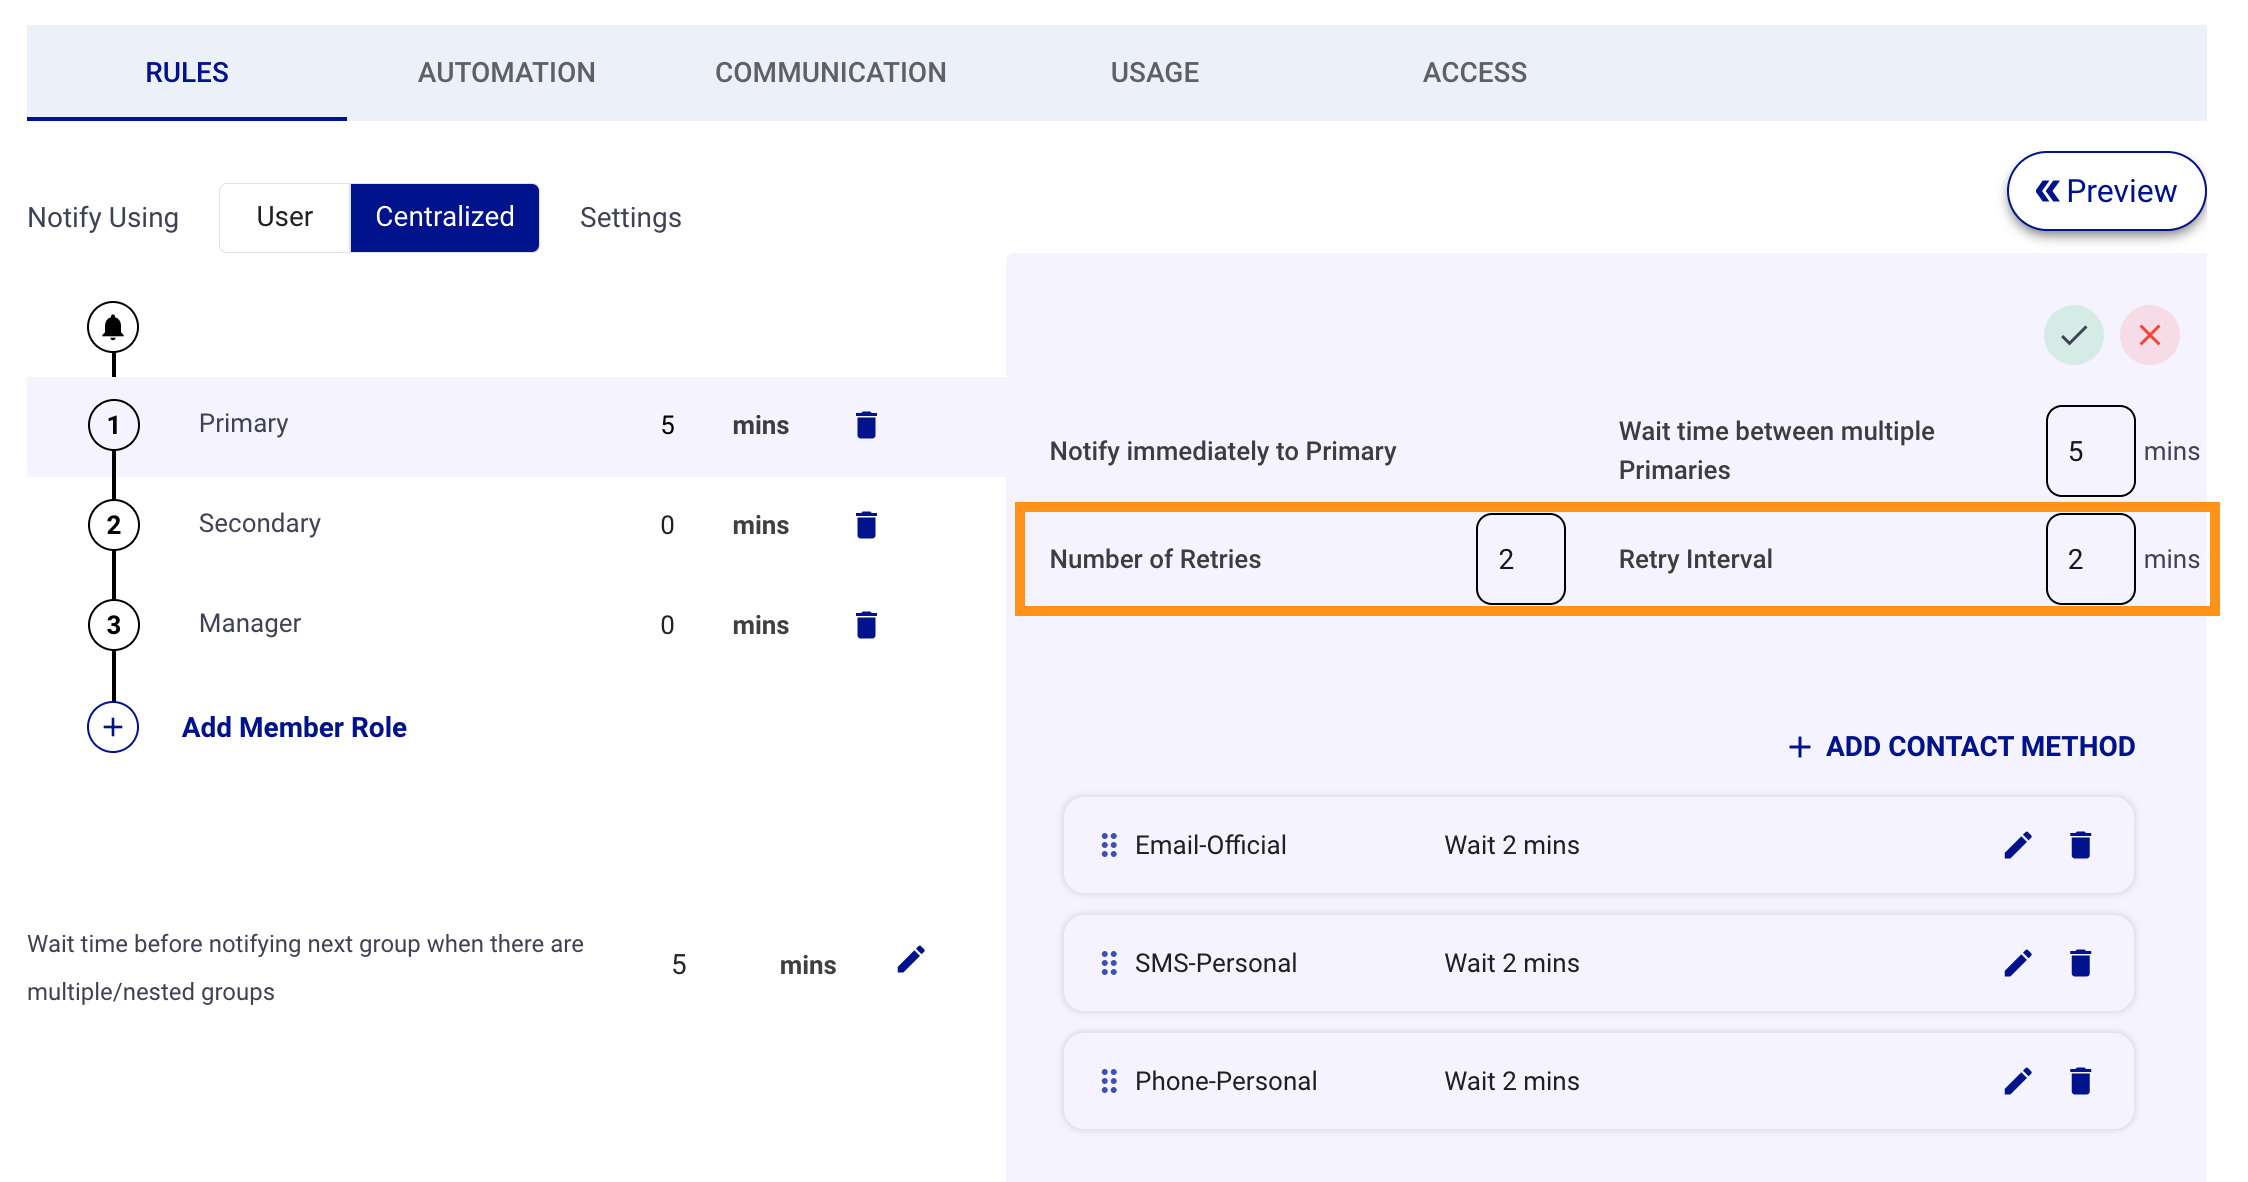
Retry Interval
Set the interval in minutes after each alert. This will define the wait time between retries. Note: this feature will not be shown if Number of Retries is set at zero.
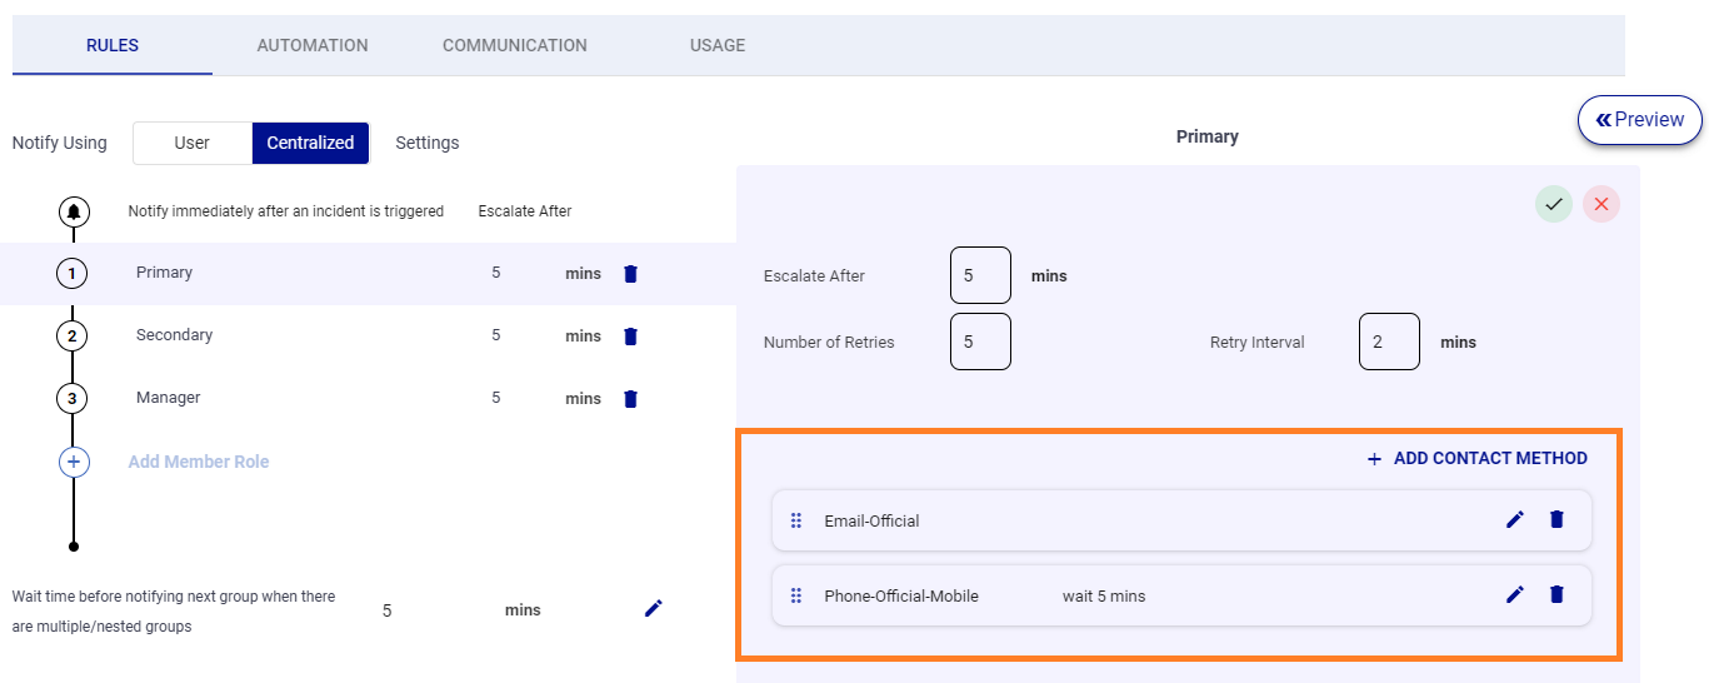
Contact Sequence
When editing a member role, you can set the sequence of contact methods in the escalation rule as well as a time interval between each contact type.
You can also set the number of retries, and retry interval. You can add additional contact types by clicking the Add Contact Method button. AlertOps will start the sequence from the top and work its way down the list.
In the example below, the alert will notify the primary by email first. It will continue to send emails 5 more times every 2 minutes. If there is still no answer, it will escalate to notify via phone call.
Matching Labels
It is important to understand that the contact labels set here in the escalation policy must match the labels listed in each user's profile contact methods. If these contact methods are not configured or have mismatched labels, it will result in alert delivery failures.
A common mistake is including 'Phone-Offical' in the escalation policy but only 'Phone-Official-Mobile' in the user profile.
If you are experiencing alert delivery failures, make sure these labels match.
A common mistake is including 'Phone-Offical' in the escalation policy but only 'Phone-Official-Mobile' in the user profile.
If you are experiencing alert delivery failures, make sure these labels match.
Preview Your Escalation
To preview the escalation process with an actual group, simply click on the "Preview" button:
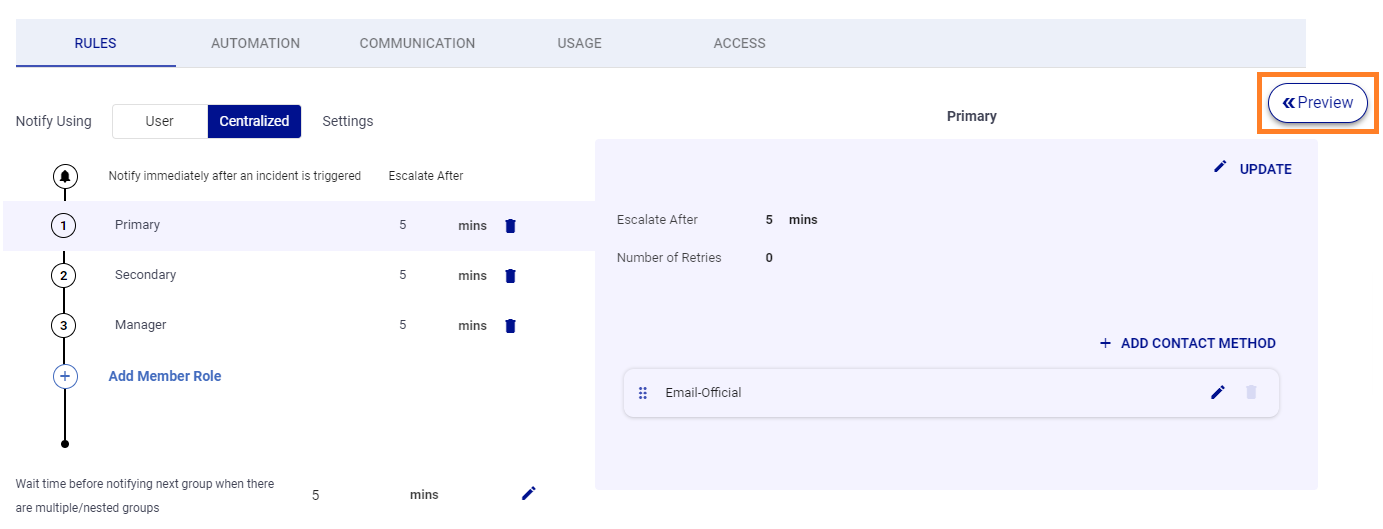
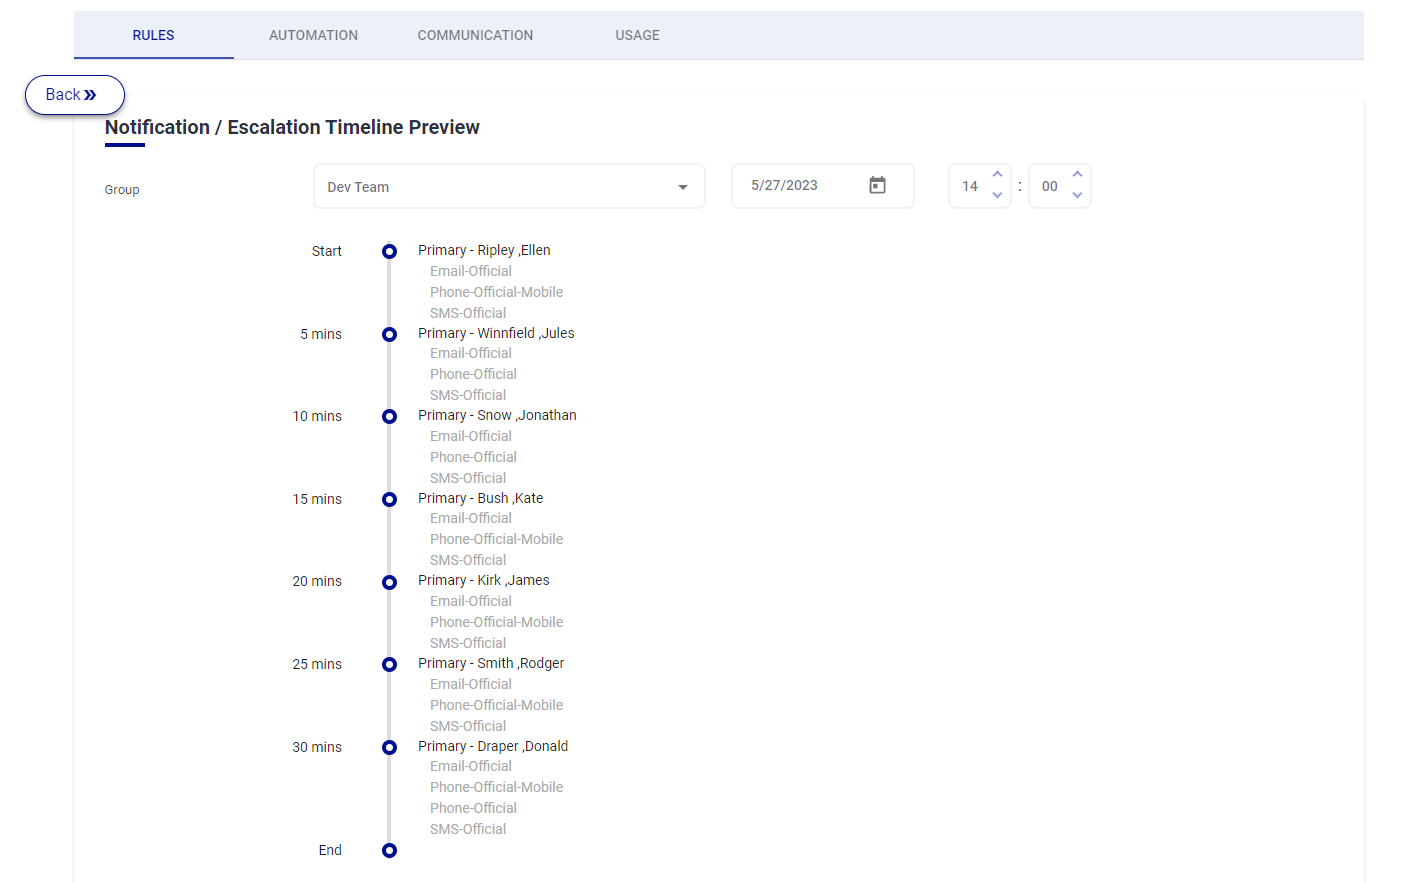
From here, you can select the desired group to test the Escalation Policy against. Additionally, you have the option to specify a date and time for a more detailed simulation of how the escalation would unfold in real time.
The preview button is a good place to make sure you are not having any issues with the way your group contact information is configured. If you spot an issue in the way your timeline is played out, make sure to check the user's contact methods to ensure that contact methods are properly configured, and the contact labels correspond to what is in the escalation policy.
Automation Tab
The automation tab is where you can view any automated actions that have been assigned to the escalation policy.
Workflows
A Workflow will trigger an auxiliary action if certain conditions are satisfied when this escalation policy is launched.
Outbound Integrations
An Outbound Integration allows you to trigger actions in third-party systems such as Salesforce, Statuspage, ServiceNow, or JIRA. These actions are not conditional like workflows and will always be executed when the escalation rule is launched.
Outbound Actions
Outbound Actions, like outbound integrations, allow you to trigger actions in third-party systems. These actions are not automated but will be available to execute on demand with the push of a button via a web app or mobile app.
Communication Tab
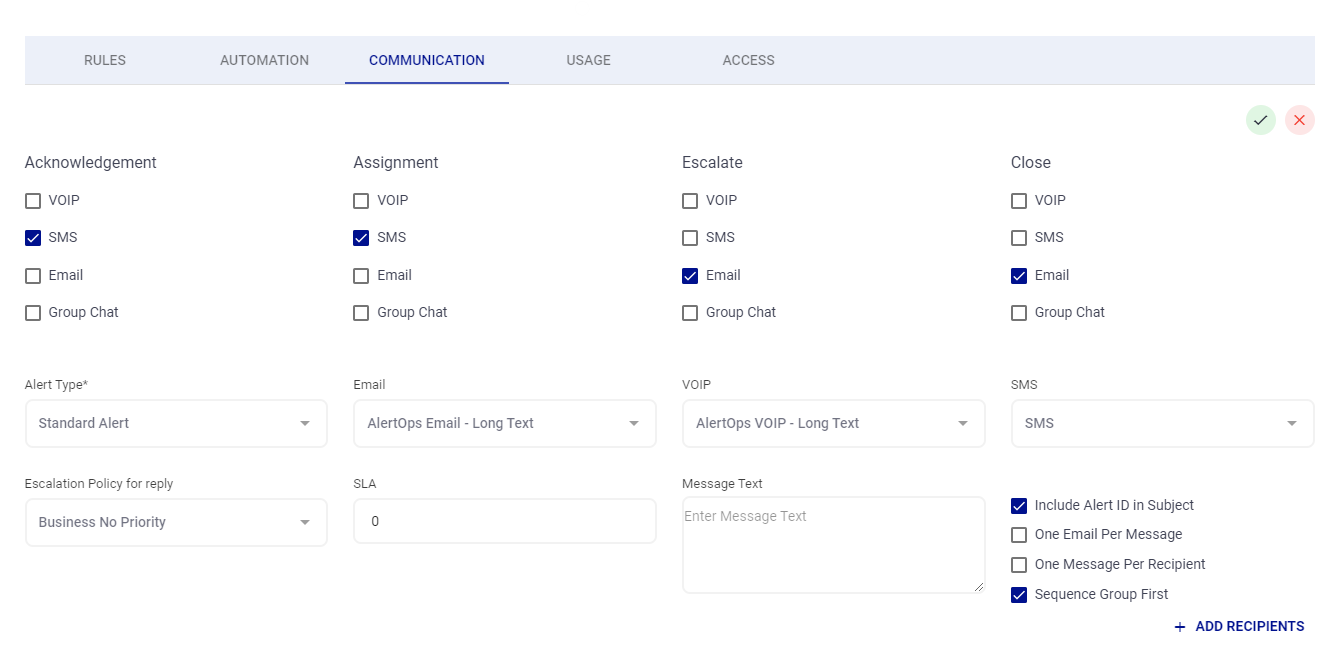
Response Action Options
The Communications tab features a range of response actions (Acknowledgement, Assignment, Escalate, Close) for administrators to link actions with specific communication channels. These channels include phone call, SMS, email, or group chat (Slack or Teams). If a communication method is not selected under a response action, the corresponding option to respond to the alert will not be available within the alert. For instance, in the given example, if an alert with this escalation policy is received by a user via SMS, the SMS alert will only include the options to acknowledge or assign the alert.
Alert Type Options
The Alert Type dropdown menu allows you to select the desired alert type for this escalation policy. It's important to note that Alert Types store all custom fields. Since workflows and outbound methods are tied to specific alert types upon creation, they determine which workflows and outbound methods can be associated with this escalation policy. The alert type choice significantly influences what options are displayed when adding workflows or outbound actions in the Automations Tab.
Email, VOIP, and SMS Options
Email, VOIP, and SMS settings determine the content length of alerts for each communication method. For example, in an AlertOps email, you can choose between short or long text. Opting for short text in VOIP means the user will receive a condensed version of the alert during a phone call. Best practice suggests using short text for VOIP and SMS, while email should utilize long text. Note that short and long text configurations are managed within the Inbound Integration advanced settings under Rules for Opening and Closing an Alert.
Escalation Policy for Reply
The "escalation policy for reply" feature enables you to designate a specific escalation policy for responding to alerts or adding others to them.
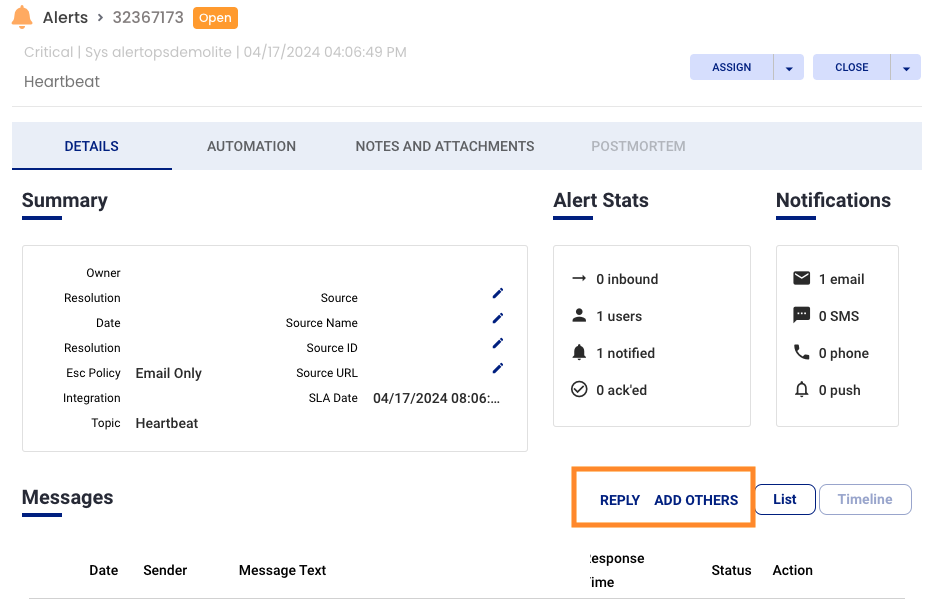
In this alert example, clicking "add others" allows you to include additional users in receiving the alert, who will be notified according to the selected escalation policy for replies. Similarly, replying directly to the alert will trigger notifications based on the same escalation policy for replies.
SLA (in Hours)
The SLA, specified in hours here, serves as a key trigger for workflows. SLAs enable the creation of time-based conditions, such as notifications before or after an SLA deadline. For instance, setting an SLA of 3 hours for this escalation policy allows for workflows like receiving a notification 30 minutes before the SLA deadline or notifying the management team if the alert remains open one minute after the SLA deadline has passed.
Include Alert ID in Subject
This option allows you standardize alerts by including the Alert ID within the subject line of all alerts applied with this escalation policy.
Sequence Group First
When alerting nested groups and group contact methods, selecting the "Sequence Group First" option ensures that they are properly arranged instead of being sent as a blanket notification to all groups.
Deprecated Features
- Message Text
- Add Recipients
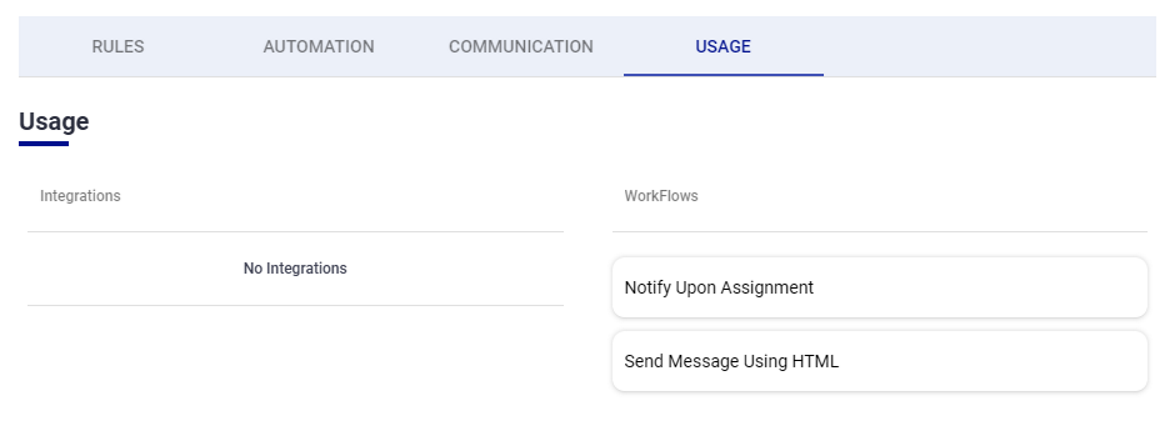
Usage Tab
Here you can view which integrations and workflows are using the escalation rule. This example escalation rule is being used in two workflows and has no associated integrations.
Was this article helpful?