Elastic-Kibana Watcher Integration
- 25 Mar 2022
- 4 Minutes to read
- Print
- DarkLight
- PDF
Elastic-Kibana Watcher Integration
- Updated on 25 Mar 2022
- 4 Minutes to read
- Print
- DarkLight
- PDF
Article summary
Did you find this summary helpful?
Thank you for your feedback!
Watcher is a feature of the Elastic Stack which enables users to send alerts or trigger actions based on certain events or threshold limits within their data. Integrate your Elastic Watches to send information via webhook when certain conditions or thresholds generate an alert.
- Have configured your elastic instance
***For help with this process please view elastic documentation:
https://www.elastic.co/guide/index.html
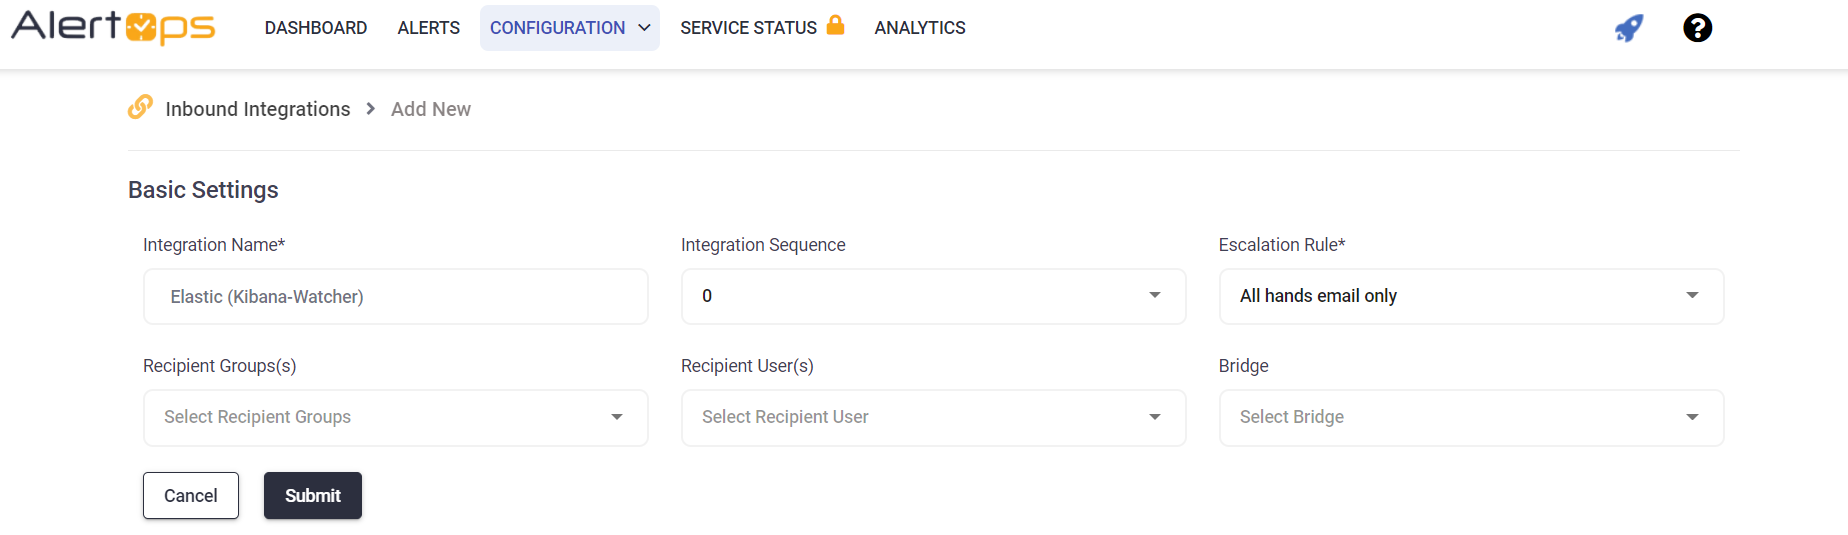
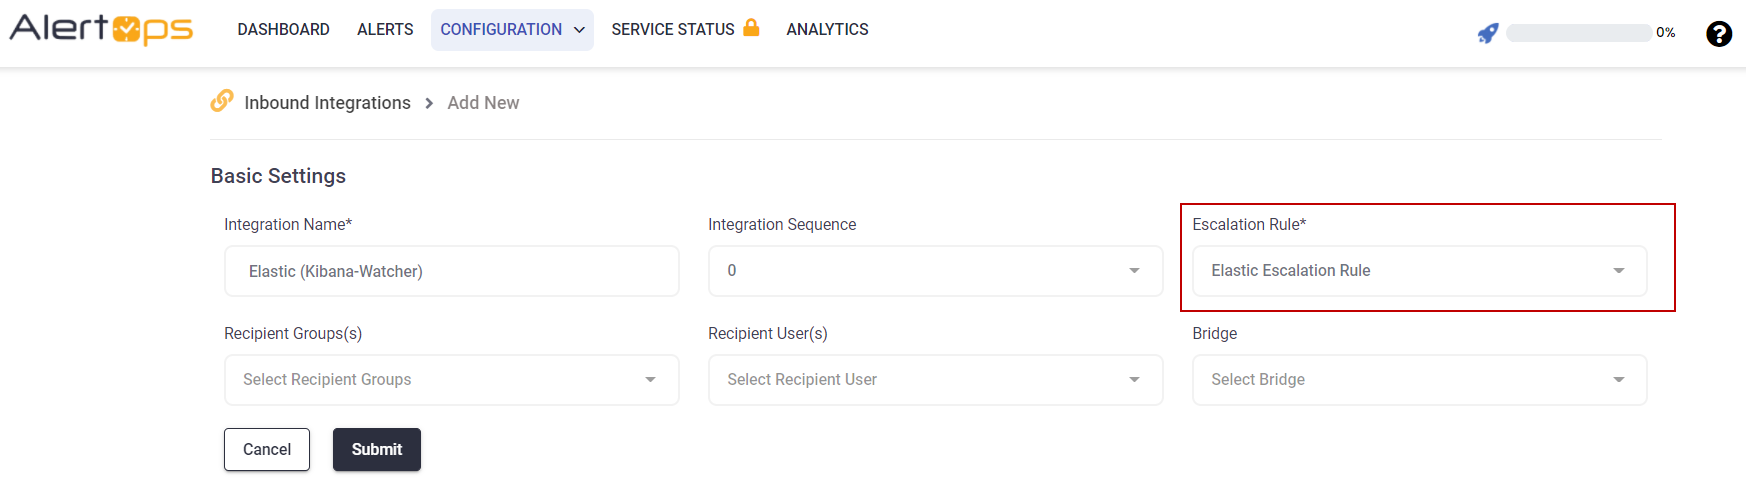
- Create Inbound AlertOps Integration
- Create an Integration Name
- Use the Elastic Escalation Rule
**You will configure this later so select a random rule - In URL Mapping select POST method and JSON for content
- Enter source as your see fit
- For Source Name enter metadata^name
- For Source ID enter watch_id
- For Source Status enter metadata
- Use Body for the Open alert When field
- Select contains any
- Enter watch_id

3. Configure Elastic Watch (Advanced JSON)
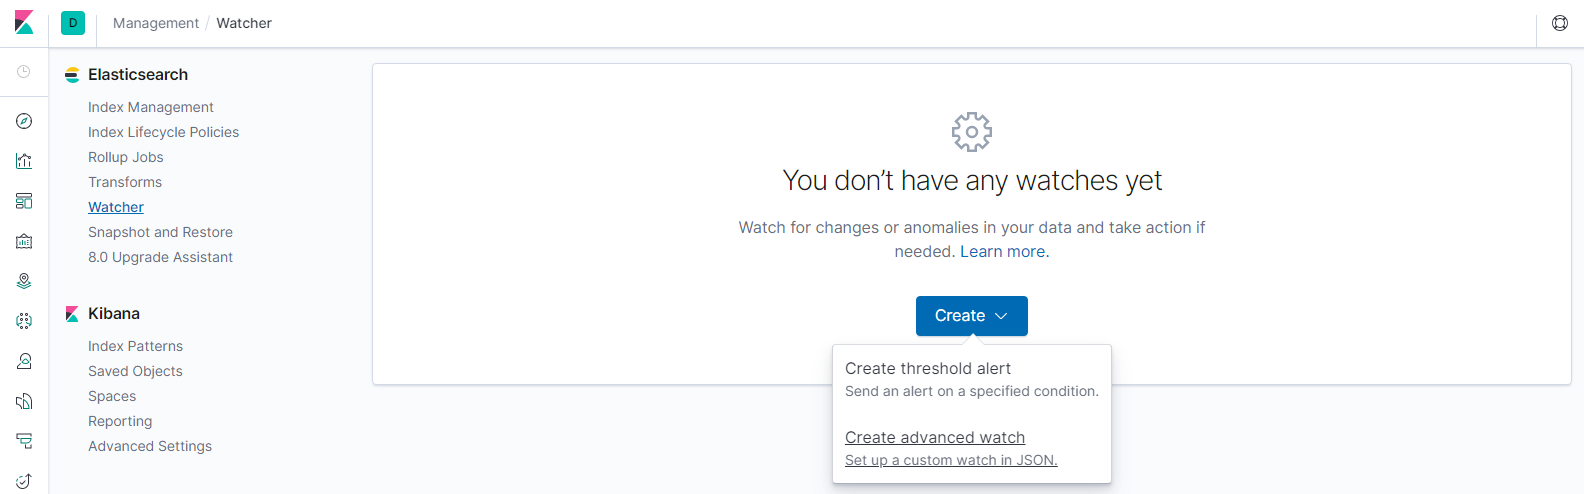
***Before continuing with this step, you must have your elastic watch and
conditions configured. For help with this process please review Elastic's watcher
documentation: https://www.elastic.co/guide/en/kibana/current/watcher-ui.html
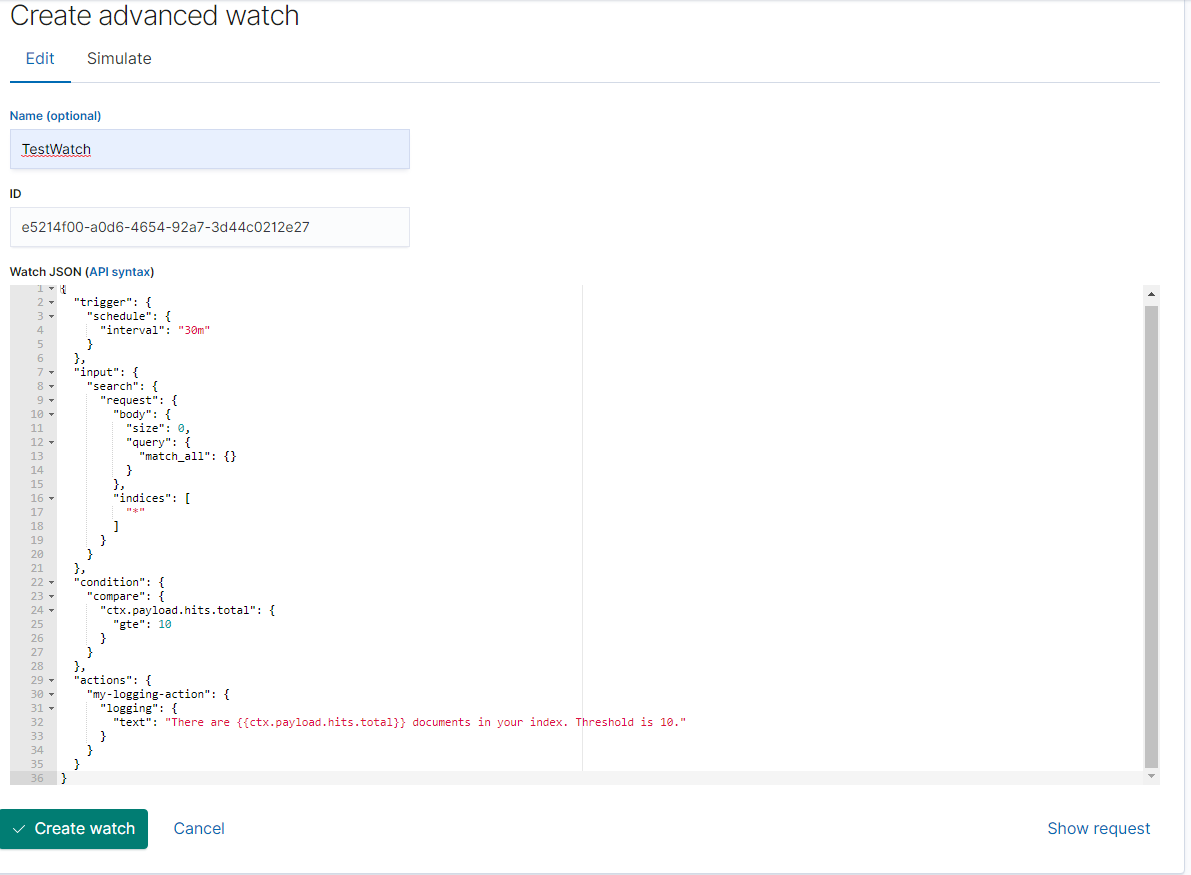
- Once configured according to your own specific checks, replace the actions field with the following based on the template provided below:
- Change the Name of your watch
- Change the path to your Elastic integration
- If wanted, change Throttle period
When a watch’s alerts are acknowledged via AlertOps, subsequent messages will stop being sent. To reduce alert noise, you can set a Throttle Period on a watch in minutes to stop sending messages to AlertOps following one that was sent for the specified period.
- Save Watch
**********************************************************************************************
"actions": {
"Name of your Watch": {
"throttle_period": "0m",
"webhook": {
"scheme": "https",
"host": "notify.alertops.com",
"port": 443,
"method": "post",
"path": "/Path to /your /Elastic integration",
"params": {},
"headers": {
"Content-Type": "application/json"
},
"body": "{{#toJson}}ctx{{/toJson}}"
}
}
},
**********************************************************************************************
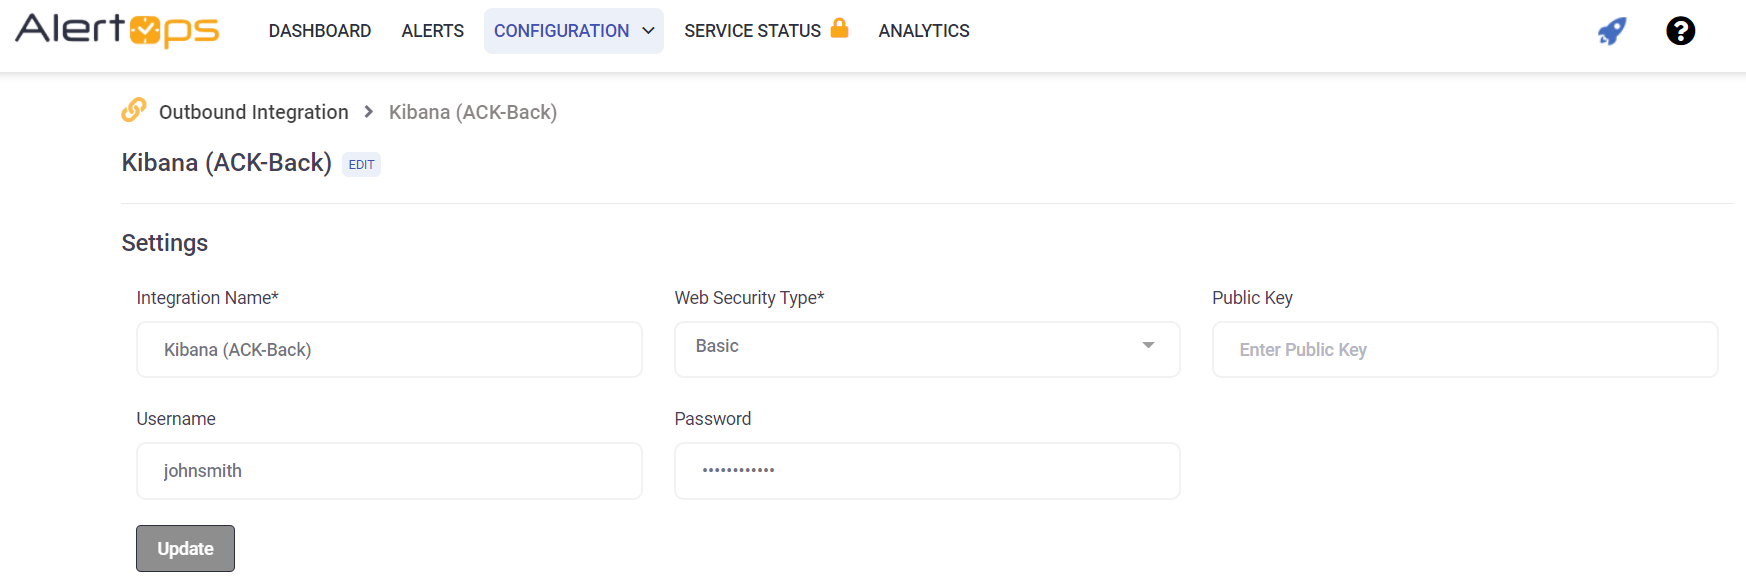
4. Configure Outbound Integration and Outbound Action AlertOps
A) Select Outbound Integrations from the main menu.
- Select ADD OUTBOUND INTEGRATION
- Create an Integration Name
- Select Basic as Web Security Type
- Generate an API Key in Kibana and place it in the Public Key field of your outbound integration
- Enter your UserName and Password in their respective fields in the Outbound Integration Detail and SAVE & CONTINUE
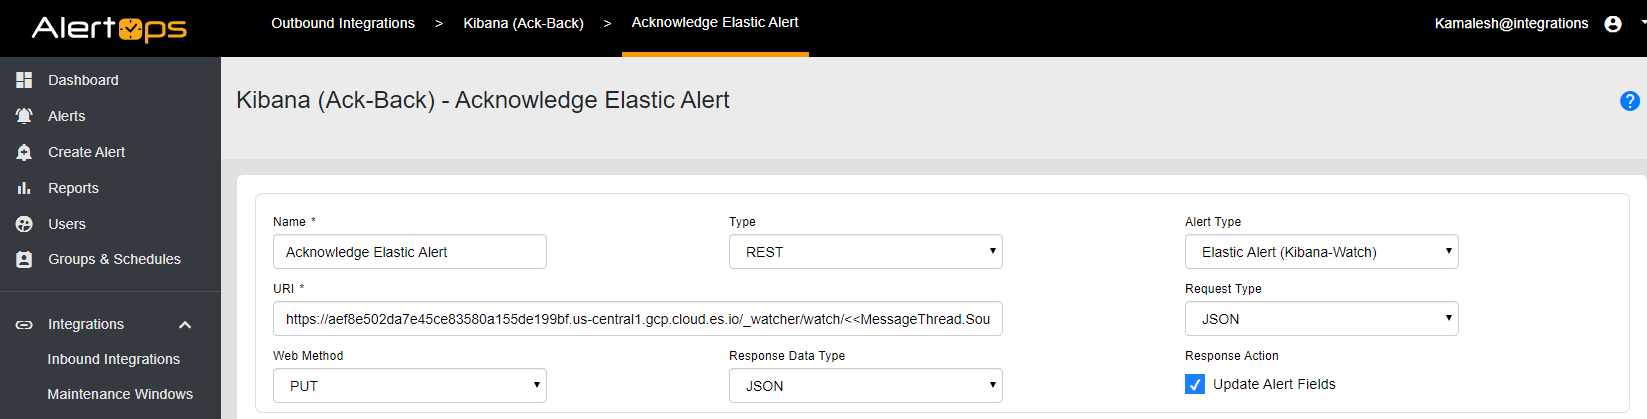
B) Configure Outbound Action Method for Outbound Integration
- In your Outbound Integrations Screen Select the Methods tab on the bottom portion of the view and select ADD METHOD
***This Outbound method is needed to acknowledge back to AlertOps. You must have a cloud instance of Elastic for alertops to send acknowledgement back to the source instance.
Input a name for the method used to acknowledge
Select REST for type
Select Standard Alert for Alert Type
For URI, use the following format
***https://hostname/_watcher/watch/<>/_ack
***Only change the hostname in the above URI
For Request Type select JSON
Select PUT for Web Method
Select JSON for Response Data Type
Select Update Alert Fields for Response Action.
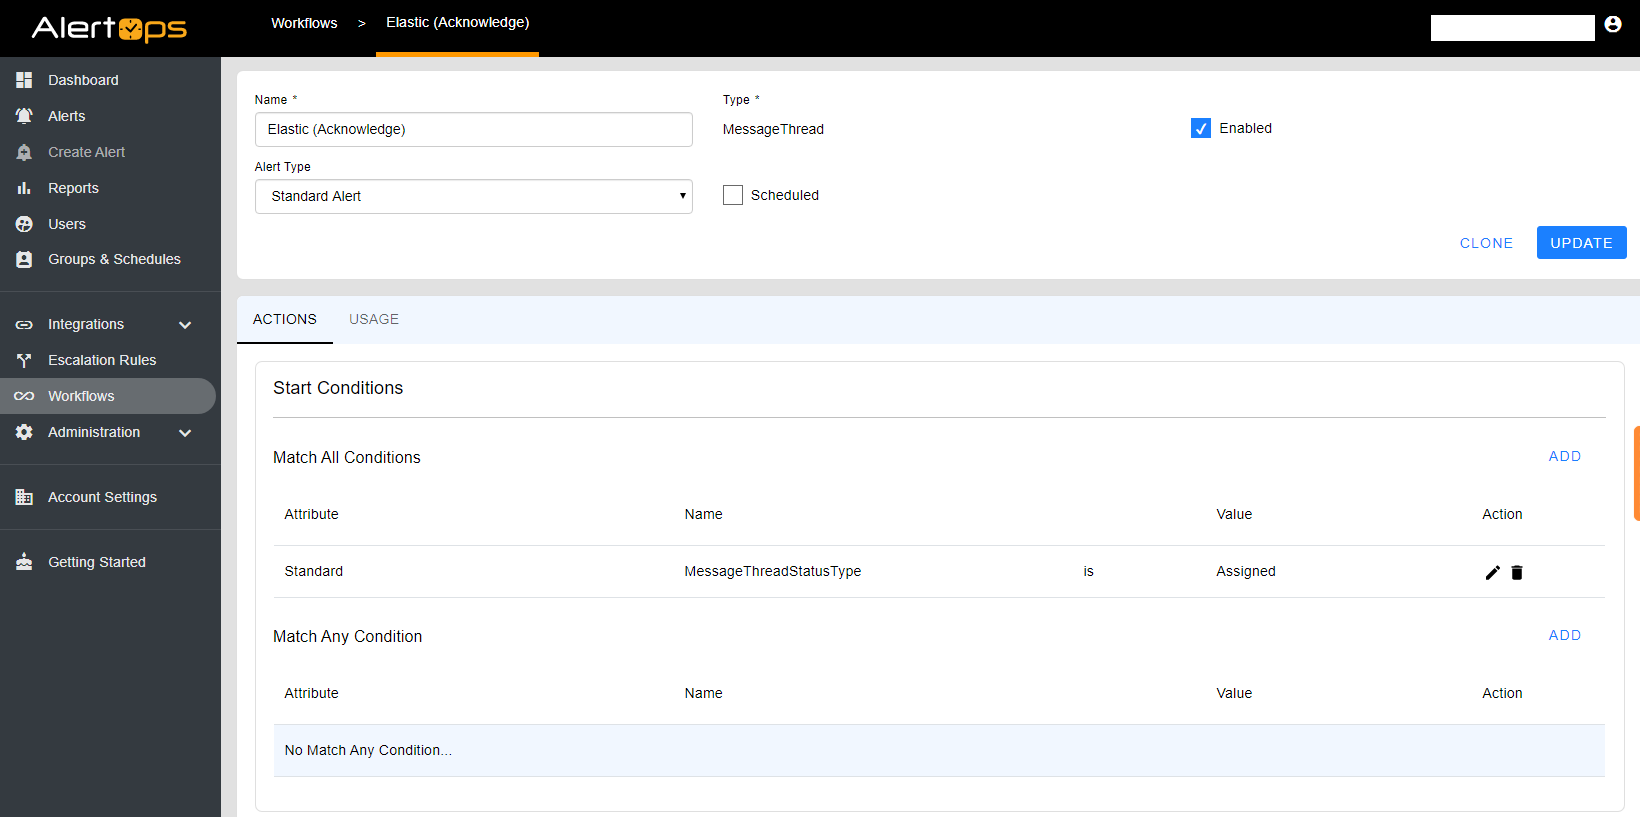
5. Configure Workflow with Outbound Action in AlertOps
- Under the Main Menu select Workflows and select ADD WORKFLOW
- Enter a name for your Workflow
- For Type Select MessageThread
- For Alert Type Select Standard Alert and click SAVE & CONTINUE
- On the bottom portion of the screen select the ACTIONS tab
- Under Start Conditions, under Match All Conditions select ADD
- Select Standard for the Attribute
- Select MessageThreadStatusType for the Name
- Select is for the relationship
- And Select Assigned for the Value
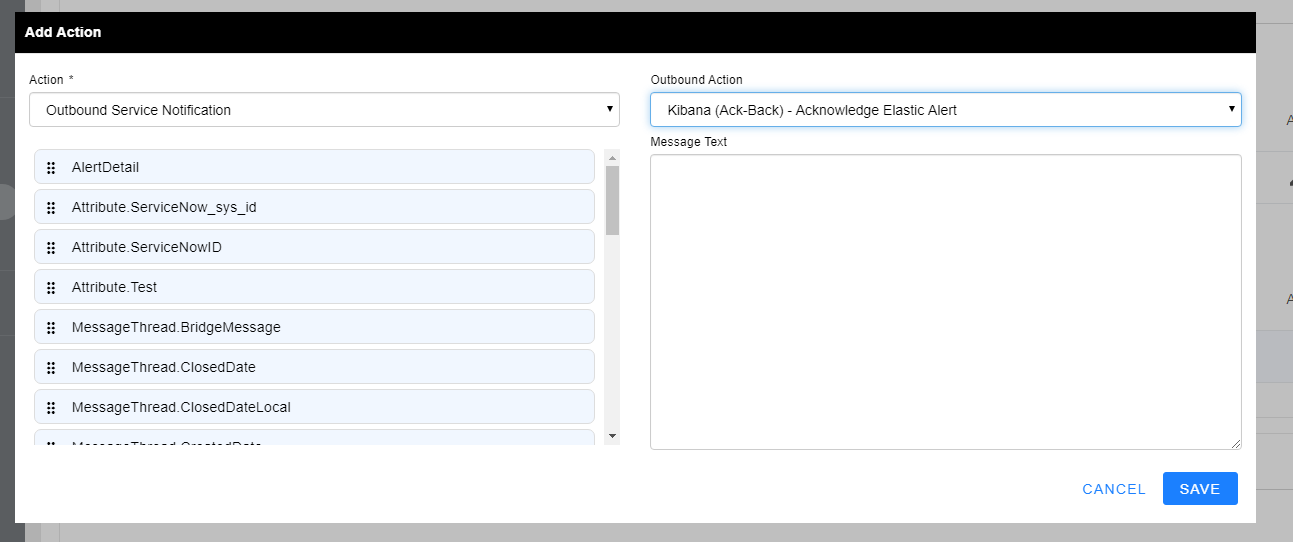
- Underneath Start Conditions, navigate to Actions the Section and Select ADD
Select Outbound Service Notification

- In the Outbound Action dropdown, select the Outbound Action you just created within your Outbound Integration and select SAVE.
At the top of the Workflow page, select the Enabled checkbox and click UPDATE
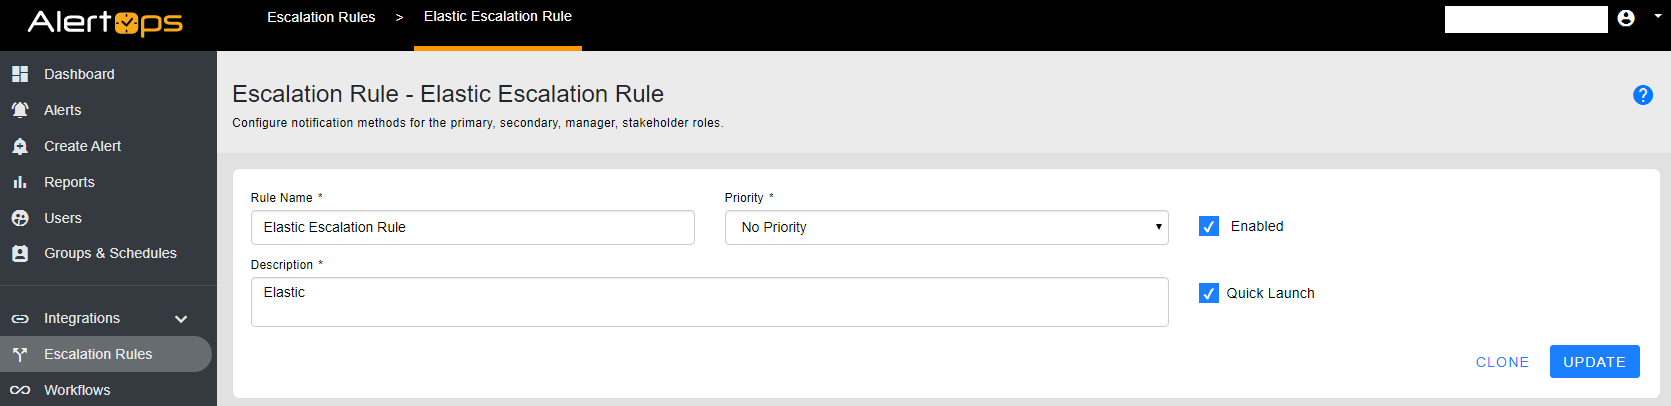
- Configure Escalation Rule and add Workflow in AlertOps
A) In the main menu select Escalation Rules and click ADD ESCALATION RULE
1) Enter your Rule Name
2) Select the priority you would like for your specific integration
3) You can enter your own integration description:
i.e. Standard Description: Escalation Rule for Elastic Kibana Watcher and Acknowledgement back to source system
4) Select Quick Launch and click SAVE & CONTINUE
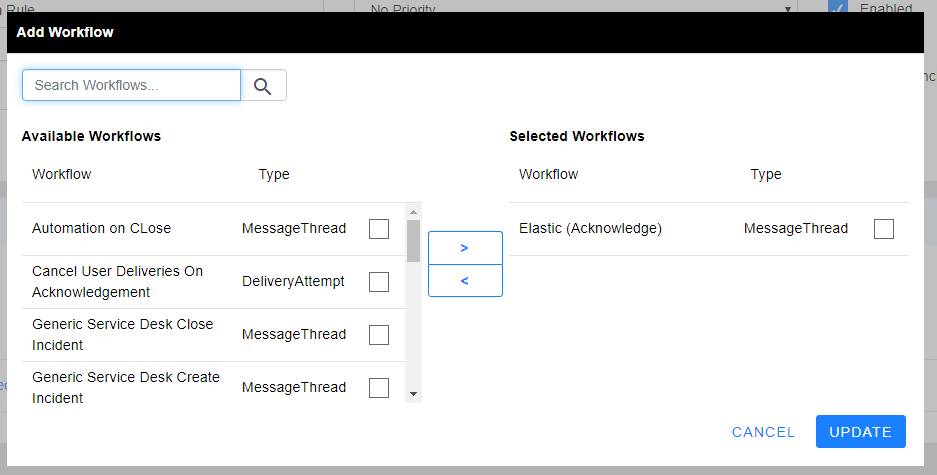
5) You should see the bottom portion of the screen now. Under WORKFLOWS tab, select ADD WORKFLOW
a. Select the Workflow you just configured for Elastic
Under the OUTBOUND ACTIONS TAB
- Select the Outbound Action that you created and configured in your outbound integration and used in your workflow.
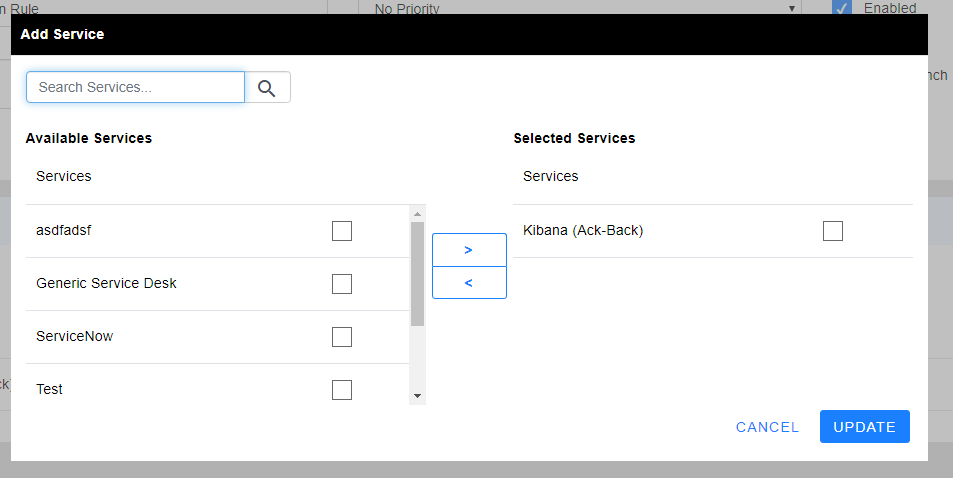
- Under Services, click ADD SERVICE and select your OutboundnElastic Integration.
7. Return to your Inbound Integration that you initially configured
A) Select your inbound integration for Elastic and change the escalation rule to the one you just created and click UPDATE
Was this article helpful?