Dashboard
- 28 Jul 2022
- 3 Minutes to read
- Print
- DarkLight
- PDF
Dashboard
- Updated on 28 Jul 2022
- 3 Minutes to read
- Print
- DarkLight
- PDF
Article summary
Did you find this summary helpful?
Thank you for your feedback!
After login, you will be landed in the Dashboard screen where you see all your Alerts and the groups in which you are associated with.
When you are in the scheduled slot, you are on-call for one or more schedules. When you are not in the scheduled slot, you will not be receiving the notifications..png)
Swipe down to refresh
- Pull the screen down to refresh, where the button will disappear and the new incidents will be shuffled in, but the view will not change.
Click

Add Alert
An alert is a message or notification the system sends out to a device to inform you that an incident needs your attention. Alerts include information about the event, also the time and location that it occurred.
You can Add Alerts using your mobile device, which requires the designated rights to add an alert.
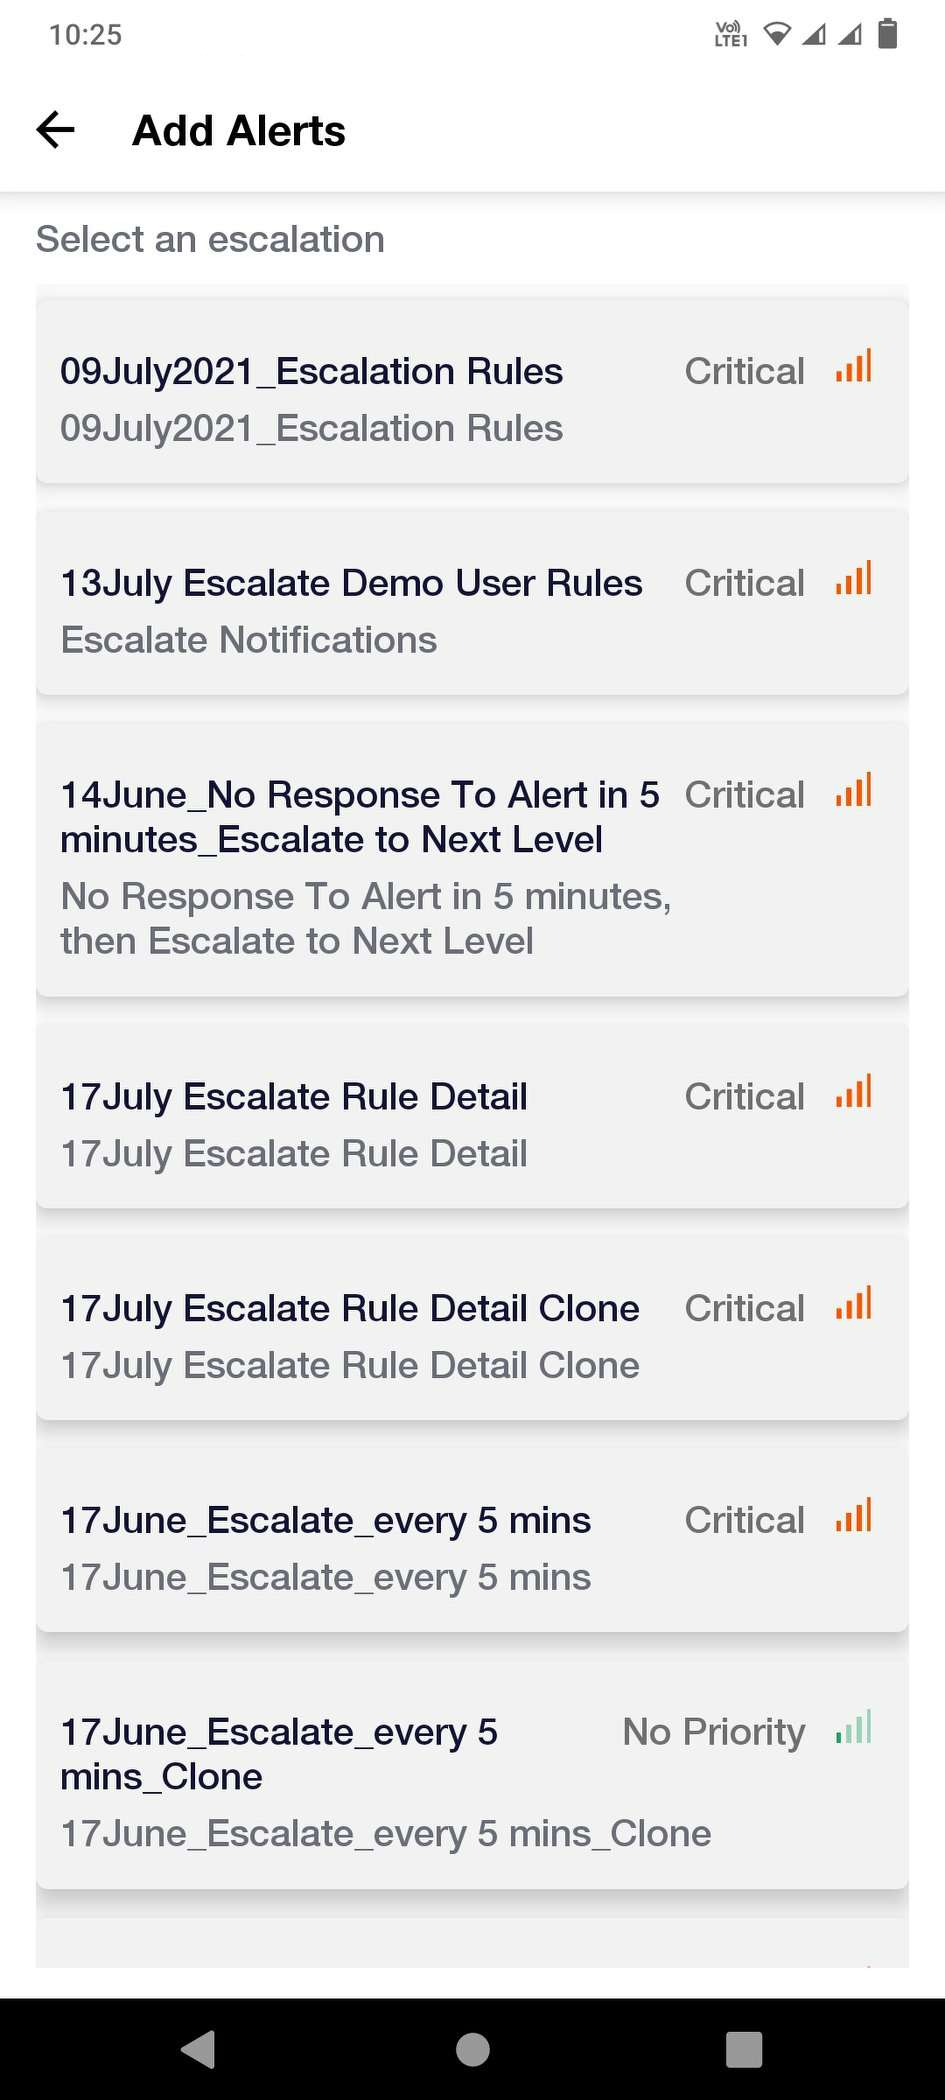
- Select Dashboard from the side menu
- Click

- Select the Escalation Rule to create an alert
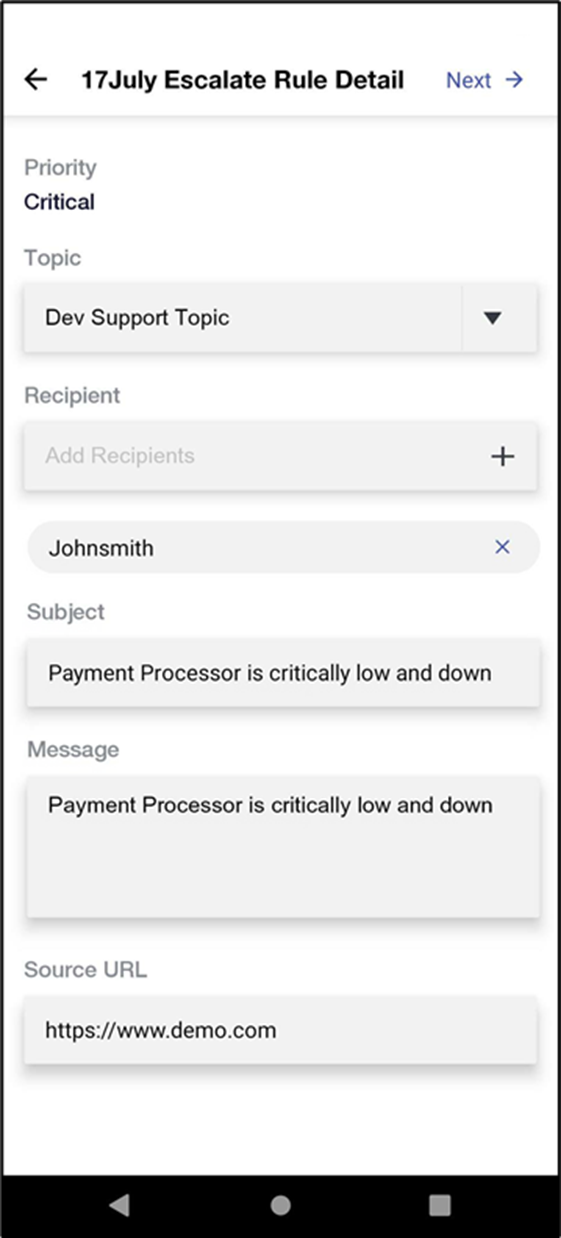
Once the escalation rule is selected, you can add an alert as follows
- Either select the Topic, or you can enter the Topic manually
- Add recipients (if you are using a topic with recipients assigned to it, then this step is unnecessary). You can add either Users or Groups.
- Enter Subject and Message text in the corresponding fields.
- Enter the Source Link and click Next the alert created successfully.
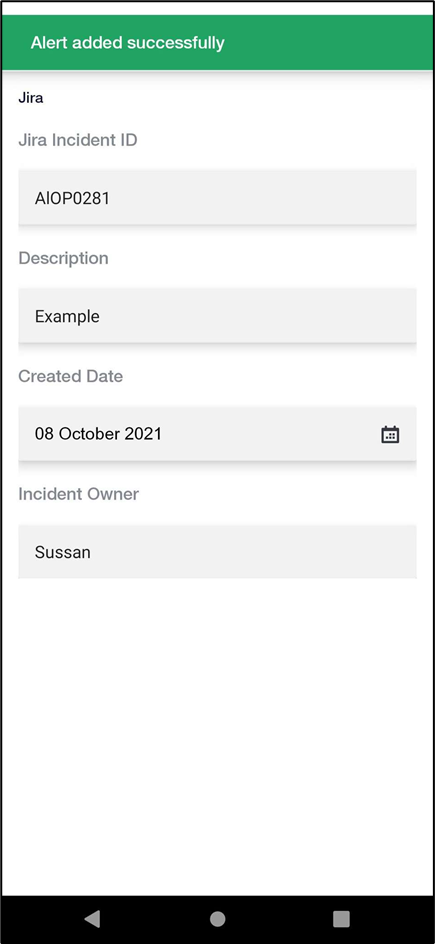
- Click Next button, the Custom Fields page appears as shown below
- Enter the Custom Fields details and Click Add button the alert is added successfully.
- The created alert will be listed in the Open Alerts screen under Mine Tab
Swipe a respective Open and assigned alerts from right side to left the alert, to Close, Assign and more.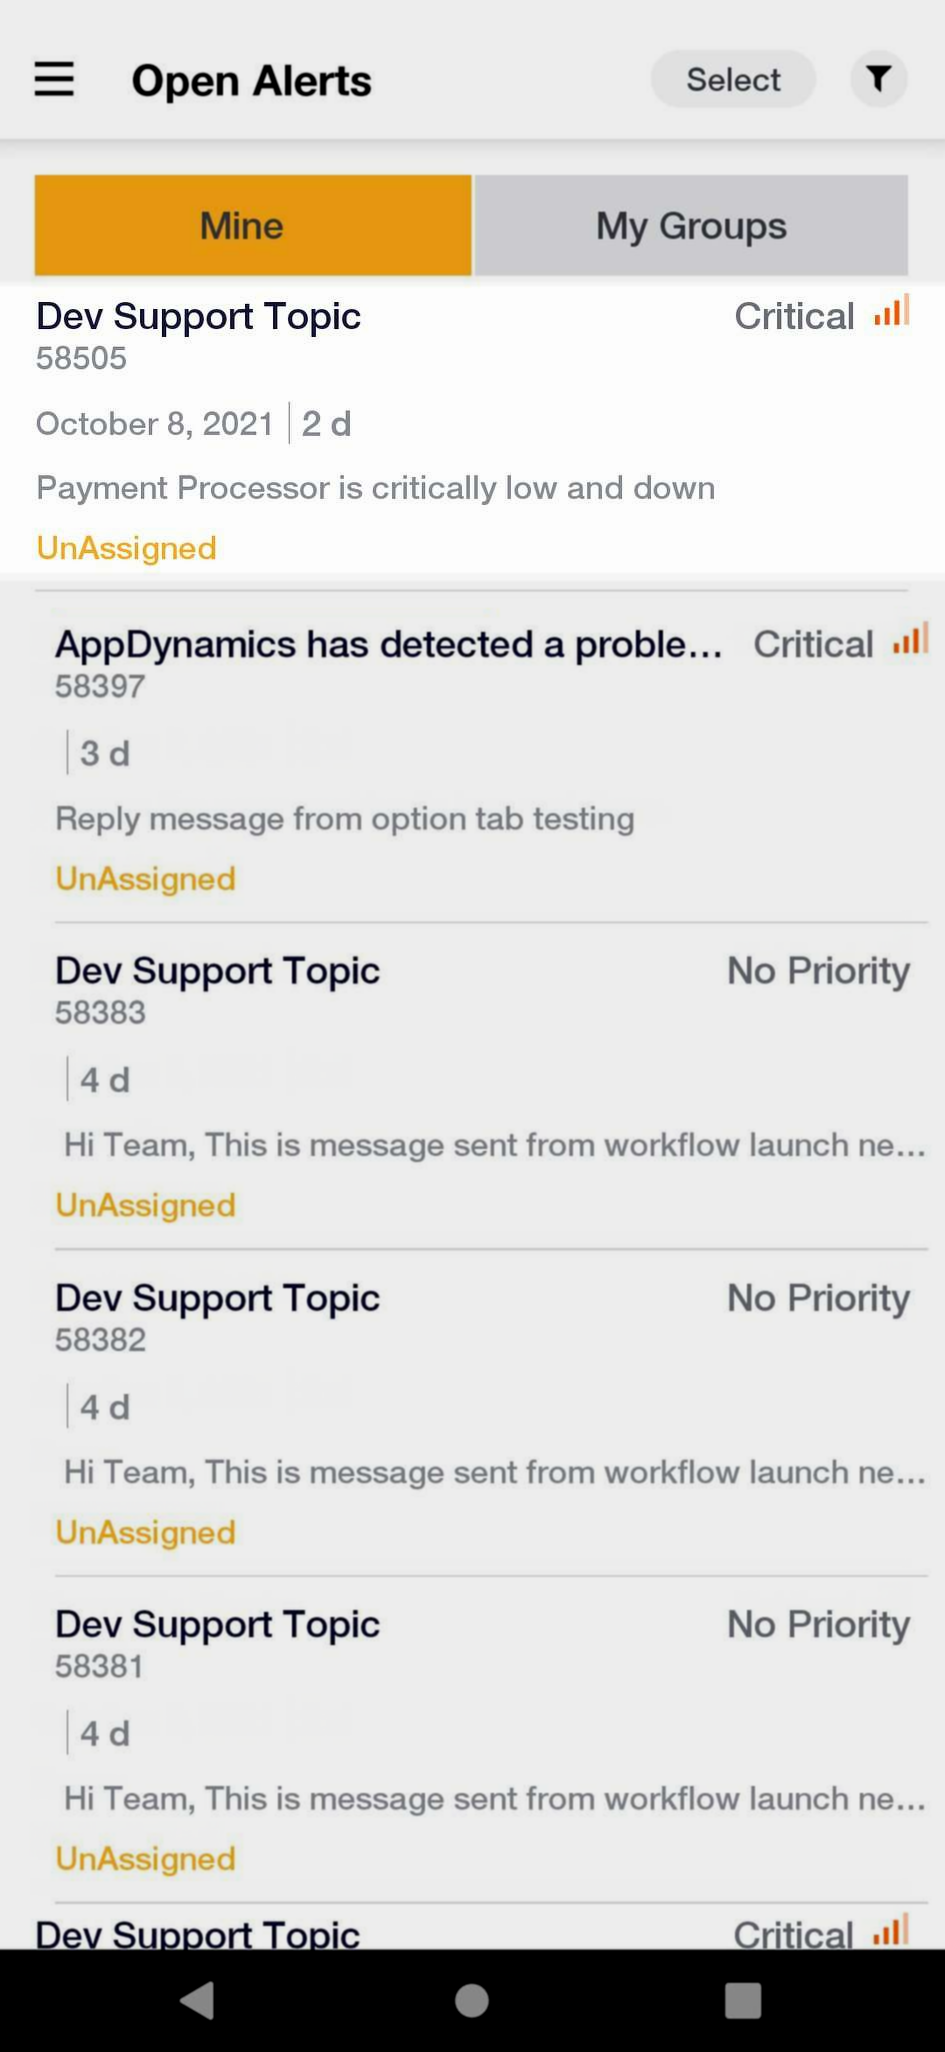
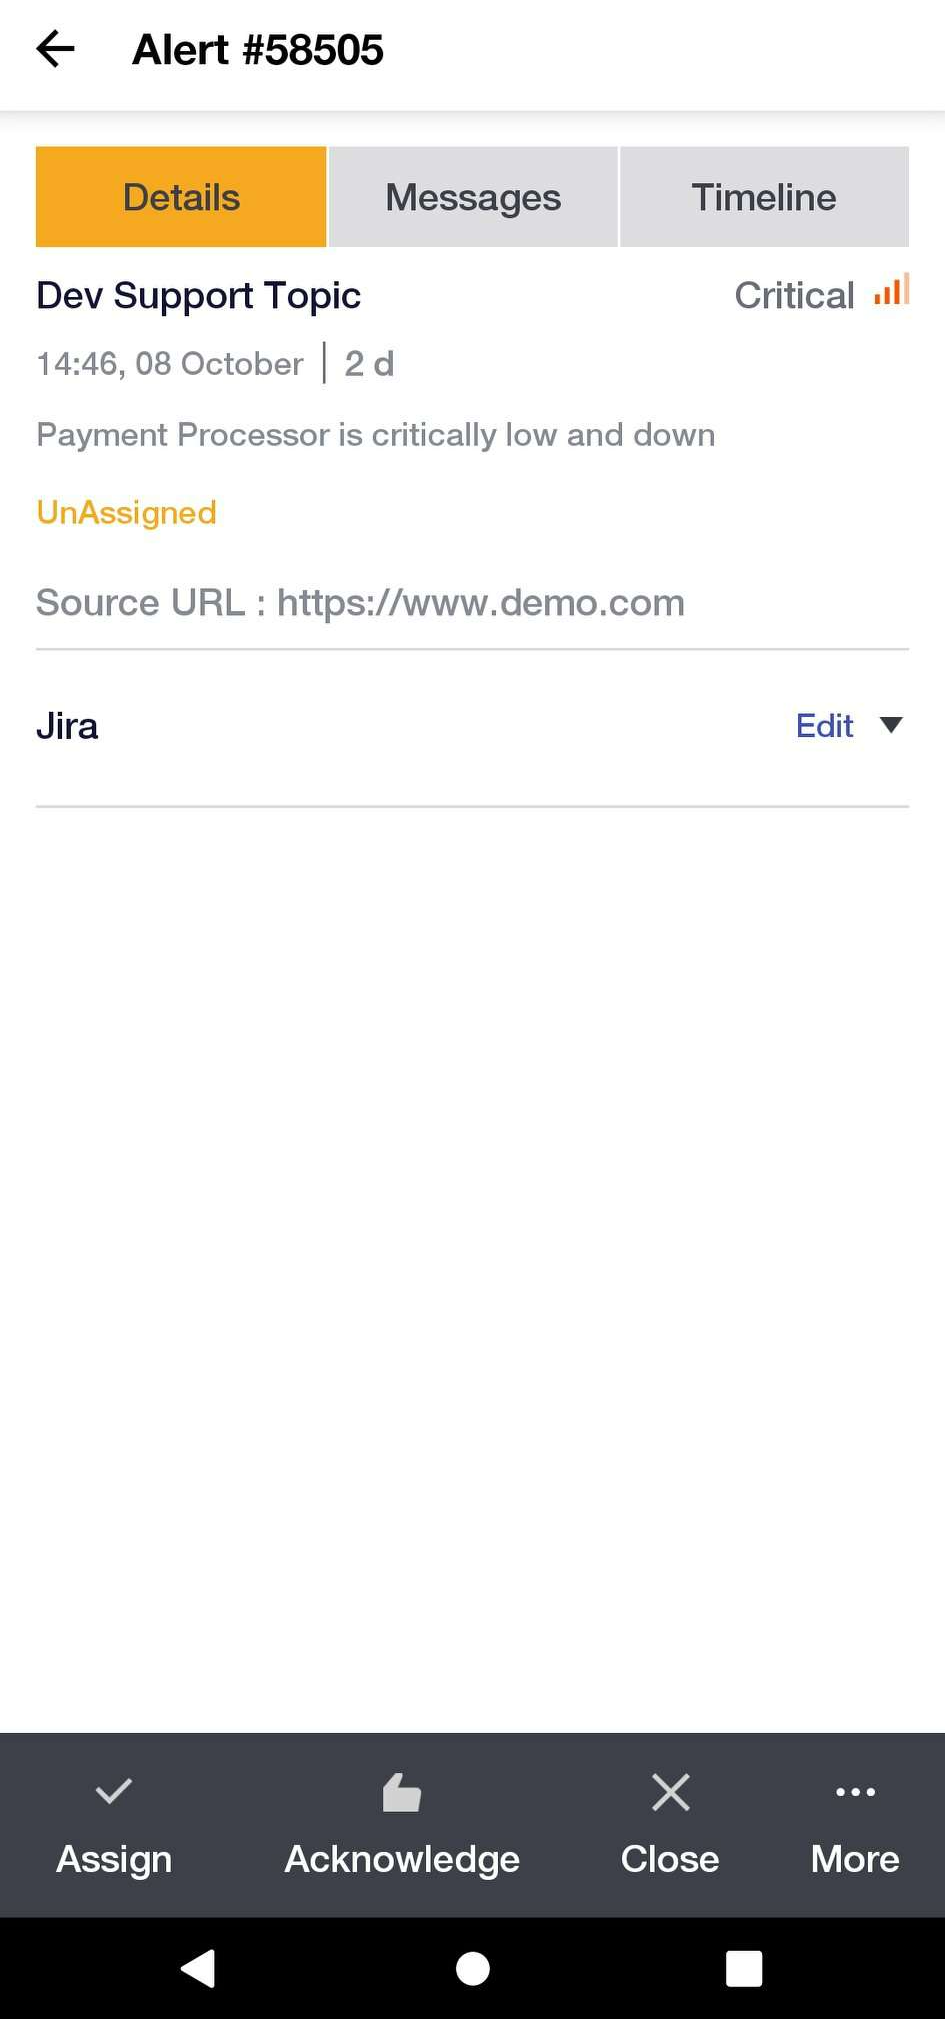

Open Alerts
When an alert is triggered, it will be in an Unassigned state. No user is designated as Owner. Notifications and Escalations will continue in the Open state
- You can view the following information for each Alert
Alert | Description |
Alert ID | The Alert identifier in AlertOps or an external system. |
Date and time | The time when Alert was initiated in AlertOps |
Summary & Description | The related information about the problem impacting the system. |
Owner Name | The first name, last name of the person currently in charge of the Alert. |
Priority or Severity |
Low: Minimal impact to a non-essential system or service; customers and users unlikely to experience any effects. Situation requires further monitoring. |
 Critical: Essential services are entirely unavailable; customers and users cannot access or perform most necessary operations. Service-level agreements are in jeopardy, and significant revenue loss is possible.
 High: Significant effect to essential systems or services; customers and users cannot access or perform some necessary operations. Service-level agreements may be in jeopardy, and financial loss is possible.
 Medium: Modest impact to one or more non-essential systems or services; customers may encounter certain difficulty in performing operations. Unlikely to affect service-level agreements or revenue.
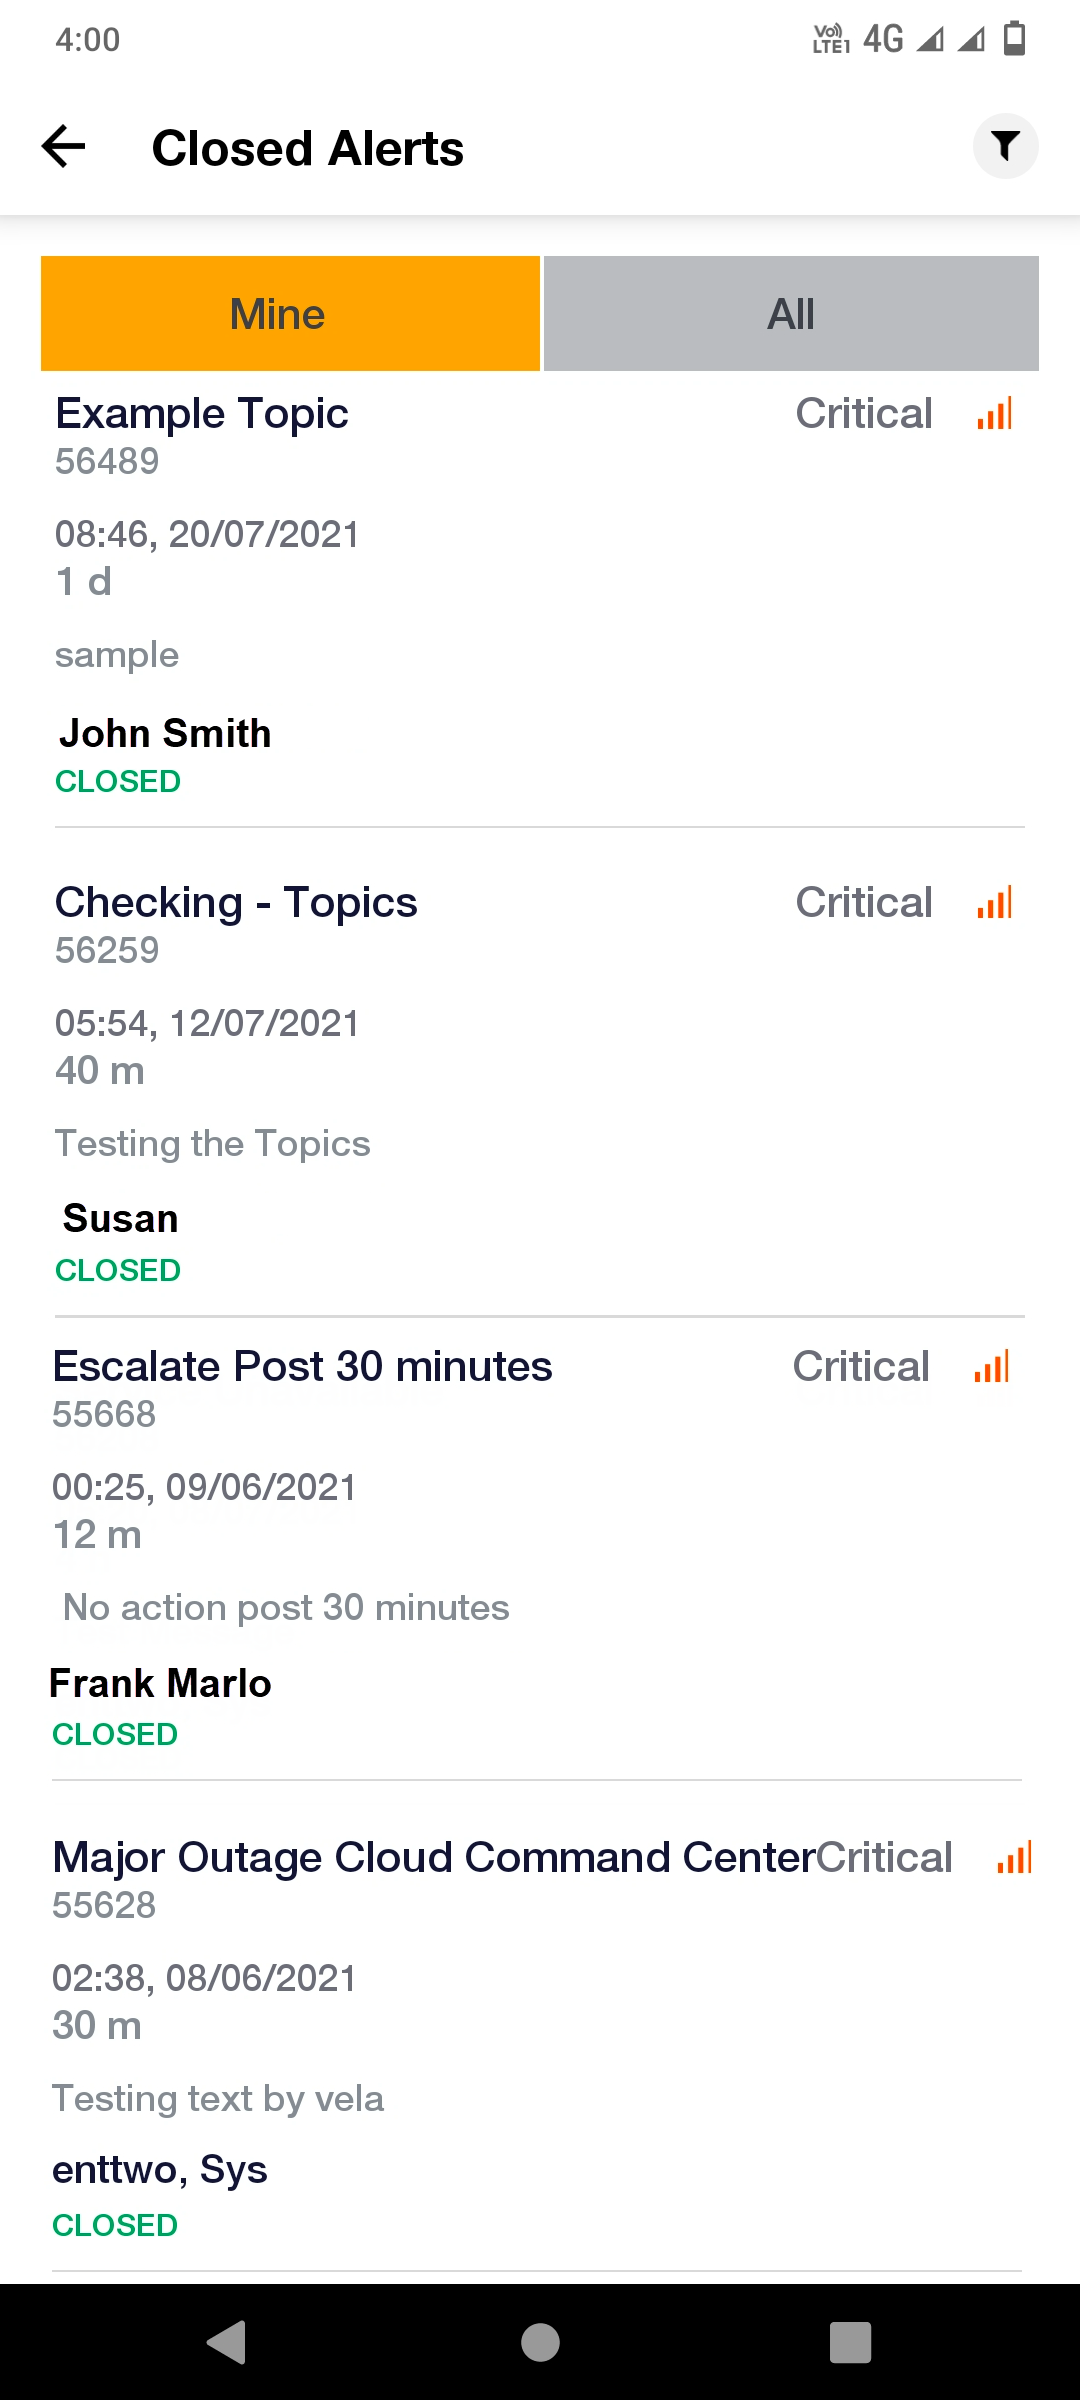
Closed Alerts
When an alert is resolved, it will be time-stamped with the close date. This event can trigger workflows.
Assigned Alerts
When an alert is assigned to a user, the user becomes the owner of the alert. When an alert is in the Assigned state, Escalations cease. Workflows can be triggered by assignment.

All Alerts
Users can use view all the alerts which are Open, Closed and assigned.
Push Notification Alerts
Push notifications are pop-up alerts on your mobile device that display the subject line of an incoming notification that is available in your mobile app inbox.
.png) | 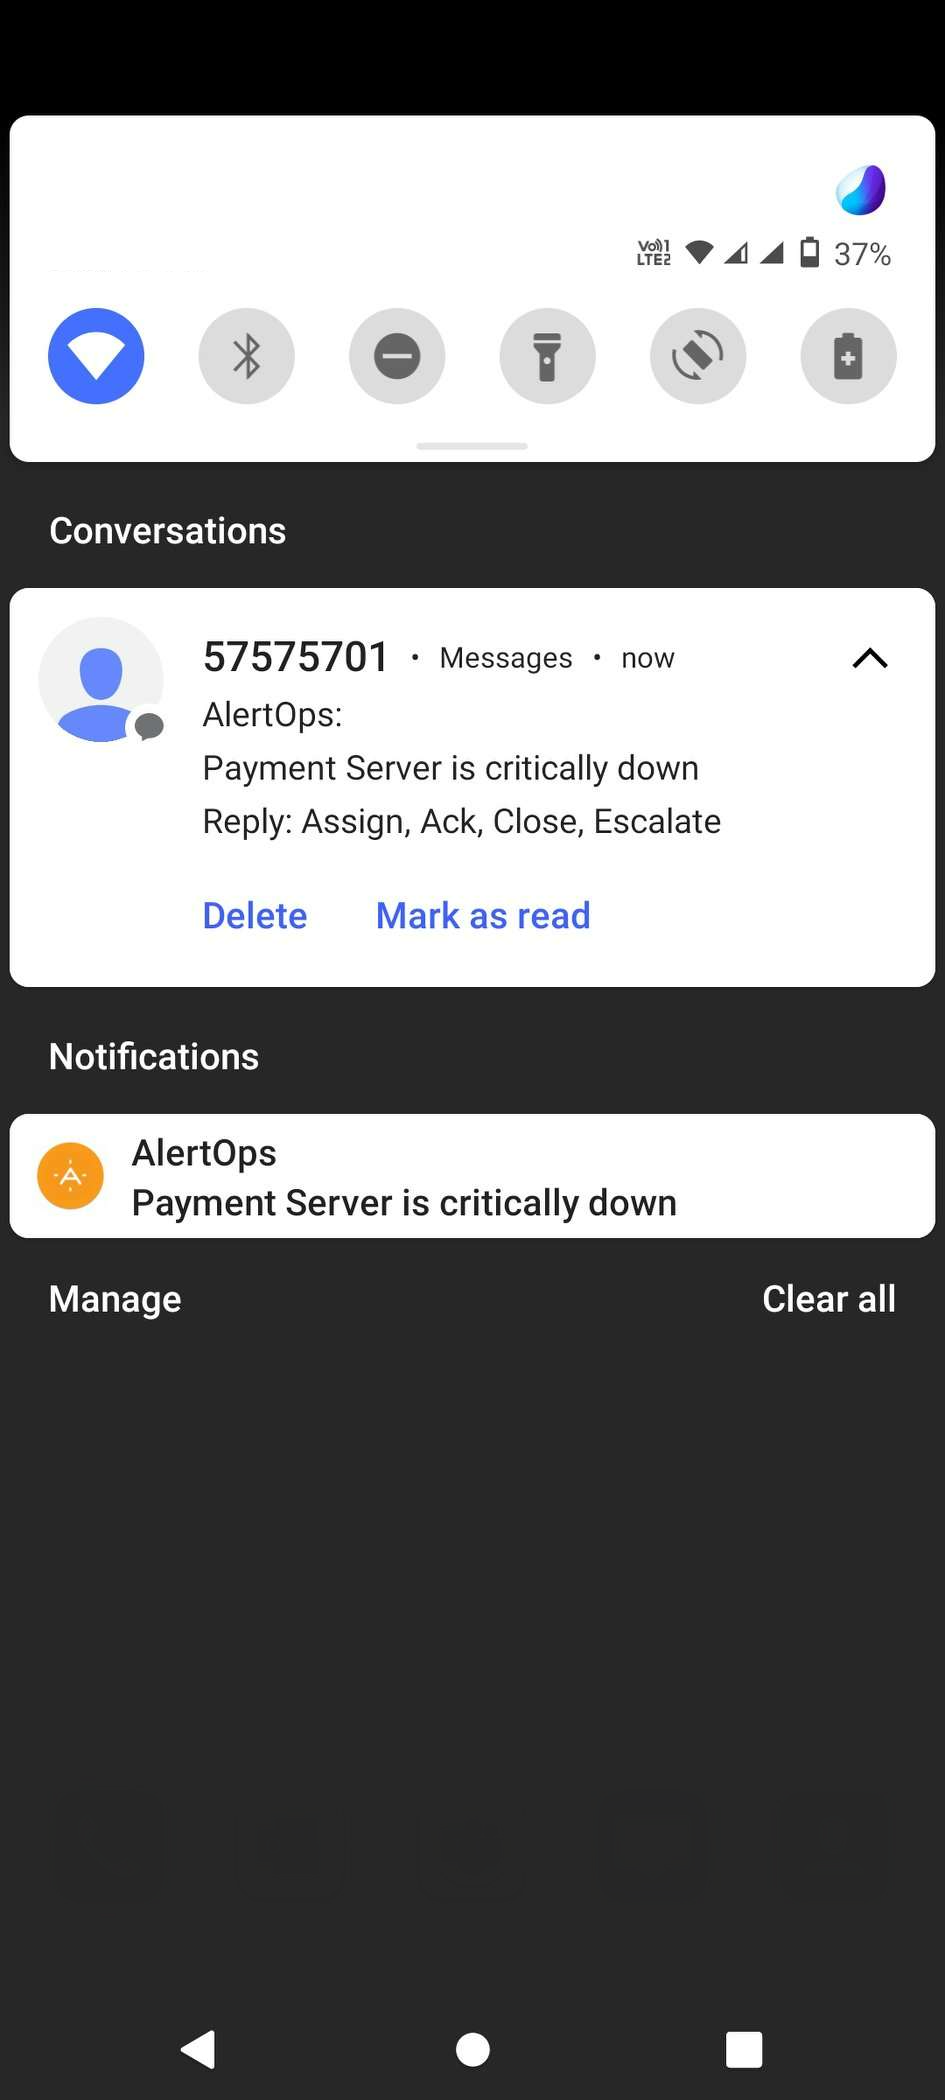 |
- Kindly ensure the AlertOps mobile app has push notifications enabled.
- Also ensure, your device settings allow notifications from the AlertOps Mobile app.
Response Actions:
When an alert is open, you can respond to it with different actions.
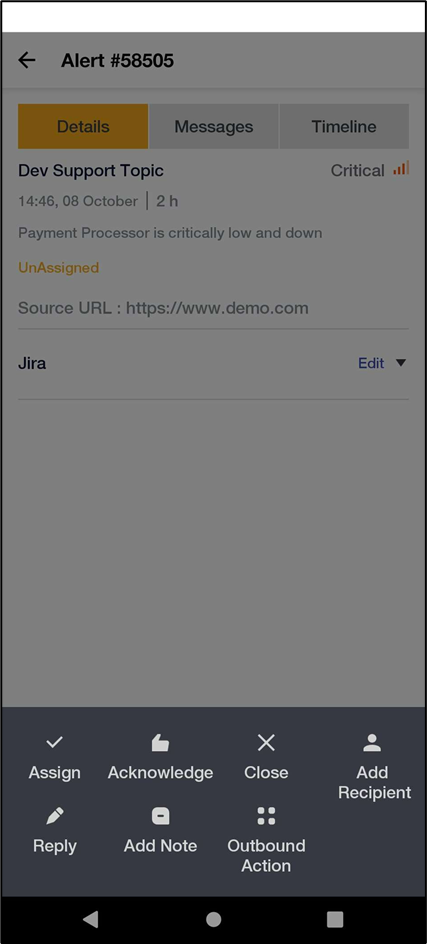
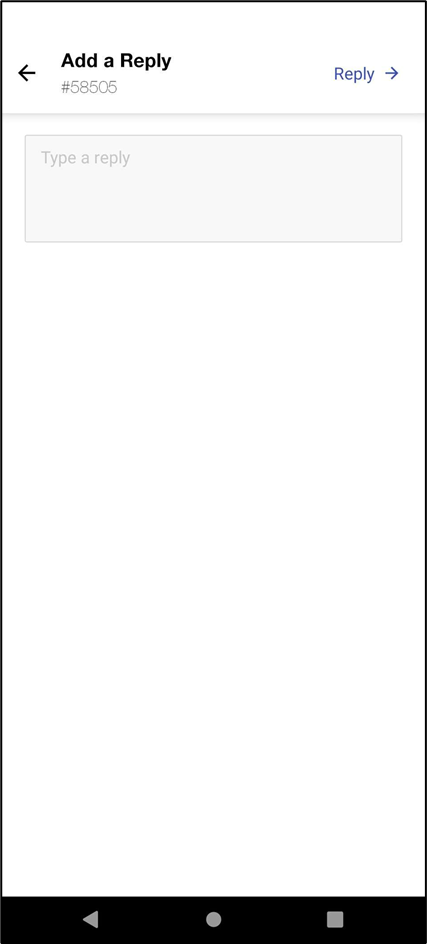
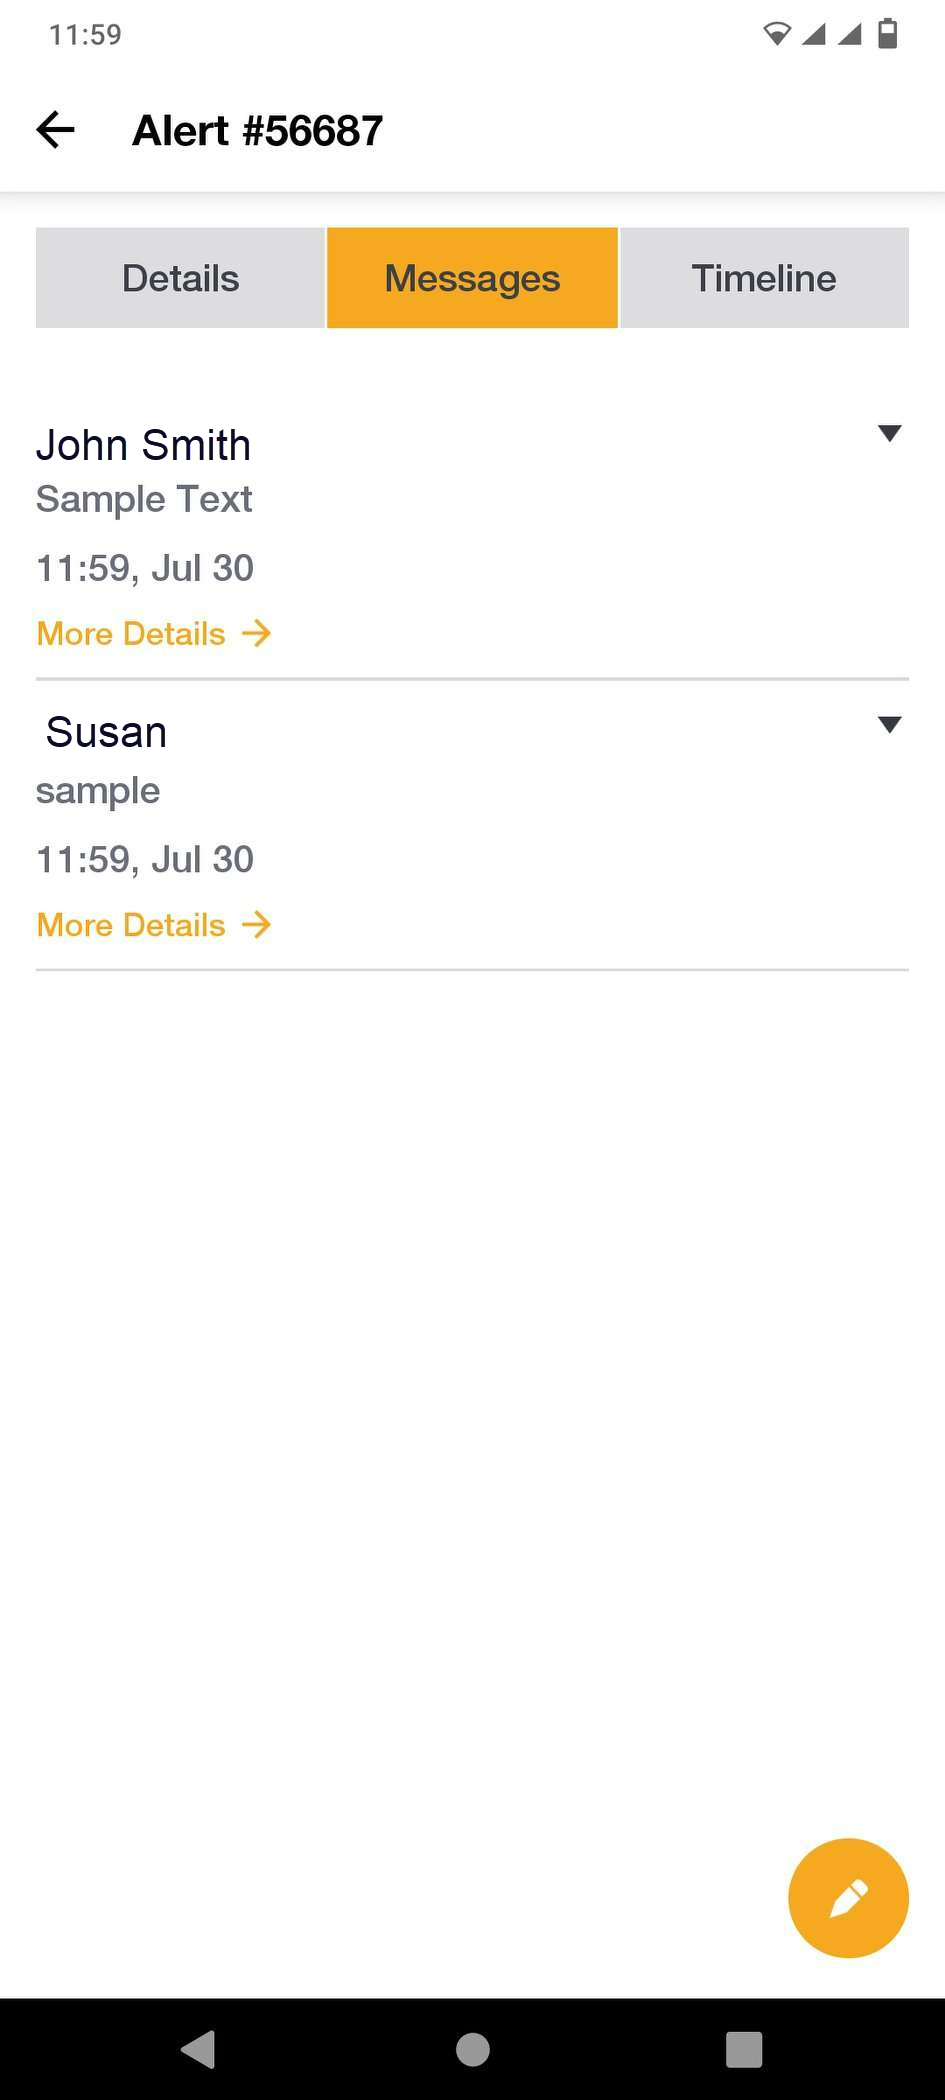
Reply to the Alert: You can reply to the alert. Replies will be delivered to other users by email or the mobile app.
- Assign: Take assignment of an alert and become its owner.
- Acknowledge: When you click on an alert to view it, your acknowledgement will be recorded.
- Close the Alert: Click Close the alert to close it. Enter the resolution text in the popup.
- Outbound Actions: Outbound Actions are a feature whereby any Method from an Outbound Integration, for a User to initiate on demand.
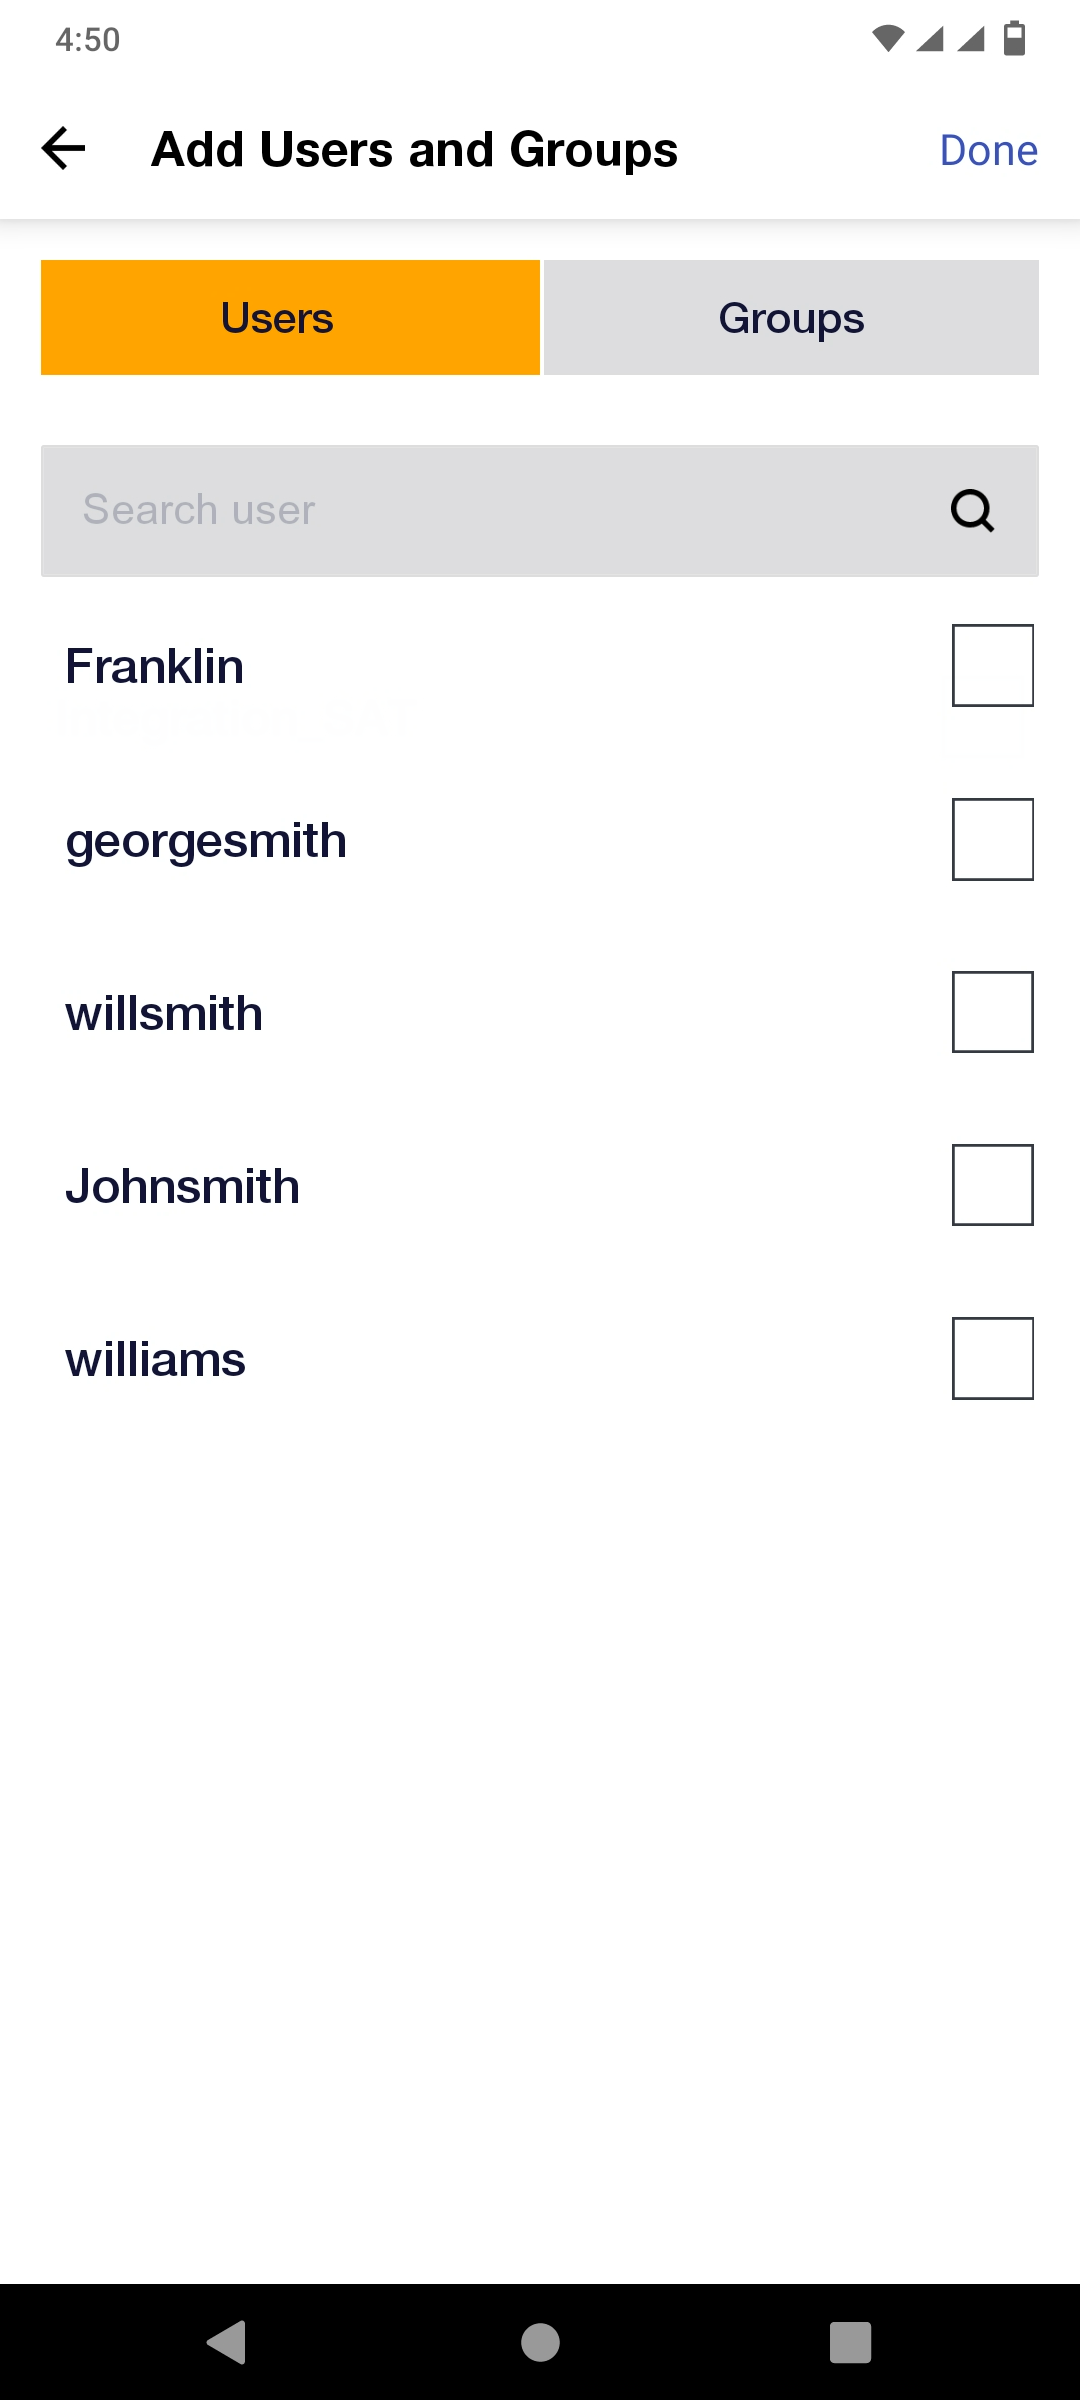
- Add Recipient: You can add others to the alert. Any User or Group you add to the alert will be notified using the same notification rule of the original message. Select the Users or Groups that you want to add and click Send.
Was this article helpful?