Custom API Integration
- 17 Jul 2023
- 3 Minutes to read
- Print
- DarkLight
- PDF
Custom API Integration
- Updated on 17 Jul 2023
- 3 Minutes to read
- Print
- DarkLight
- PDF
Article summary
Did you find this summary helpful?
Thank you for your feedback!
The InboundIntegrations_GlobalAccess entitlement is necessary for creation, update, and deletion of inbound e-mail, API, and chat integration templates in the environment. The user roles that have access to this entitlement include Owner, App Admin, and Integrations Admin.
AlertOps can integrate with a wide range of monitoring and help desk systems that support REST API functionality. With our custom API integration, you can quickly and easily connect AlertOps to your existing system. Follow the instructions below to get started and set up your custom API integration with AlertOps in no time.
Configure a Custom API Integration
- Click Configurations on the menu bar. Then select Integrations.
- From the Inbound Integrations section of the page, select API from the drop-down menu on the right. Then, click Add API in the top, right-hand corner.
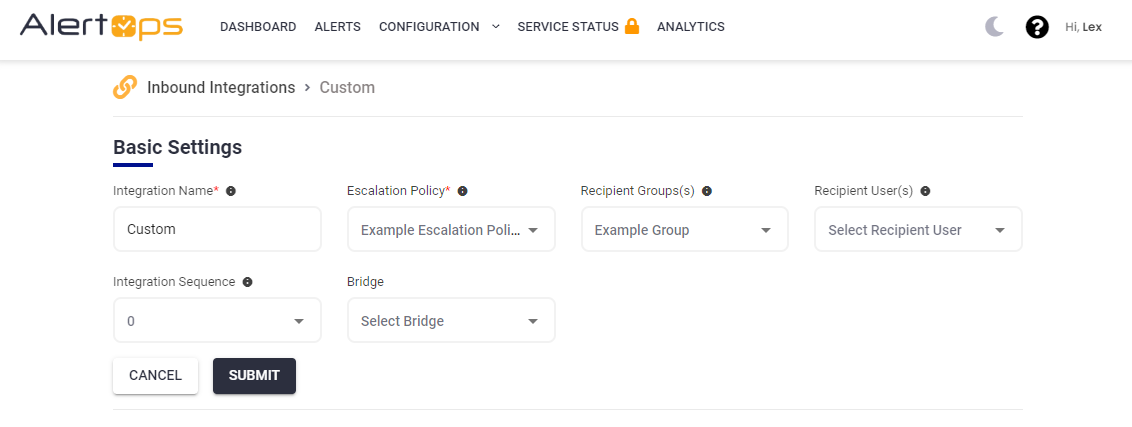
- On the API Integration screen select the Custom Integration from available integration templates.
- Name the integration. In this example we will set up a custom integration for a server monitoring system named ABC Monitoring.
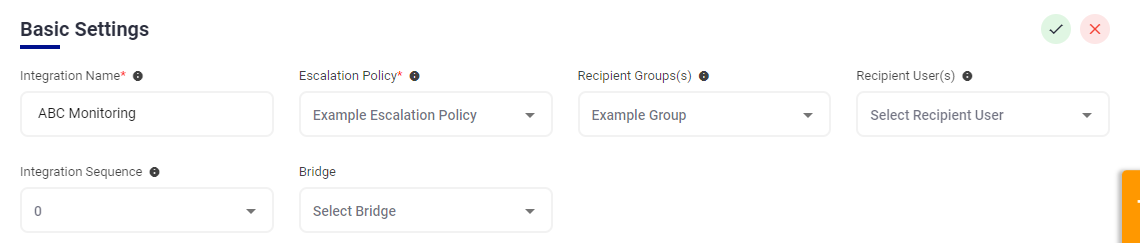
- From the API Integration set up page, select an Escalation Policy, Recipient Group or Recipient Users, and click the Submit button
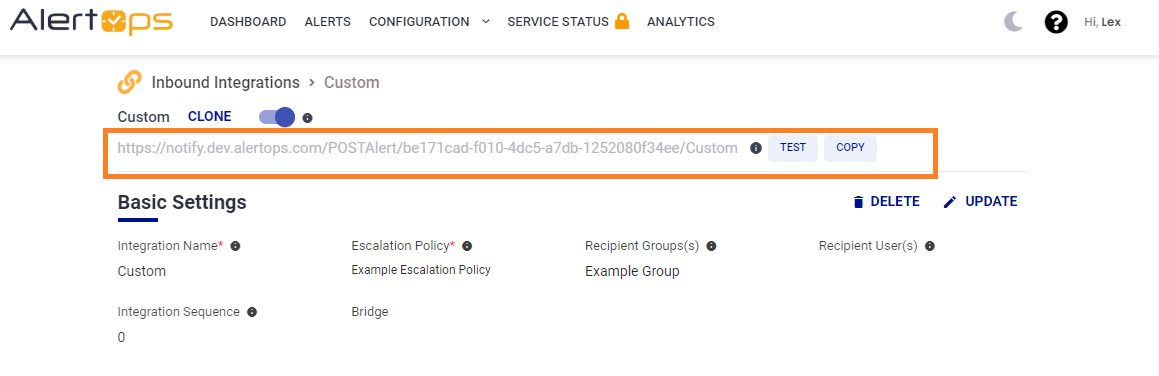
- Once saved, at the top of the Integration page, you can click the Copy button to paste the integration endpoint URL into a source tool.
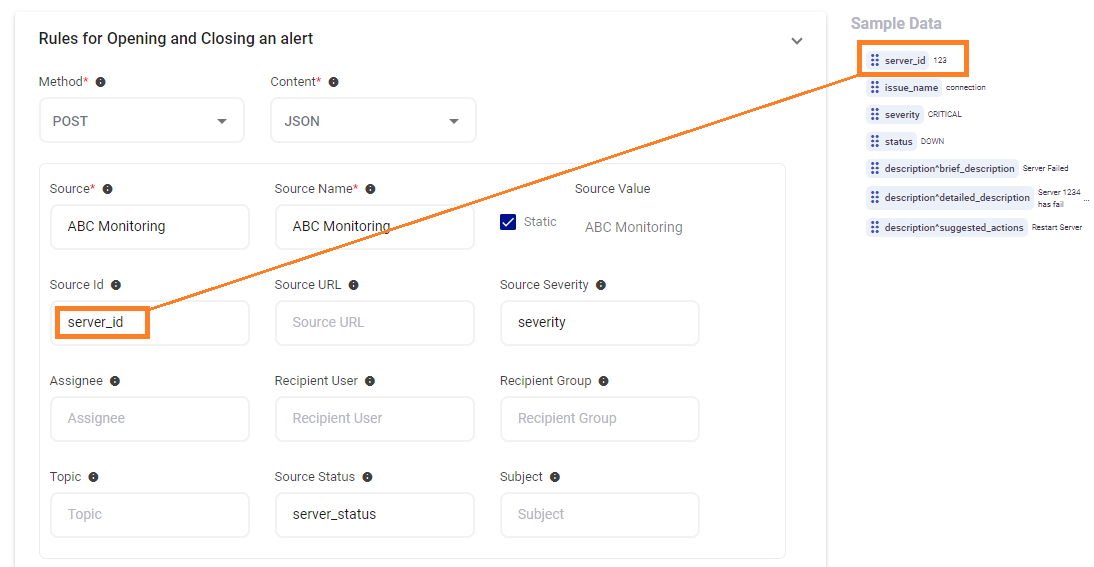
Rules for Opening and Closing an Alert
At the bottom of an Integration page, you will find an expandable list of Advanced Settings where you can make additional configurations for an integration by expanding Rules For Opening and Closing an Alert.
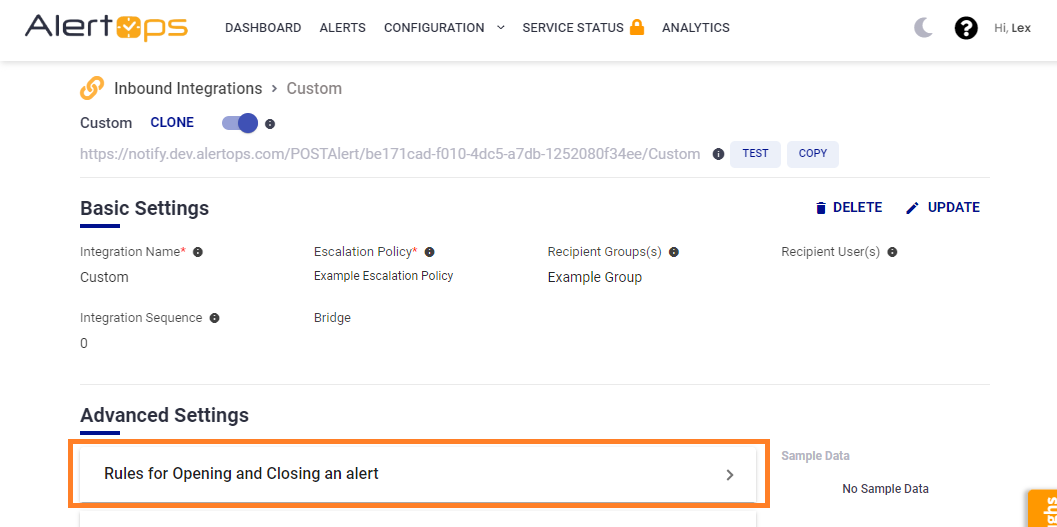
Here you must configure the Source, Source Name, Source Id, Source Status, and Status Control actions (Open, Close, and Update Alert) in order to produce alerts from your source tool.
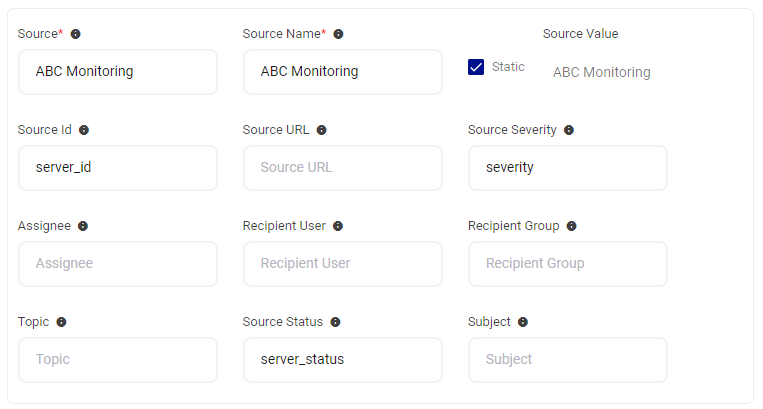
- Source - the "Source" field refers to the type or category of the integration or source itself. It represents the system, application, or service from which the alerts originate. For example, if you are integrating with an IT monitoring tool like Nagios or New Relic, you would specify "Nagios" or "New Relic" as the source. This also dictates what the integration URL will look like as well. In this integration URL, you can see the ABC Monitoring at the end of the URL:

- Source Id - The "source ID" refers to a unique identifier associated with a particular integration or source within the system. It is a numeric or alphanumeric value that uniquely identifies a specific source or integration. This is a Dynamic input field that comes directly from the JSON data sent through the API.
- Source Name - The "Source Name" field allows you to give a more descriptive and recognizable name to differentiate between different instances or setups of the same source. For example, if you have multiple Nagios instances, you can provide distinct source names like "Nagios Production" and "Nagios Development" to easily identify and manage them. This name can be static or dynamically pulled from a field being sent across the API.
- Source Status - The "Source Status" refers to the current operational status or state of a particular integration or source. It indicates whether the integration or source is active, inactive, or experiencing any issues. The Source Status can have different values depending on the system or platform. Some common source status values can include Active, Inactive, Open, or Closed.
These fields will require mapping to a particular value. This is most commonly a field that is referenced from the Incoming JSON. To learn more about configuring Rules for Opening and Closing an alert, visit Advanced Field Mapping.
Sample Data and API URL
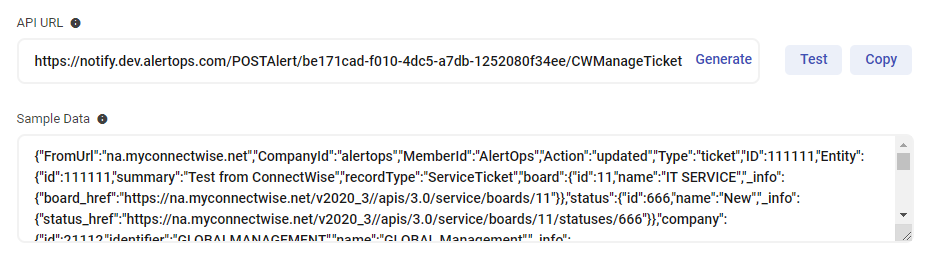
The API URL is the endpoint for the integration and is used to configure the webhook endpoint in your source system.
Sample Data can be used to store a sample JSON body for reference. You can also use the Sample Data to test your configuration. The Sample Data box allows you to store a sample of the JSON data used in this integration. Use this both as a reference and also for testing purposes. You can test your configuration using the Test URL button along with the sample data.
Once sample data has been pasted and saved in the Sample Data text area, the dynamic keys will be listed on the right and can be dragged and dropped into each text area.
If the value for Source changes, the API URL must be updated. To do this, click on GENERATE URL under URL Mapping after the source name has been changed and update the integration.
Was this article helpful?