Catchpoint
- 25 Mar 2022
- 1 Minute to read
- Print
- DarkLight
- PDF
Catchpoint
- Updated on 25 Mar 2022
- 1 Minute to read
- Print
- DarkLight
- PDF
Article summary
Did you find this summary helpful?
Thank you for your feedback!
Catchpoint
Catchpoint Integration Guide
Catchpoint is an intelligent monitoring platform that offers insight into customer-critical services to help organizations deliver consistent and superior user experiences. Integrate AlertOps’ alert management platform with Catchpoint to receive and respond to critical alerts through email, SMS, push notification, and phone alerts. AlertOps ensures that alerts received from Catchpoint always reach the correct, available team member by utilizing escalation policies and on-call schedules.
AlertOps Configuration
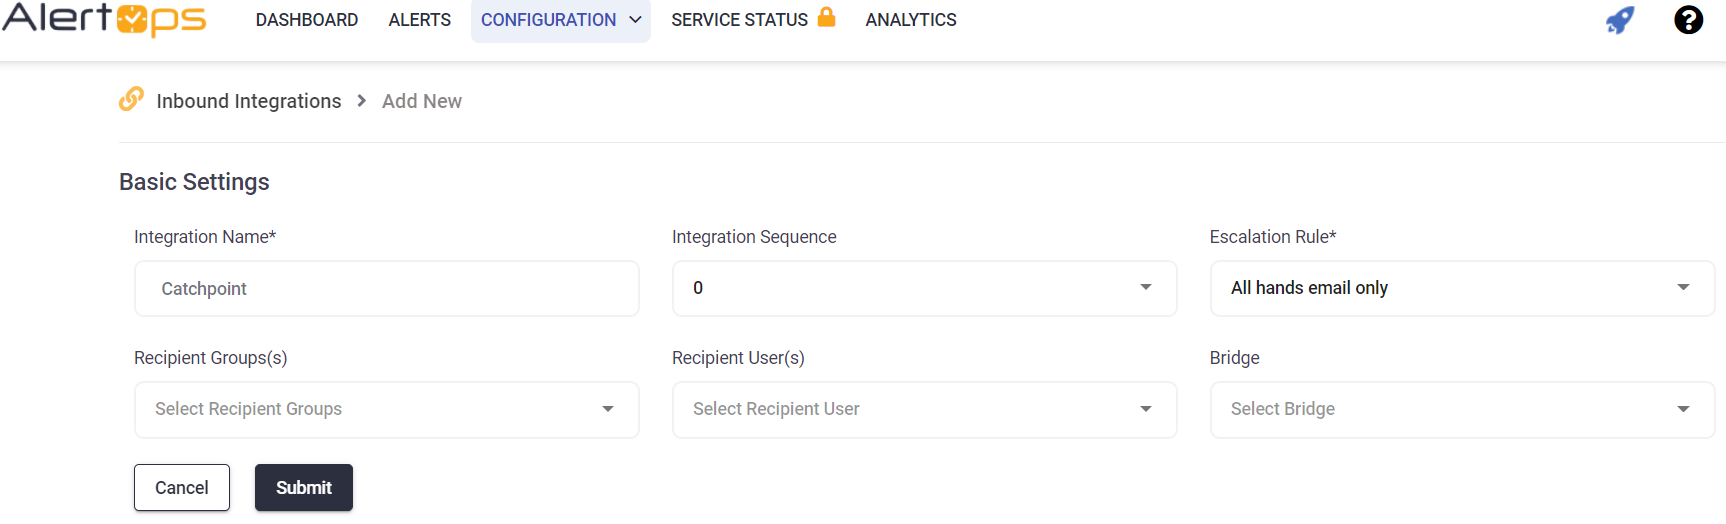
From the main menu, click on Integrations and then select Inbound Integrations from the sub menu.
- Select API tab
- Select the 'ADD API INTEGRATION' button, you should now be on the API Integration Detail page.
- Select Catchpoint from the pre-built Integration Templates.
- Enter a name for the integration.
- Select an escalation rule to determine the integration's escalation policy.
- Enter the names of recipient group(s) and recipient user(s).
- Click 'SAVE.' Then, click 'COPY URL' to copy the URL endpoint to be used in the Catchpoint configuration.
Catchpoint Configuration
Login to the Catchpoint Portal. Under Settings, click on API.
In the Alerts API section, paste in the AlertOps REST URL (from the Copy URL button).
Select the Format template and, then click Add New. You will be taken to the Edit Template window.
Give the Template a name and set the Format to JSON. Copy the template below into the Template box.
The following template, is recommended and certified by AlertOps:
{
“IncidentSourceName”:”Catchpoint – ${productId}”,
“IncidentSubject”:”${ProductName} – ${TestName}”,
“IncidentId”:”${ClientId}-${testid}”,
“IncidentStatus”:”${switch(${notificationLevelId},’0′,’WARNING’,’1′,’CRITICAL’,’3′,’OK’)}”,
“IncidentSeverity”:”${switch(${notificationLevelId},’0′,’WARNING’,’1′,’CRITICAL’,’3′,’OK’)}”,
“IncidentURL”:”http://portal.catchpoint.com”,
“IncidentShortText”:”${TestName} – ${switch(${notificationLevelId},’0′,’WARNING’,’1′,’CRITICAL’,’3′,’OK’)}”,
}
Step 5: The JSON string can include Catchpoint Alert API Macros that will allow you to customize alert content.
Data Sample – Create an alert.
{
“IncidentSourceName”:”PROD Server 1″,
“IncidentSubject”:”Server CPU Alert”,
“IncidentId”:”1527895AF1235DE”,
“IncidentStatus”:”PROBLEM”,
“IncidentSeverity”:”CRITICAL”,
“IncidentURL”:”http://myaccount.catchpoint.com/incidents”,
“IncidentShortText”:”The server CPU status is PROBLEM”,
“IncidentLongText”:”The Server Status for rule # 10576 is PROBLEM state. CPU utilization exceeds threshold.”,
“IncidentAssignee”:”georgeusername”
}
Data Sample – Close an alert.
{
“IncidentSourceName”:”PROD Server 1″,
“IncidentSubject”:”Server CPU Alert”,
“IncidentId”:”1527895AF1235DE”,
“IncidentStatus”:”OK”,
“IncidentSeverity”:”CRITICAL”,
“IncidentURL”:”http://myaccount.catchpoint.com/incidents”,
“IncidentShortText”:”The server CPU status is OK”,
“IncidentLongText”:”The Server Status for rule # 10576 has transitioned to OK status.”,
“IncidentAssignee”:”georgeusername”
}
A full list of the Alert API Macros can be found here.
Click here to view advanced integration options.
Alert Triggering Information
AlertOps will automatically create an incident when a new alert is received from Catchpoint with an IncidentStatus status of “CRITICAL.”
If an alert with status “CRITICAL” matches an existing Open Alert, AlertOps will recognize the new alert as a duplicate and ignore the alert. The alert will be recorded in the Inbound Messages table as “Mapped Appended.”
AlertOps will automatically close the same incident when an alert with an IncidentStatus status “OK” is received.
Testing and Troubleshooting
Click here to read about Web API Testing and Troubleshooting.
Was this article helpful?