Autotask Inbound 2025
- 05 Mar 2025
- 1 Minute to read
- Print
- DarkLight
- PDF
Autotask Inbound 2025
- Updated on 05 Mar 2025
- 1 Minute to read
- Print
- DarkLight
- PDF
Article summary
Did you find this summary helpful?
Thank you for your feedback!
Configuring Email-Based Autotask Inbound Integration
Step 1: Set Up Email Integration in AlertOps
- Log into AlertOps:
- Navigate to your AlertOps dashboard.
- Access Integrations:
- Go to Configuration > Integrations from the main menu.
- Add a New Email Integration:
- Click +ADD EMAIL under the Inbound Integrations section.
- Set a descriptive name, such as "Autotask Email Integration."
- Configure the integration to parse incoming emails for alerts:
- Use rules to match specific patterns in the email subject or body.
- Ensure the email integration captures key ticket details, like ticket ID, status, priority, and description.
- Be sure to enable the integration before moving on.
- Save the integration and note the unique email address provided (e.g., autotask-alertops@yourcompany.alertops.com).
- Test the Email Integration:
- Send a test email to the provided AlertOps email address to verify that an alert is generated.
Step 2: Configure Workflow Rules in Autotask
- Log into Autotask:
- Navigate to your Autotask dashboard.
- Access Workflow Rules:
- Go to Admin > Automation > Workflow Rules >Workflow Rules.
- Create a New Workflow Rule:
- Click New to create a new workflow rule and a workflow dialog box will appear.
- Name the Workflow "AlertOps Email Workflow"
- In the Events section, define the trigger for the rule:
- Select "Ticket" from the Entity dropdown.
- Check the box for "Created by" and leave the value as "Anyone".
- Check the box for "Edited by" and leave the value as "Anyone".
- Add any necessary conditions.
- You may add conditions for this workflow here, but the rest of this guide will walk you through defining conditions in AlertOps.
- Set the Notification Action:
- Select the Notification tab.
- In the Recipients section, find the Other Emails text box and add the AlertOps integration email address (from Step 1) as a recipient.
- In the Notification section find the Notification Template options.
- Click the plus (+) symbol to the right of the dropdown to create a custom template for the email to be sent to AlertOps.
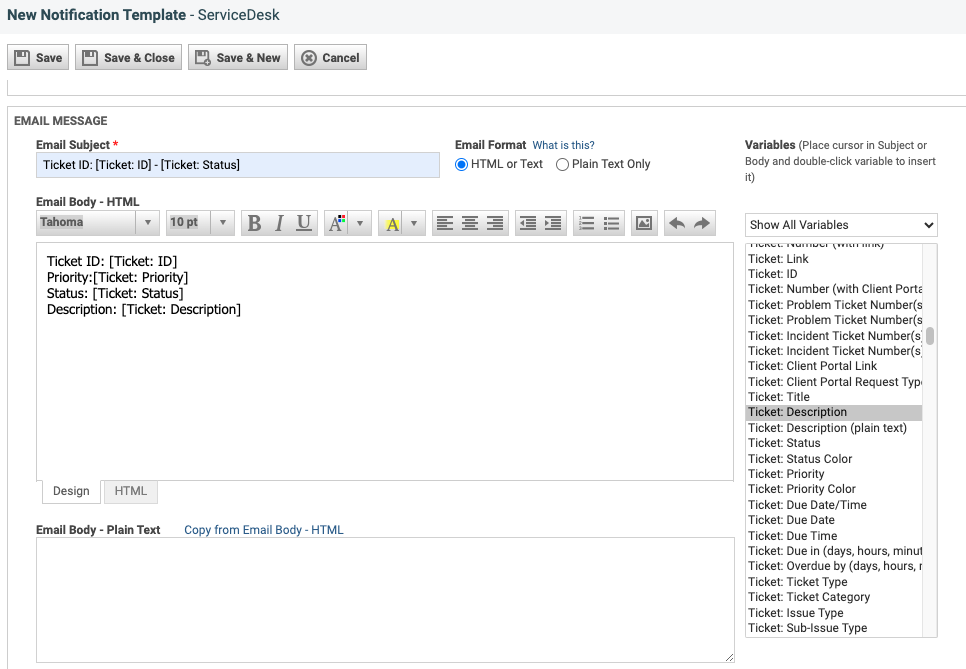
- In the New Notification Template pop-up, name the notification template and find the Email Message section.
- Here you can customize the email subject and body to include key ticket details you want to send to AlertOps. This template can also be used later in AlertOps integration advanced settings.
- Save and Close the New Notification Template.
- Activate the Workflow Rule:
- Activate and Save the New Workflow rule.
- Test the Workflow Rule:
- Create or update a ticket in Autotask to trigger the workflow.
- Verify that an email is sent to AlertOps and generates an alert.
Was this article helpful?