AppDynamics
- 25 Mar 2022
- 1 Minute to read
- Print
- DarkLight
- PDF
AppDynamics
- Updated on 25 Mar 2022
- 1 Minute to read
- Print
- DarkLight
- PDF
Article summary
Did you find this summary helpful?
Thank you for your feedback!
AppDynamics Integration Guide
AppDynamics is an all-in-one web application performance tool that measures efficiency and offers real-user monitoring for the entire IT infrastructure. Integrate AlertOps’ alert management platform with AppDynamics to receive and respond to critical alerts through email, SMS, push notification, and phone alerts. AlertOps ensures that alerts received from AppDynamics always reach the correct, available team member by utilizing escalation policies and on-call schedules.
AlertOps Configuration
- Navigate to Configuration àIntegrations àAdd API Integration, the corresponding API Integration Detail page opens
- Select AppDynamics from the pre-built Integration Templates.
- Enter a name for the integration. Select an escalation rule to determine the integration's escalation policy.
- Enter the names of recipient group(s) and recipient user(s).
- Click 'SAVE.' then, click 'COPY URL' to copy the URL endpoint to be used in the AppDynamics configuration.

AppDynamics Configuration
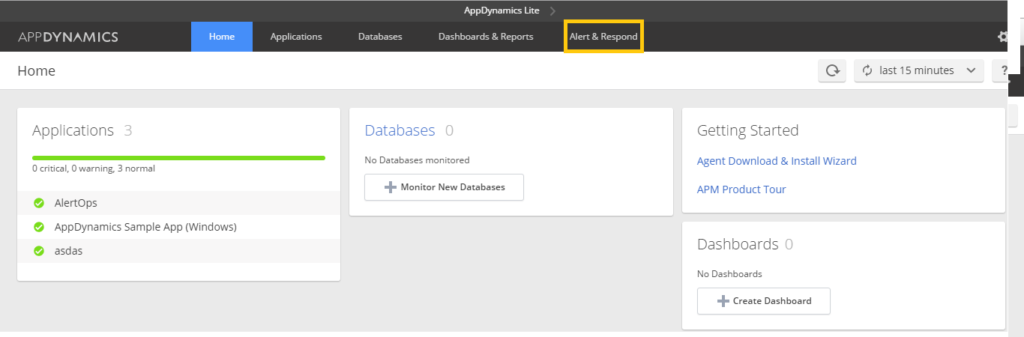
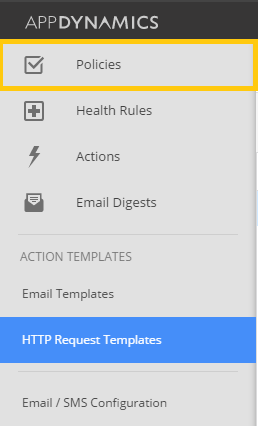
Step 1: In AppDynamics, click on the Alert & Respond tab.
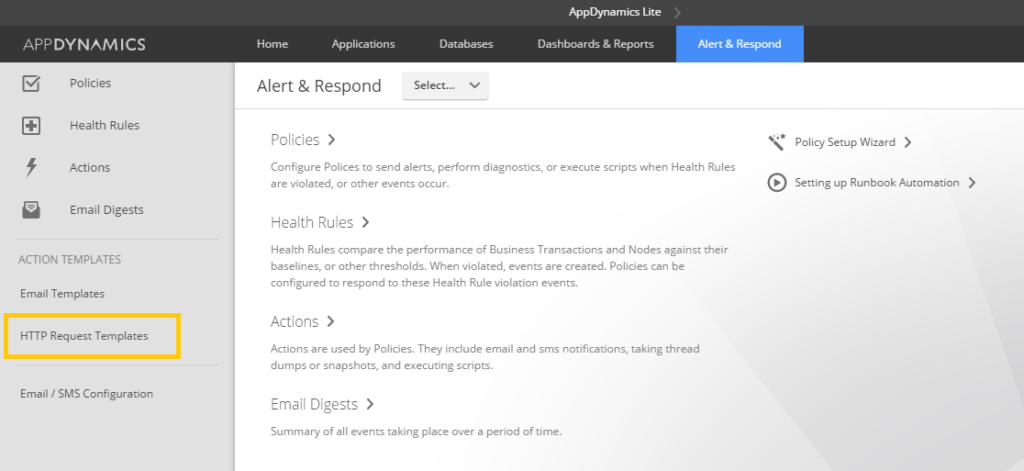
Step 2: Select the HTTP Request Templates tab.
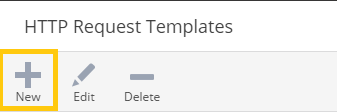
Step 3: Create a new HTTP Request template.
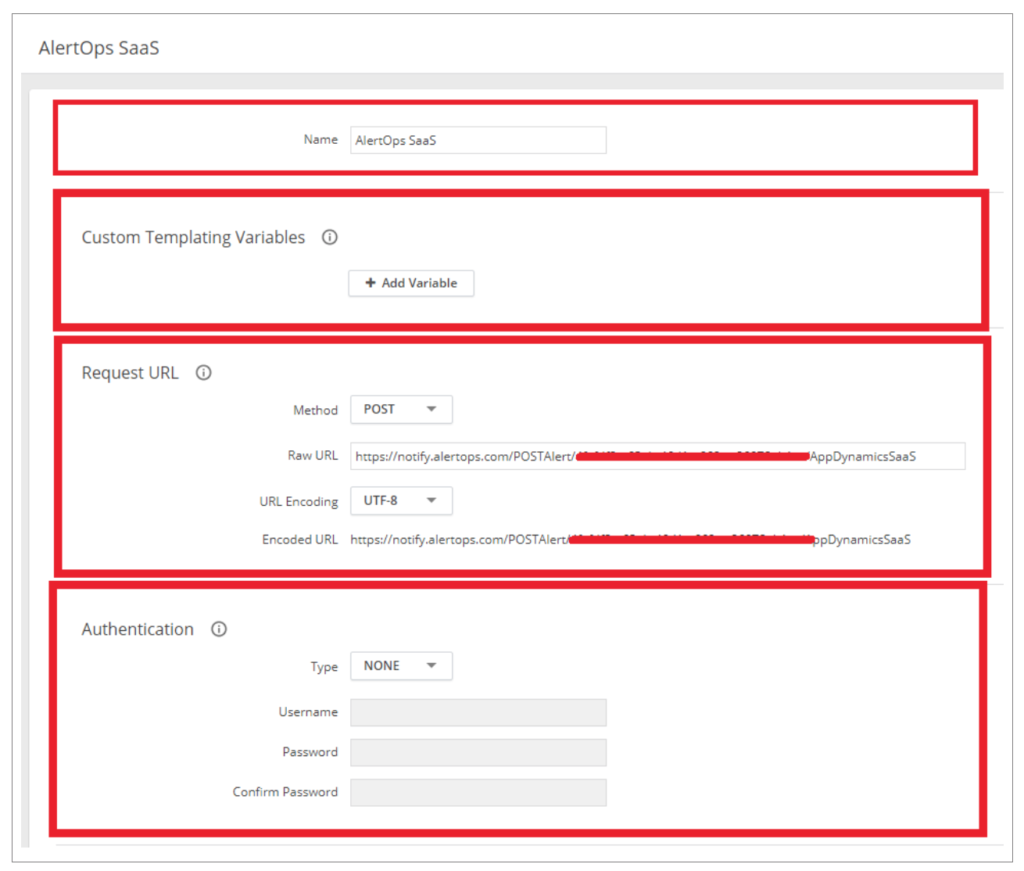
Step 4: Fill out the necessary information, while creating any necessary custom template variables.
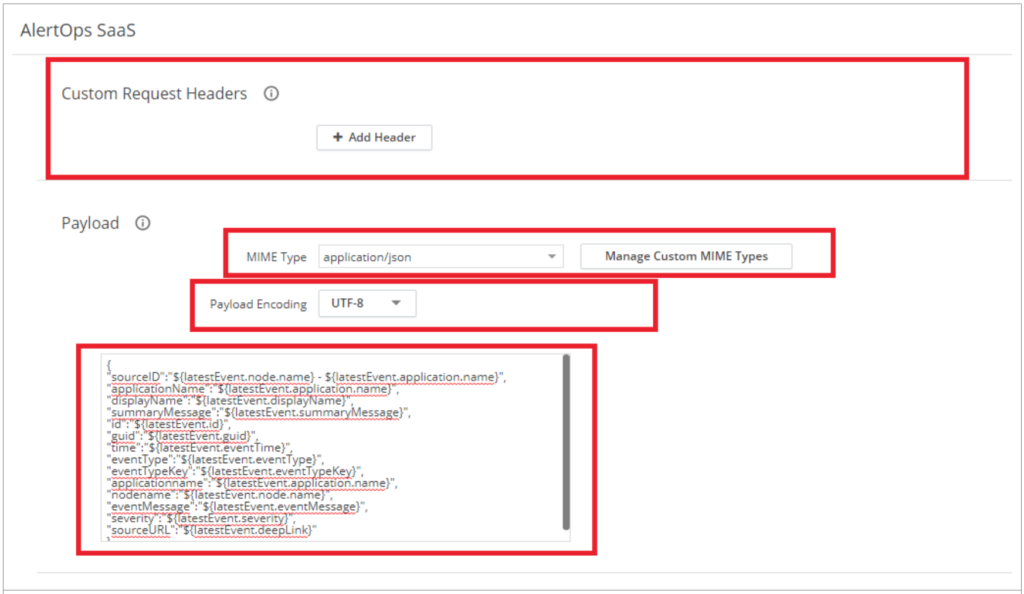
Payload Body
{
"sourceID":"${latestEvent.node.name} - ${latestEvent.application.name}",
"applicationName":"${latestEvent.application.name}",
"displayName":"${latestEvent.displayName}",
"summaryMessage":"${latestEvent.summaryMessage}",
"id":"${latestEvent.id}",
"guid":"${latestEvent.guid}",
"time":"${latestEvent.eventTime}",
"eventType":"${latestEvent.eventType}",
"eventTypeKey":"${latestEvent.eventTypeKey}",
"applicationname":"${latestEvent.application.name}",
"nodename":"${latestEvent.node.name}",
"eventMessage":"${latestEvent.eventMessage}",
"severity":"${latestEvent.severity}",
"sourceURL":"${latestEvent.deepLink}"
}
Step 5: Test and save the integration.
Step 6: Go to the Policies tab.
Step 7: Create a new policy.
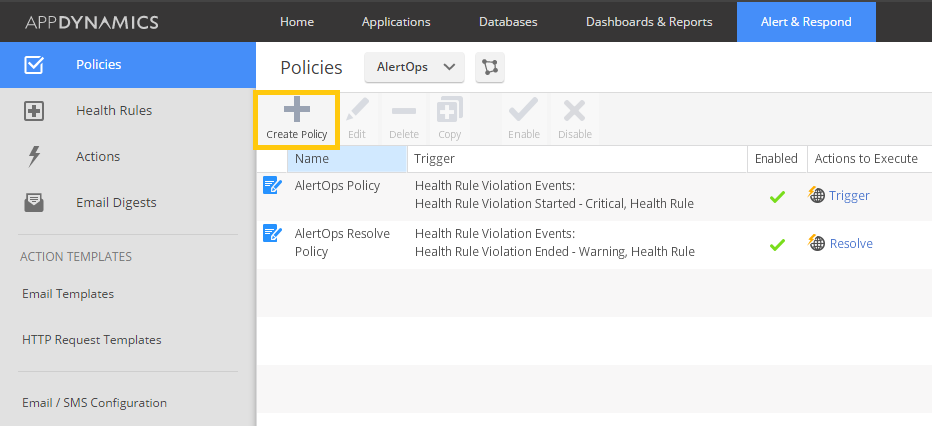
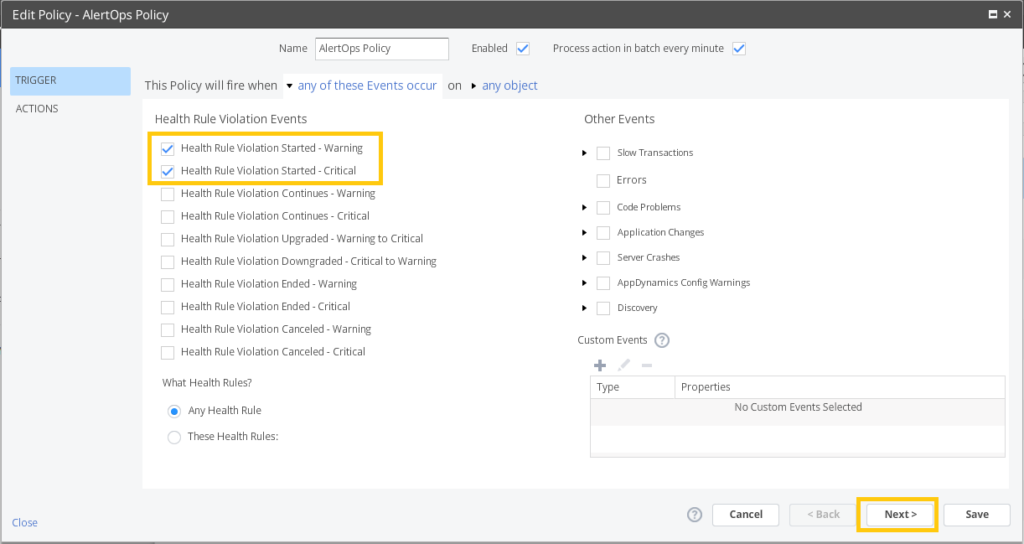
Step 8: Enter the correct Health Rule Violation Events and press Next.
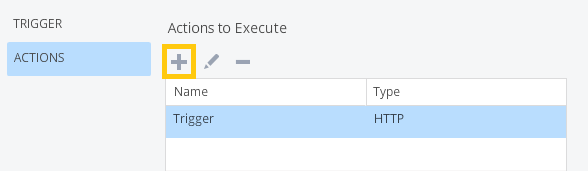
Step 9: In the actions tab, add a new action.
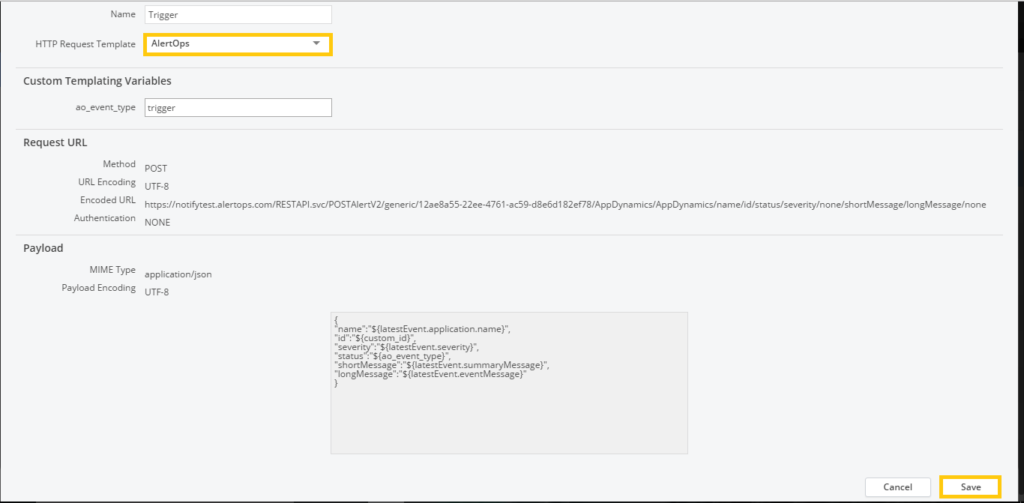
Step 10: Set the request template and then save the policy.
Alert Triggering Information
AlertOps will automatically create an incident when a new alert is received from AppDynamics with an IncidentStatus status of “Trigger.”
If an alert with status “Trigger” matches an existing Open Alert, AlertOps will recognize the new alert as a duplicate and ignore the alert. The alert will be recorded in the Inbound Messages table as “Mapped Appended.”
AlertOps will automatically close the same incident when an alert with an IncidentStatus status “Resolve” is received.
Testing and Troubleshooting
Click here to read about Web API Testing and Troubleshooting.
Was this article helpful?