API Integration Advanced Settings
- 18 Nov 2025
- 8 Minutes to read
- Print
- DarkLight
- PDF
API Integration Advanced Settings
- Updated on 18 Nov 2025
- 8 Minutes to read
- Print
- DarkLight
- PDF
Article summary
Did you find this summary helpful?
Thank you for your feedback!
The InboundIntegrations_GlobalAccess entitlement is necessary for creation, update, and deletion of inbound e-mail, API, and chat integration templates in the environment. The user roles that have access to this entitlement include Owner, App Admin, and Integrations Admin.
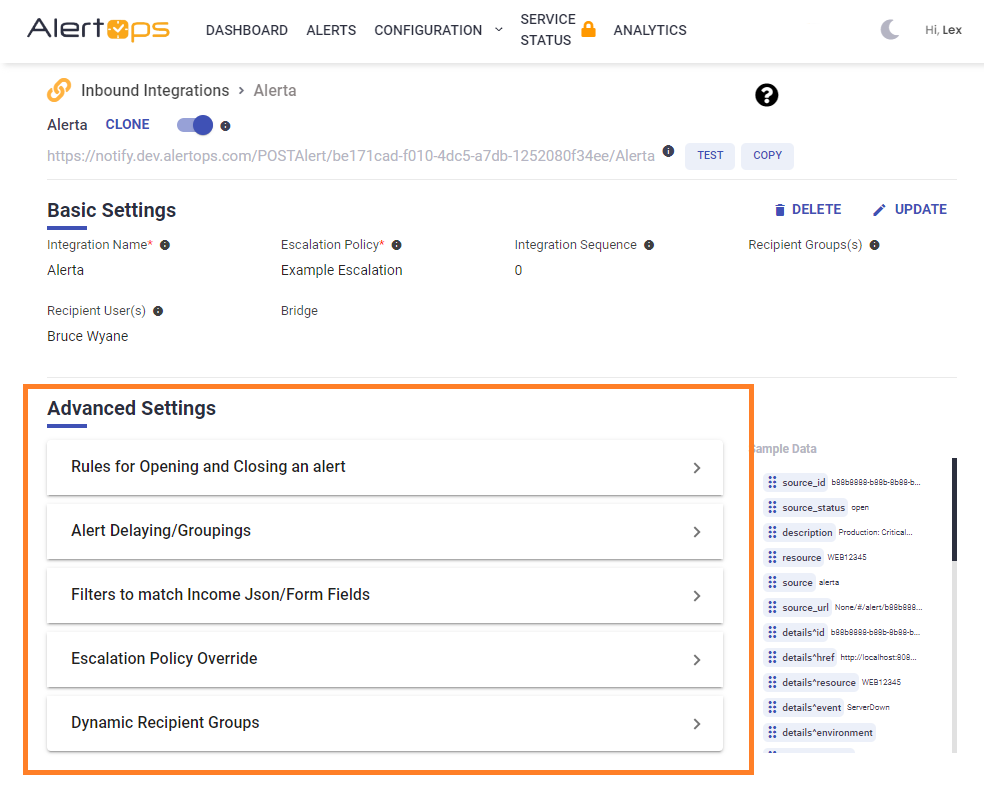
At the bottom of an Integration page, you will find an expandable list of Advanced Settings where you can make additional configurations for an integration. Depending on your AlertOps package, you may not have access to all of the options below:
Rules for Opening and Closing an Alert
Use Rules for Opening and Closing an Alert to access, add, or change the underlying field mapping for an integration to open and close an alert. This section will explain the high level use case for Rules for Opening and Closing an Alert. Please visit Advanced Field Mapping for more information on leveraging field mapping.
Auto Grouping of Alerts
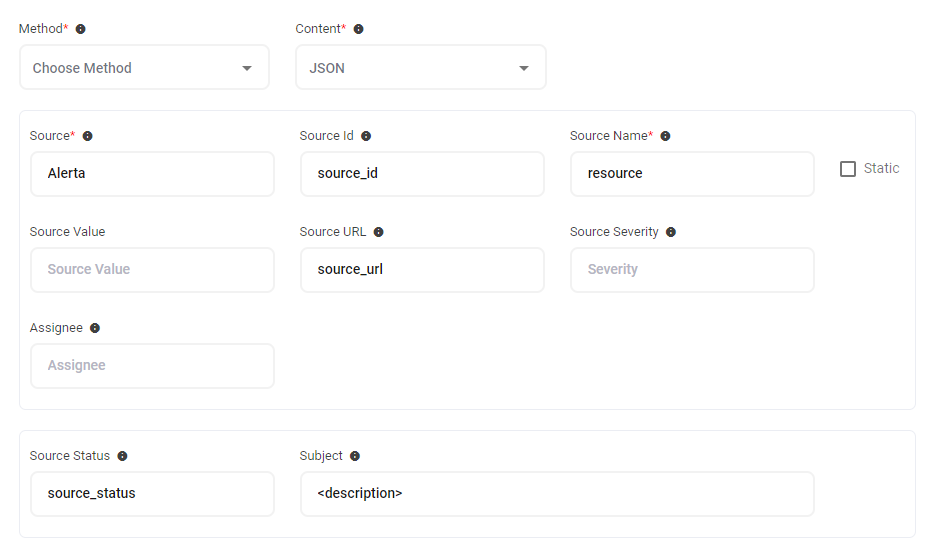
In the case of alert updates, an open alert may have follow-up notifications appended to the original alert to reduce alert noise. AlertOps can combine, or group, multiple alerts with the same value for Source, Source Name, and Source Id respectively. An alert received with an "Open" value for SourceStatus will create a notification and all other alerts with the matching Source, Source Name, and Source Id will be appended to the existing alert. These updates can be viewed in the messages or status changes section of an alert.
In example image above, a signal from Alerta will produce an alert and notification only when the source id and source name are unique. Any matching signals with be appended to existing alerts.
Open Alert When
 This setting is where you can configure the source and value that AlertOps will parse from incoming data to trigger an alert. In the example above, you can see that a new alert will be triggered when the body of an incoming integration email contains a value of 'open'.
Close Alert When

Most sources support auto-closing. This is when a closing event is sent to match the open event. In this case, AlertOps will automatically close the existing alert when an incident matches an existing open alert and also contains the 'close' Value.
Custom Messaging
Under the alert mapping options, there are several fields to create rich messages for your alerts and notifications. These options will vary based on your AlertOps package, as well as the integration type. Each of these fields can include static text or dynamic variables.
Email integrations allow you to configure a Subject Text for email subject, as well as a sample email body for testing the integration.
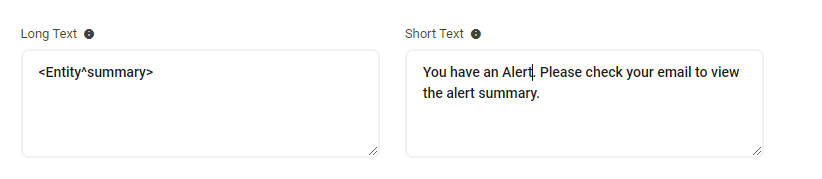
The Short Text and Long Text fields are not required, but it is recommended that you configure each of these.If there is no Long or Short Text field configured, AlertOps will use the entire JSON body as the Message text. You can customize the text fields using a combination of static and dynamic text.
- Short Text Field: The Short Text is the message used in SMS and voice notifications. If there is no short text, AlertOps will use the long text as the Short Message text.
- Long Text: The Long Text / Long Message is the message used in Email and Push notifications.
.png)
You can also include an attachment in the form of a URL by selecting the Attachments box. You can send one or more URLs in an array structure. Enter the field name surrounded by brackets.
- Base Path: enter the value for the base path in the incoming URL data.
- URL: enter the value for the URL in the incoming URL data. AlertOps can send the URL as a clickable link in an email notification, or users can click the link in the web app.
- File Name: enter the value for the file name in the incoming URL data.
Alert Delaying/Grouping Options
Alert Delaying
Customers often need to delay alerts for various reasons. One use case might be to ignore flapping incidents that will self-resolve, such as a network router periodically experiencing intermittent connectivity issues. During these flapping incidents, the router's status fluctuates between "up" and "down" multiple times within a short span of time, triggering alerts each time the status changes. To address this, we can introduce an Alert Delay tailored to your specific requirements.
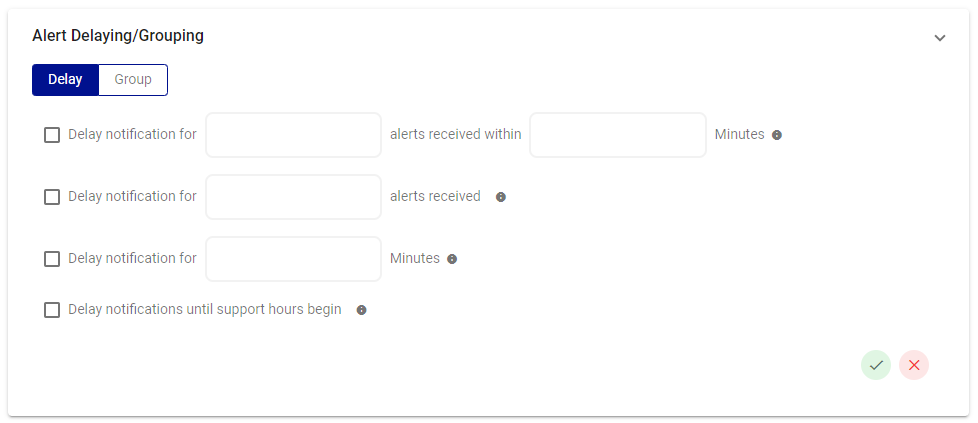
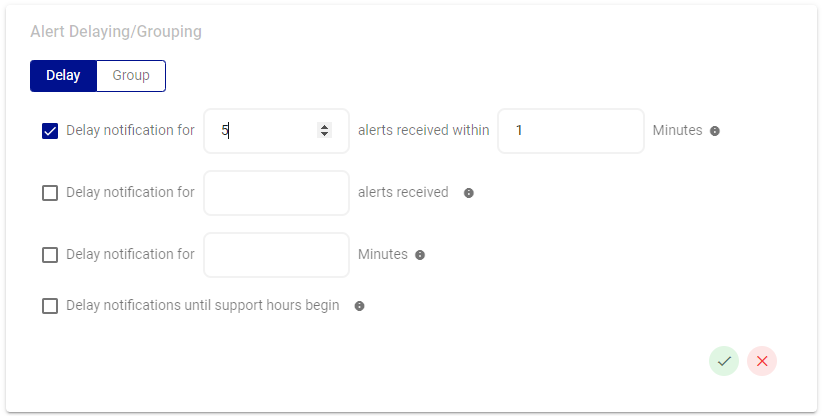
The Alert Delaying feature offers a variety of delay settings for alerts. First toggle Delay at the top of this screen.
- Delay notification for (n) number of incidents received within (n) minutes.
- Delay notification for (n) number of incidents received.
- Delay notification for (n) minutes.
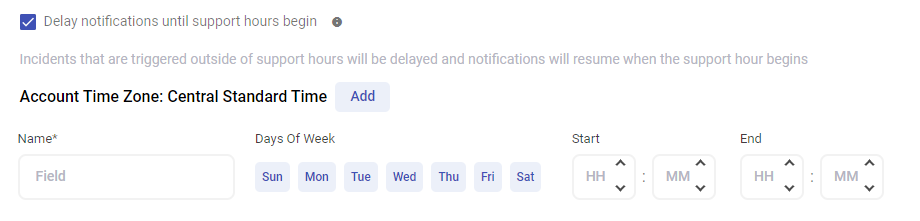
- Delay notification until support hours begin. By selecting this option, you can then define the period of time in which users will receive alerts.
Example: The IT team has determined that each network issue produces 5 alerts in 1 minute and has implemented an Alert Delay to reduce noise.
Group
Grouping limits the amount of alerts that can flood in from incidents that occur at the same time from the same source. Incoming incidents will merge with the opened alert and prevent multiple notifications for grouped incidents. 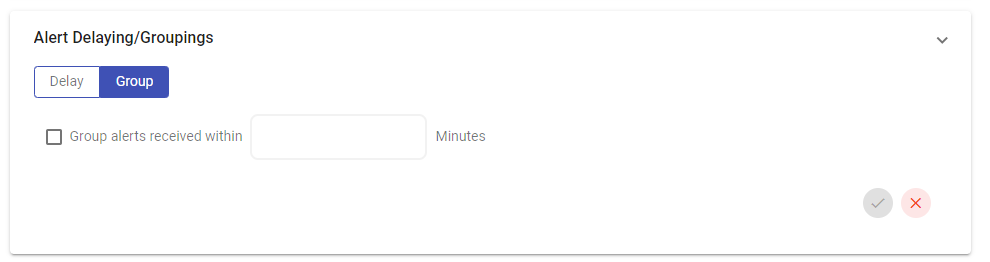
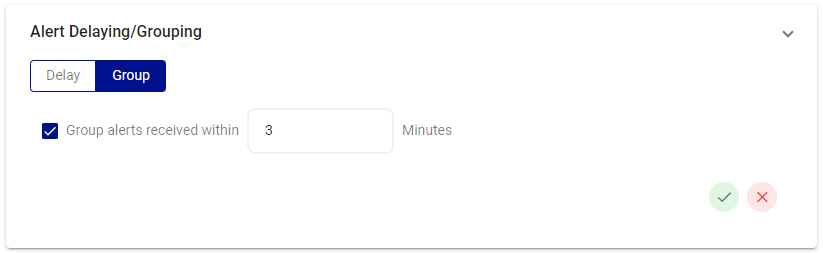
Most monitoring systems, for example, generate multiple alerts when a critical server goes down. These alerts might include notifications for CPU usage, disk space, and network connectivity issues. Instead of receiving separate notifications for each individual alert, you can configure the AlertOps integration to group these alerts together based on time frame.
Example: Alerts received from this integration will be grouped if they all come in within the same 3-minute span.
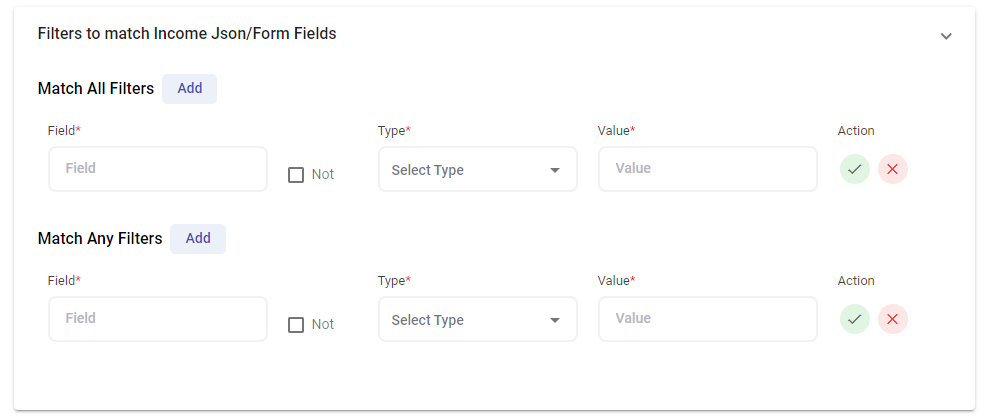
Filters to Match Incoming JSON/Form Fields
The AlertOps Filtering feature is a way to prioritize alerts that are important to you.Filtering works by allowing you to be selective about which alerts create notifications based on specific criteria.
For example, if you receive alerts from your monitoring system for a host of events, you can apply filters to only notify for critical server failure alerts, or for alerts with severity above a certain threshold.
Filters
Match All Filters requires all conditions must be true.
Match Any Filters simply requires just one of the conditions to be matched.
Note: Match All and Match Any filters used in conjunction constitute an ‘OR’ condition. Only when the Match All Filters are not satisfied will the filter evaluate the Match Any conditions if both are present.
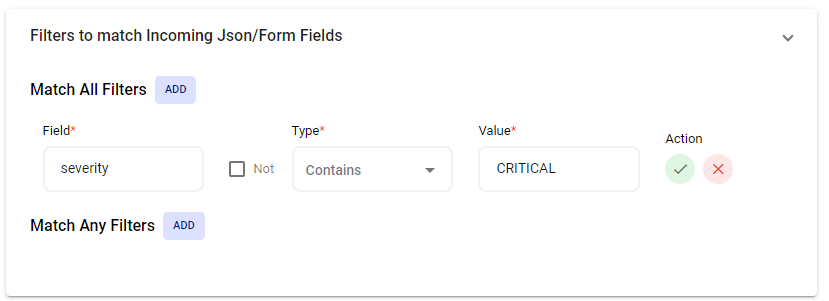
Field
The filter field corresponds to the specific JSON key you intend to target with this filter.
Value
The value field represents the associated JSON value pair. Inputting a value here dictates the matching criterion, determining when the filter should trigger further actions.
Type
A filter type determines how specific conditions, like pattern or exact matching, are applied to identify and act on data points. Various filter types provide different approaches to customize and refine the filtering process based on your needs as well as the JSON data characteristics.
When setting a filter, users can choose the pattern-matching from the Type dropdown. The available types vary for "Match All Filters" and "Match Any Filters."
Filter Types for Match All
- Is Any enables users to set multiple filter values, and the alert will be processed if any of these values exactly match the corresponding field in the JSON data.
- Contains Any permits the filter value to be one word, part of a word, or a whole sentence. This type also supports multiple values for comprehensive filtering.
- MatchesRegex Allows users to set a filter value using regular expressions for advanced pattern matching in the JSON data.
Filter Types for Match Any
- Contains specifies that the filter value must have a complete word or sentence that exactly matches the corresponding field in the JSON data. Unlike "Contains Any," this type does not allow partial matches.
- Is requires the filter value to be an exact match to the corresponding field in the JSON data.
- MatchesRegex allows users to set a filter value using regular expressions for advanced pattern matching in the JSON data.
Filter Example: In this example, incoming JSON data from this integration includes a field called “severity”. This filter will only produce an alert if the “severity” field contains a value of “CRITICAL”.
Escalation Policy Override
Time of Day
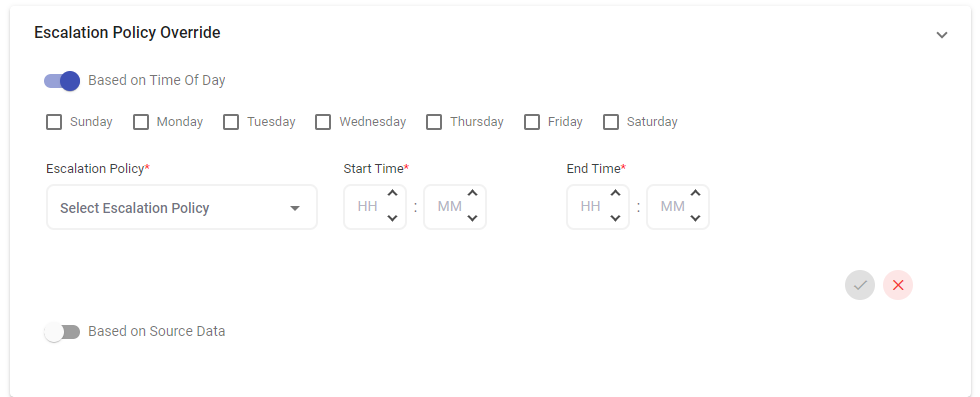
An Escalation Policy Override is set at the Integration level and will supersede an associated Escalation Policy based on the time an alert is generated. This feature allows for different applied Escalation Policies at different intervals.
For example, you can apply a different escalation policy during normal business hours and a separate escalation policy for nights or weekends. With time-of-day escalation policy override, these changes between policies will happen automatically and seamlessly.
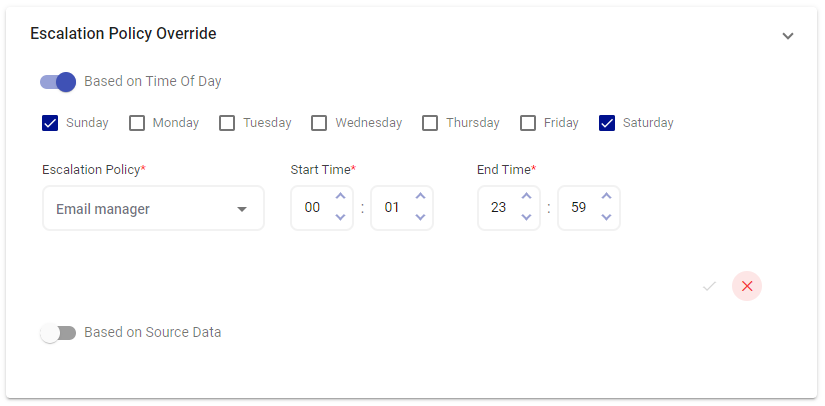
Example: Alerts coming through on Sunday and Saturday will be emailed to the Manager per the applied Escalation Policy Override.
Source Data
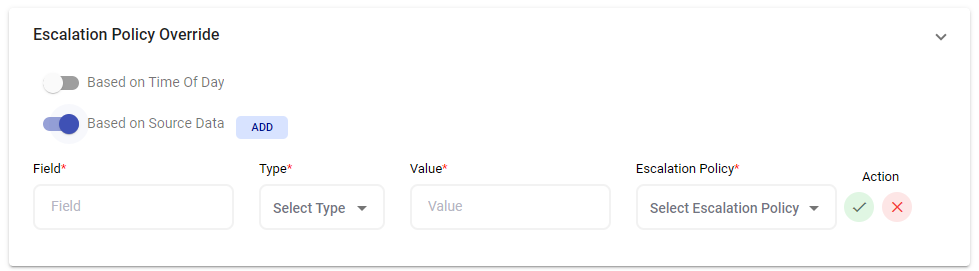
In other cases, an Escalation Policy needs to be updated dynamically based on key values coming from the JSON data which you can set using the Source Data feature. By utilizing the source data escalation policy override feature, you can define specific rules or conditions based on the source of the alert. For example, you may set up different escalation policies for alerts originating from your production servers compared to those from your development or testing environment.
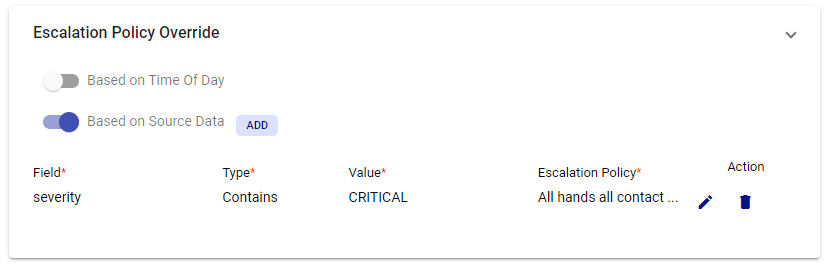
Example: If incoming JSON data contains a field named "severity" with a value of “CRITICAL”, alerts will be blasted to all hands per the applied escalation policy override. This is also useful in the case of priority based escalations. For instance, you can say if the 'severity' JSON field contains 'P1', use an Escalation Policy for P1, if it contains 'P2', use the one for P2 and so on.
If there is an Escalation Policy Override, the override rules are evaluated first, and if it is not satisfied, the policy under Basic Settings is used to trigger the alert.
Dynamic Recipient Groups
Dynamic Recipient Groups gives the option to change recipient groups based on key values from incoming JSON data.
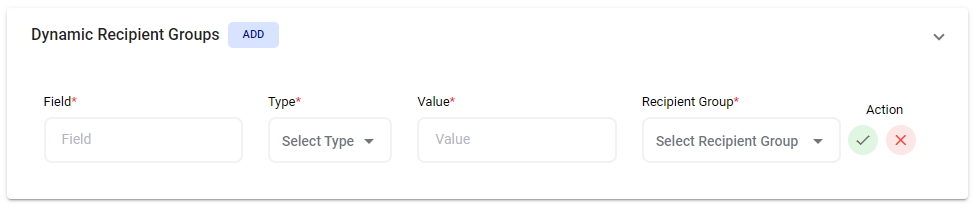
For large organizations with multiple departments, it’s important to ensure that when an alert is triggered, it is routed to the appropriate department or team based on the nature of the issue. With dynamic recipient groups, you can define rules or conditions that determine which group should receive the alert. For instance, you may set up rules based on keywords in the alert description or source data, such as "network" or "database." When an alert matches these conditions, it is automatically routed to the corresponding department or team responsible for handling such issues.
Example: In this example, if incoming JSON data contains a field named "issue_name" with a value of "network" then the Infrastructure Team will be alerted.
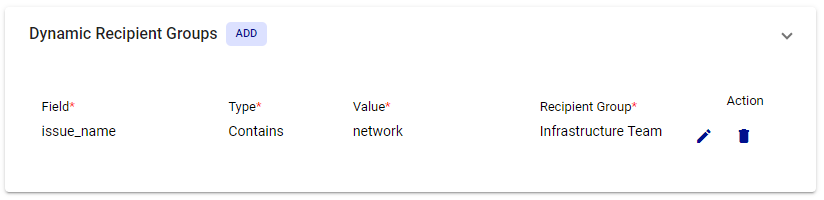
Note: If a Dynamic Recipient Group is added to the integration, you should not have a 'Recipient Group' configured under the Basic Settings (else if will go route to groups specified in both areas even if conditions match):

Was this article helpful?