Alerta
- 25 Mar 2022
- 4 Minutes to read
- Print
- DarkLight
- PDF
Alerta
- Updated on 25 Mar 2022
- 4 Minutes to read
- Print
- DarkLight
- PDF
Article summary
Did you find this summary helpful?
Thank you for your feedback!
Alerta Integration Guide
Alerta monitoring system is a tool used to consolidate and de-duplicate alerts from multiple sources for quick ‘at-a-glance’ visualization. Integrate AlertOps’ alert management platform with Alerta to receive and respond to critical alerts through email, SMS, push notification, and phone alerts. AlertOps ensures that alerts received from Alerta always reach the correct, available team member by utilizing escalation policies and on-call schedules.
AlertOps Configuration
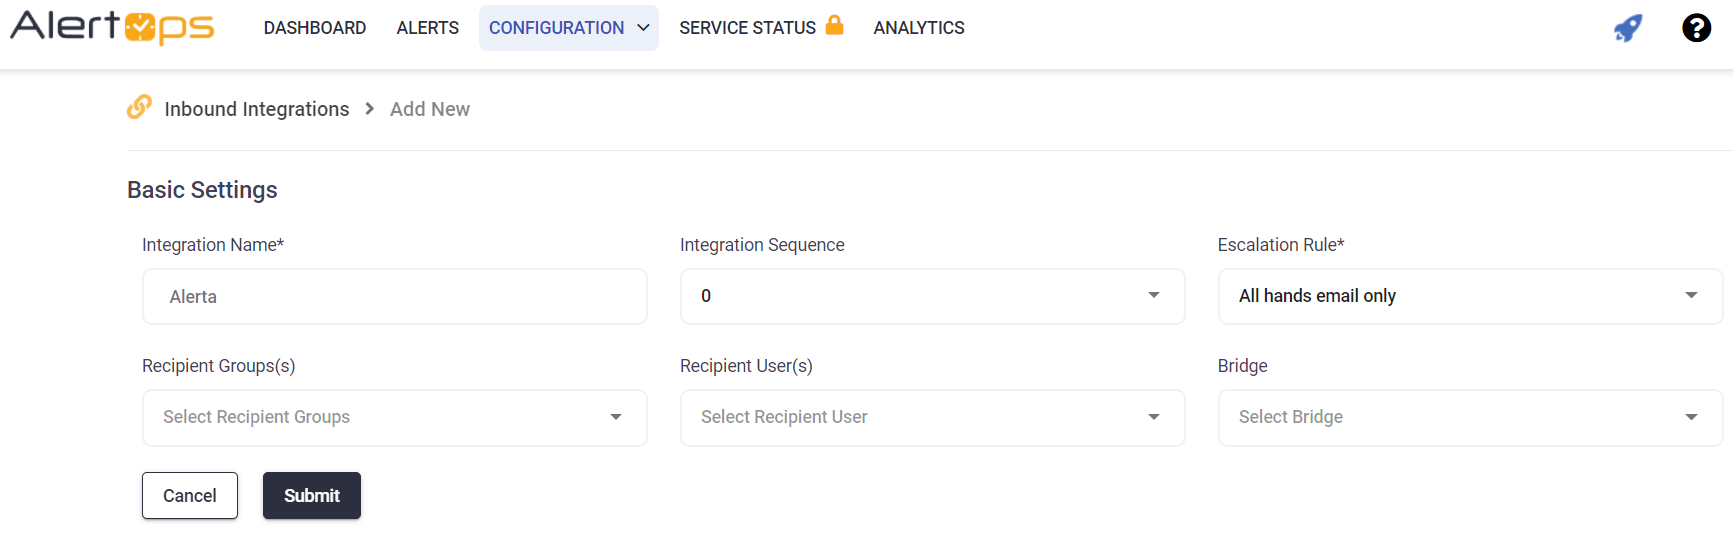
- Navigate to Configuration àIntegrations àAdd API Integration, the API Integration Detail page opens
- Select Alerta from the pre-built Integration Templates.
- Enter a name for the integration.
- Select an escalation rule to determine the integration's escalation policy. And enter the names of recipient group(s) and recipient user(s).
- Click 'SAVE. click 'COPY URL' to copy the URL endpoint to be used in the Alerta configuration.
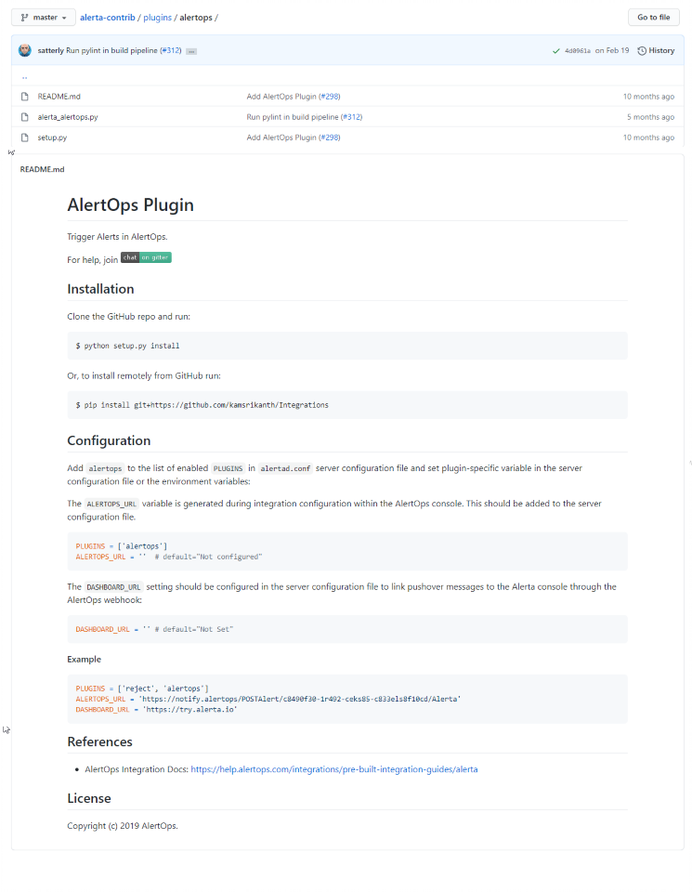
Alerta Configuration
Refer to Alerta plugin document.
Alert Triggering Information
AlertOps will automatically create an incident when a new alert is received from Alerta with an IncidentStatus status of “open”.
If an alert with status “open” matches an existing Open Alert, AlertOps will recognize the new alert as a duplicate and ignore the alert. The alert will be recorded in the Inbound Messages table as “Mapped Appended.”
AlertOps will automatically close the same incident when an alert with an IncidentStatus status “close” is received.
Testing and Troubleshooting
Click here to read about Web API Testing and Troubleshooting.
AlertOps JIRA ServiceDesk Outbound Integration
This Documentation Pertains to JIRA ServiceDesk Classic. Our documentation on JIRA ServiceDesk NextGen is coming soon.
Things to Have Retrieved from JIRA ServiceDesk before building the integration:
- User Account ID
- Service Desk ID
- Transition IDs
These Items can be found via configuration. For some, however, api calls may need to be made through a tool like Postman or set-up in AlertOps to retrieve values.
Create Custom Attributes
In AlertOps...
- Select Custom Alert Fields from Administration in the Main Menu
- Select Standard Alert
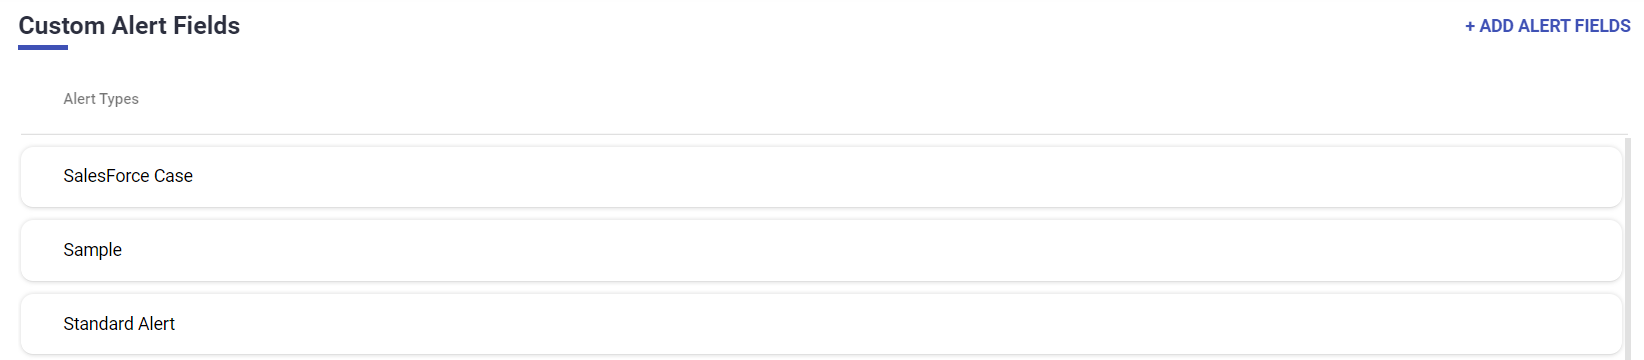
- Select Add Alert Field
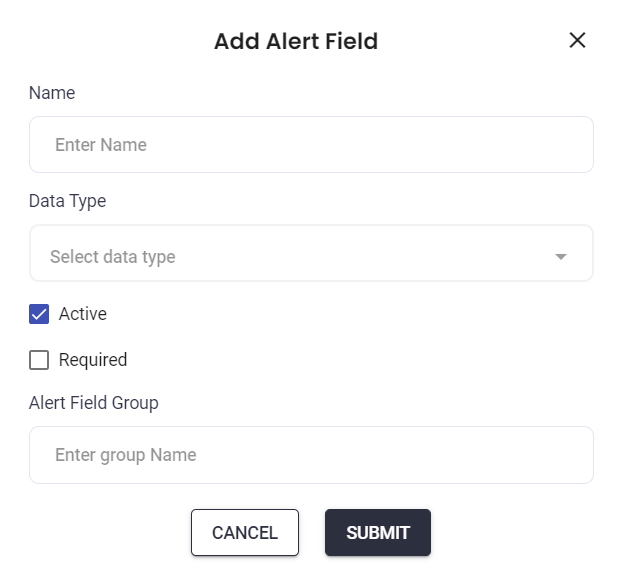
- Fill out the Alert Field with the following information for 2 Alert Fields given below:
Name: JIRASDRequestID
Data Type: LongString
Active: Check
Required: N/A
Alert Field Group: N/A
Name: JIRASDRequestKey
Data Type: LongString
Active: Check
Required: N/A
Alert Field Group: N/A
Generate JIRA Token
Have logged into JIRA ServiceDesk on your browser. In a new tab navigate to https://id.atlassian.com/manage/api-tokens
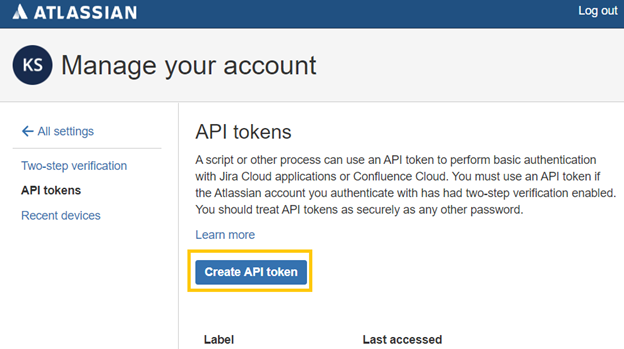
- Generate Token, copy to clipboard and save locally for later use
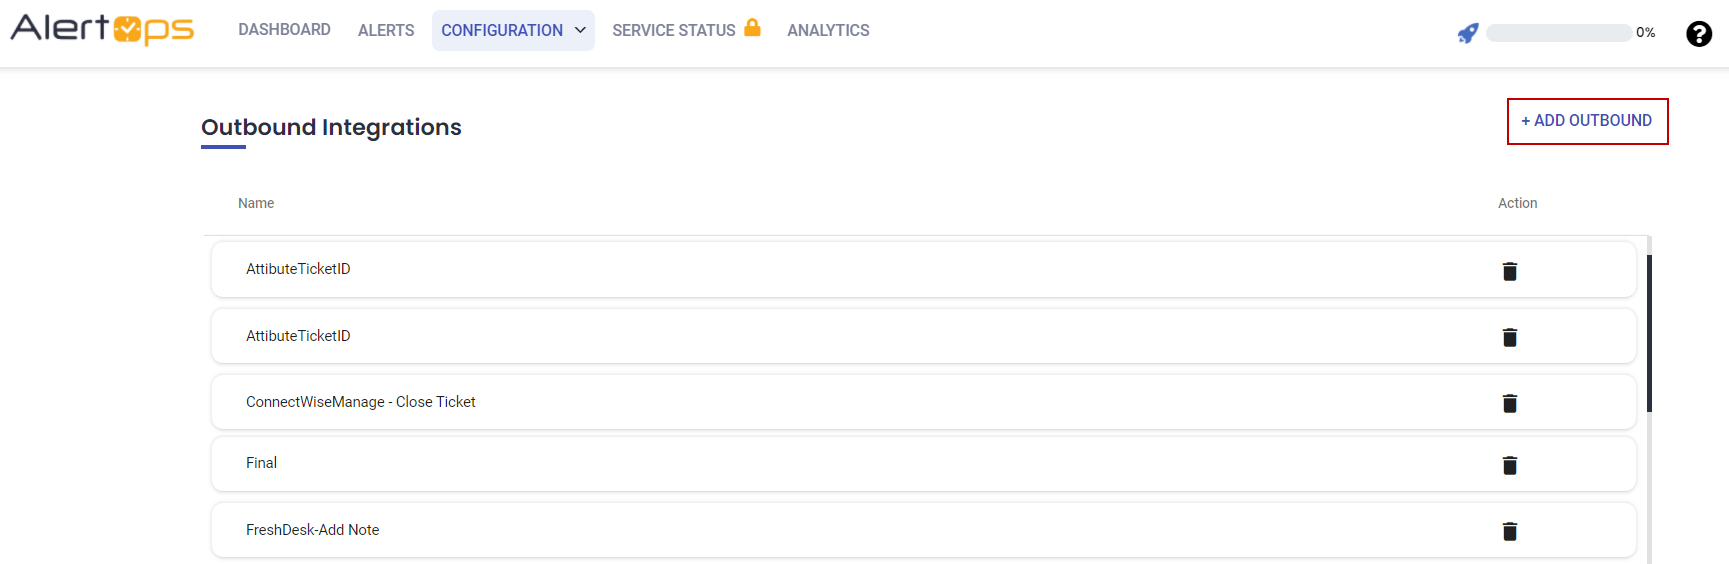
- Create AlertOps Outbound Integration
- In AlertOps Navigate to Outbound Integrations from the Main Menu and select ADD OUTBOUND INTEGRATION
- Fill Out the Outbound Integration Detail with the Following Configurations:
- Integration Name: Name anything
- Web Security Type: Basic
- UserName: Your JIRA login Email
- Password: Paste your JIRA API Token
- Public Key: Leave Empty
- Create your outbound Integration Methods
- Navigate to the bottom of your Screen and Select ADD METHOD.
- Fill out the ADD METHOD Page for each Method (Create, Assign, and Resolve) with the configuration info below:
METHOD 1: CREATE JIRA SERVICEDESK ISSUE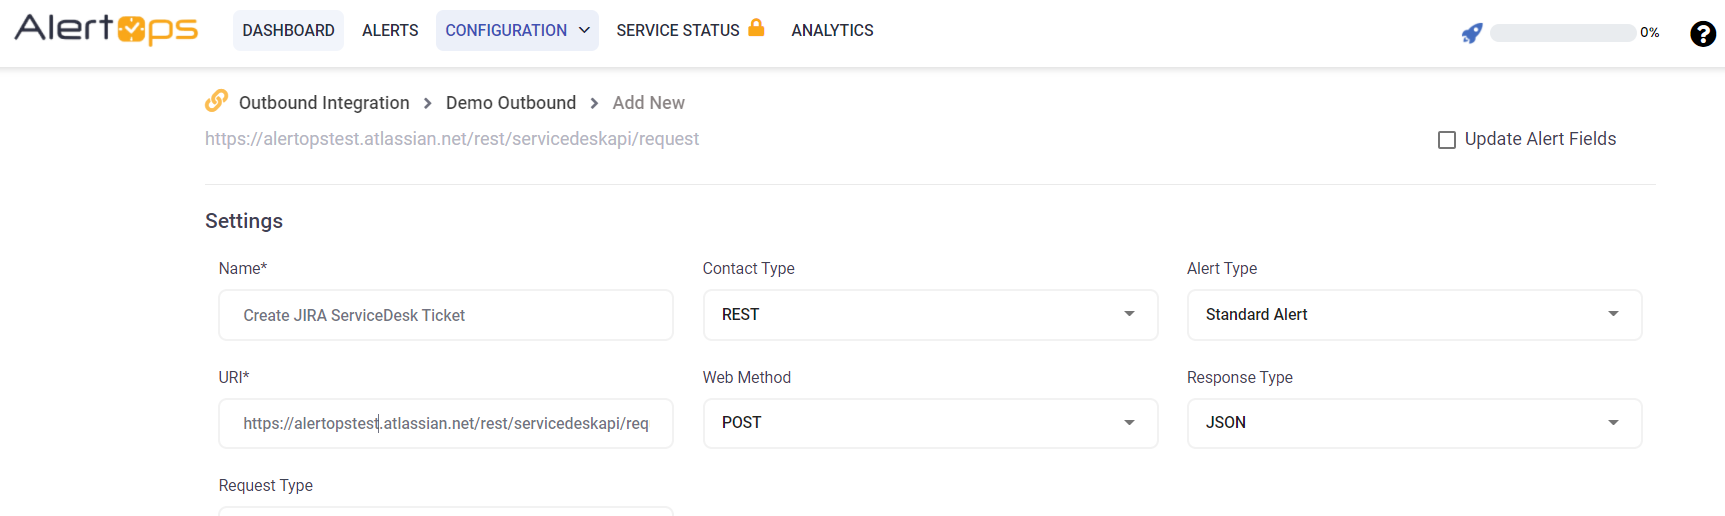
Name: Name anything
Type: REST
Alert Type: Standard Alert
URI: https://yourDomain.atlassian.net/rest/servicedeskapi/request
Request Type: JSON
Web Method: POST
Response Data Type: JSON
Update Alert Fields: Check
Request Data:
{"serviceDeskId": "YourServiceDeskID","requestTypeId": "15","requestFieldValues": {"summary": "<>"}}
Response Data:
{"issueId":"<>","issueKey":"<>"}
METHOD 2: ASSIGN JIRA SERVICEDESK ISSUE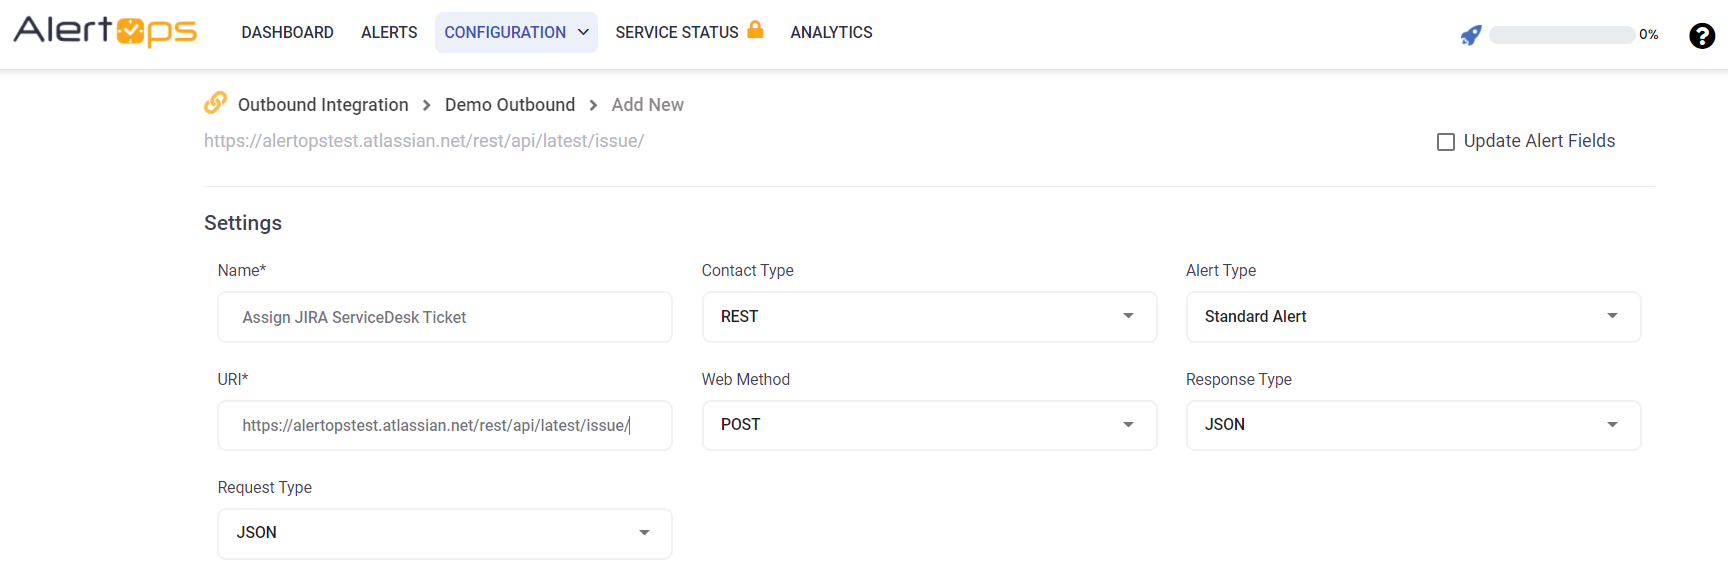
Name: Name anything
Type: REST
Alert Type: Standard Alert
URI: https://yourDomain.atlassian.net/rest/api/latest/issue/<>
Request Type: JSON
Web Method: PUT
Response Data Type: JSON
Update Alert Fields: N/A
Request Data:
{ "fields":{"assignee":{"accountId":"5e4599a9924db10e74b76bee"} } }
Response Data:{"issueId":"<>","issueKey":"<>"}
METHOD 3: RESOLVE JIRA SERVICEDESK ISSUE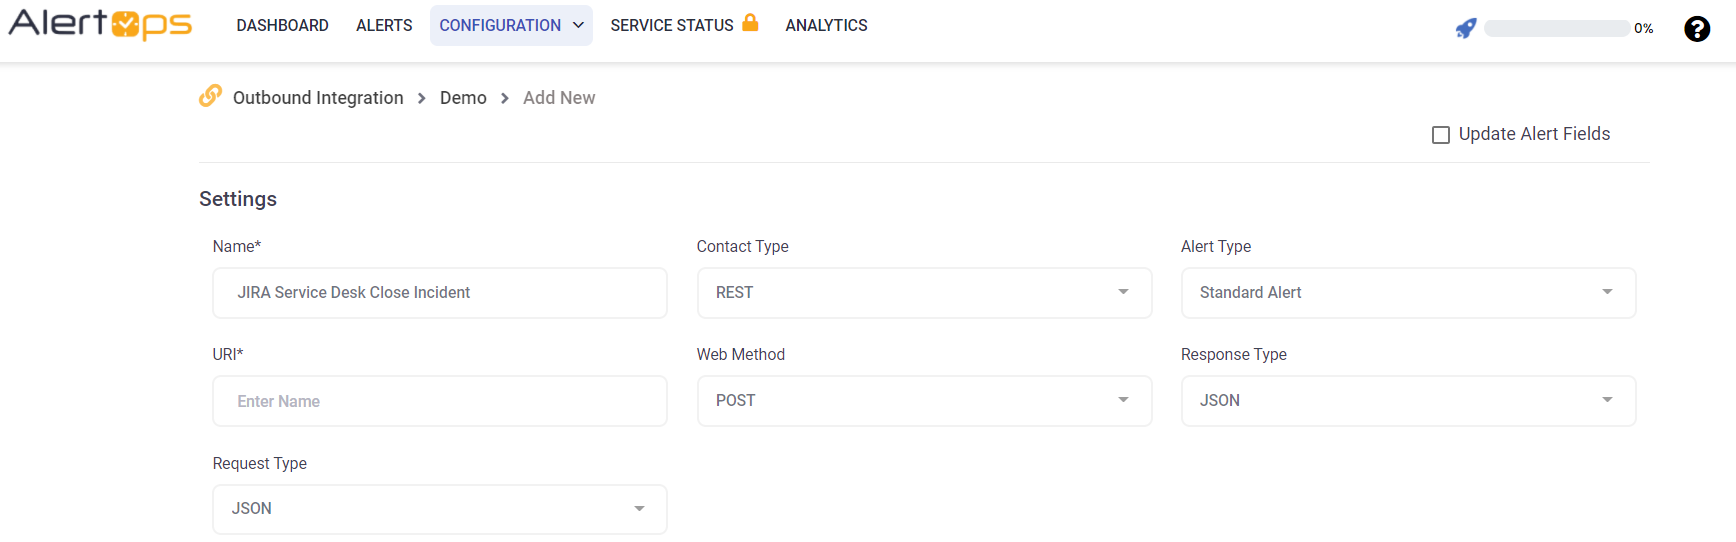
Name: Name anything
Type: REST
Alert Type: Standard Alert
URI: https://yourDomain.atlassian.net/rest/api/latest/issue/<>/transitions
Request Type: JSON
Web Method: PUT
Response Data Type: JSON
Update Alert Fields: N/A
Request Data:
{"transition":{"id":"111"}}
Create Workflows
- In AlertOps Navigate to Workflows from the Main Menu
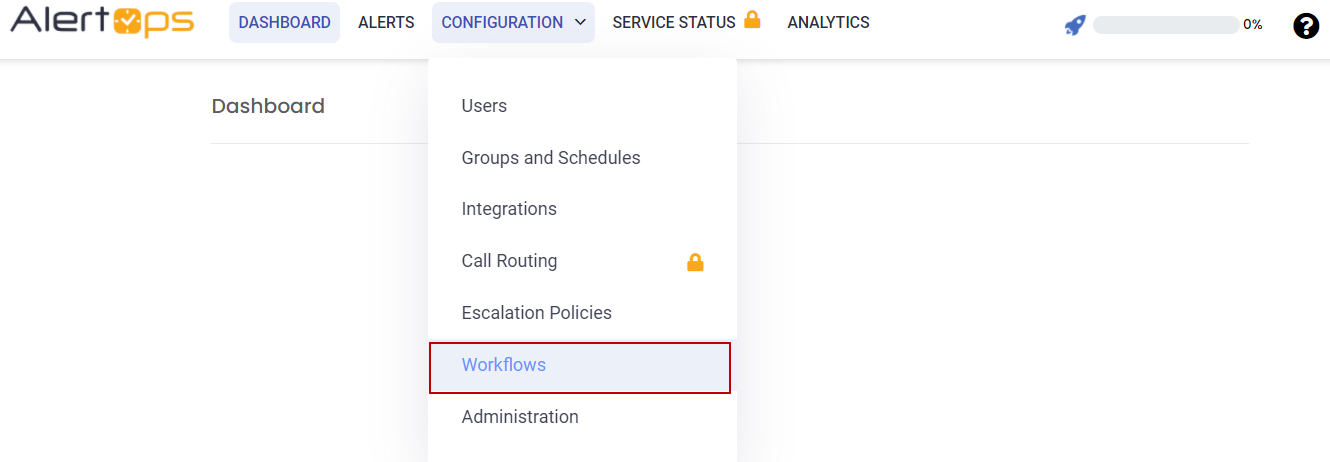
- Select ADD WORKFLOW

- Fill Out the Workflow Detail with the Following Configurations:
WORKFLOW: CREATE JIRA SERVICEDESK ISSUE
- Name: Name anything
- Type: MessageThread
- Enabled: Check (will not be able to till the end)
- Alert Type: Standard Alert
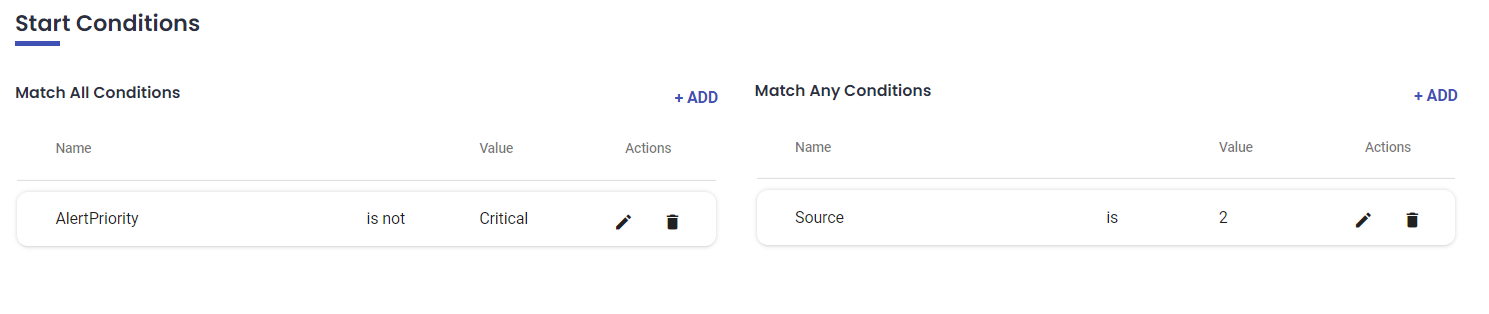
Continue to the bottom portion of the page under ACTIONS, click ADD and enter the Start Conditions under Match All Conditions with the followings:
Attribute | Name | Relation | Value |
Standard | MessageThreadStatusType | Is | Open |
Actions
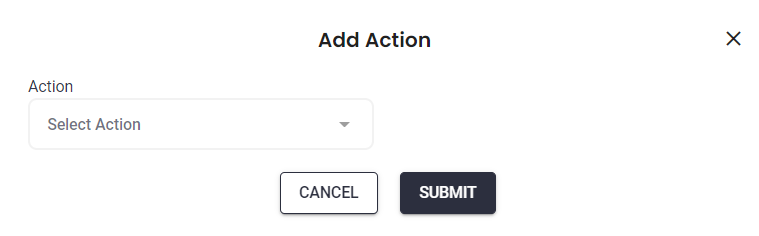
- Click Add Actions, a window prompts as below
- In the Add Action Dropdown, select Outbound Service Notification and hit SAVE.
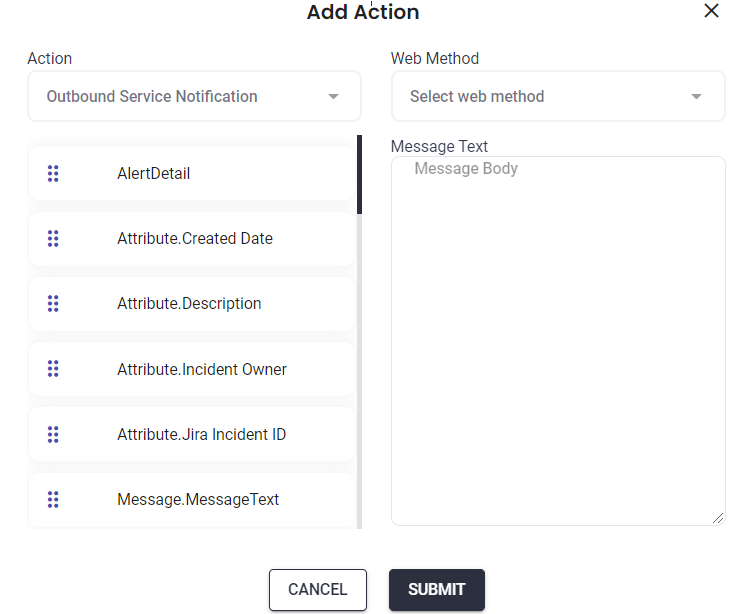
- In the Outbound Action Dropdown, Select the Method you created above to Create a JIRA ISSUE
- Click SAVE
- Once you Save your Workflow. Return to the top of the Workflow Detail, select the Enabled Checkbox, and SAVE (UPDATE)
WORKFLOW: ASSIGN JIRA SERVICEDESK ISSUE
Name: Name anything
Type: MessageThread
Enabled: Check (will not be able to till the end)
Alert Type: Standard Alert
Continue to the bottom portion of the page under ACTIONS, click ADD and enter the Start Conditions under Match All Conditions with the followings:
Attribute | Name | Relation | Value |
Standard | MessageThreadStatusType | Is | Assigned |
- Continue to the next portion, ACTIONS and enter select ADD.
- In the Add Action Dropdown, select Outbound Service Notification and hit SAVE.
- In the Outbound Action Dropdown, Select the Method you created above to Assign a JIRA ISSUE
- Click SAVE
- Once you Save your Workflow. Return to the top of the Workflow Detail, Select the Enabled Checkbox, and SAVE (UPDATE)
WORKFLOW: CREATE JIRA SERVICEDESK ISSUE
Name: Name anything
Type: MessageThread
Enabled: Check (will not be able to till the end)
Alert Type: Standard Alert
Continue to the bottom portion of the page under ACTIONS, click ADD and enter the Start Conditions under Match All Conditions with the followings:
Attribute | Name | Relation | Value |
Standard | MessageThreadStatusType | Is | Closed |
Continue to the next portion, ACTIONS and enter select ADD
- In the Add Action Dropdown, select Outbound Service Notification and hit SAVE.
- In the Outbound Action Dropdown, Select the Method you created above to Resolve a JIRA ISSUE
- Click SAVE
- Once you Save your Workflow. Return to the top of the Workflow Detail, Select the Enabled Checkbox, and SAVE (UPDATE)
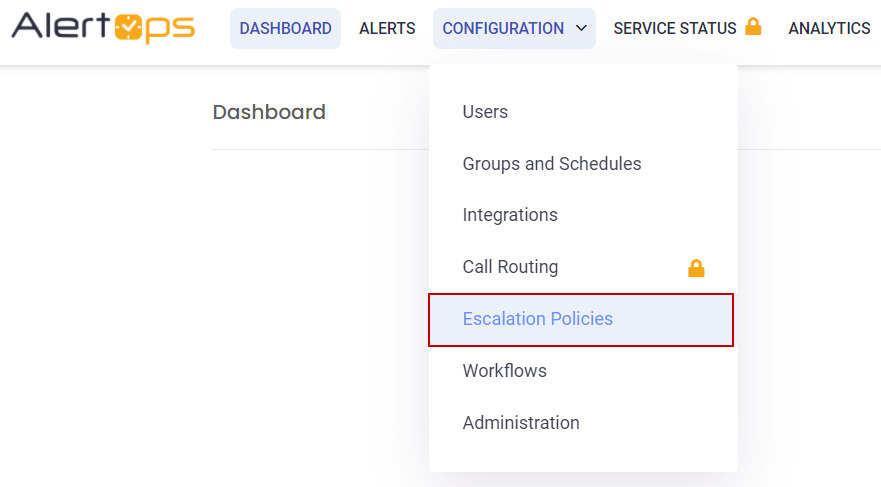
Create Escalation Rule:
- Select Escalation Rule from the Main Menu
On the Escalation Rules page select ADD ESCALATION RULE

Fill out the Escalation Rule Detail page with the Following Configuration:
Rule Name: Name Anything
Priority: Criticality of Alerts using this Rule
Enabled: Check
Quick Launch: Check
Description: Anything
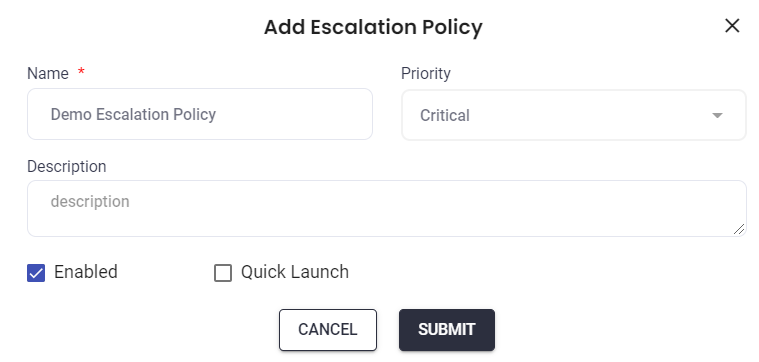
Click Submit
Configure your Escalations to your preference. Once you are finished, under the WORKFLOWS tab, select ADD WORKFLOW - Add Each one of the 3 workflows you just created (Create, Assign, and Resolve)
Was this article helpful?